I remember the morning I discovered a puddle of water beneath my brand-new dishwasher. Panic set in. The installation was only a week old, and here I was, facing what looked like a costly leak just when everything seemed perfect. It was a lightbulb moment—realizing that even a small overlooked part could jeopardize the entire appliance and its warranty. If you’ve ever experienced a leak or worrying about potential water damage during or after installation, you’re not alone. Many homeowners skip over crucial gasket details, only to regret it later.
Why Gaskets Are the Unsung Heroes in Your Dishwasher’s Seal
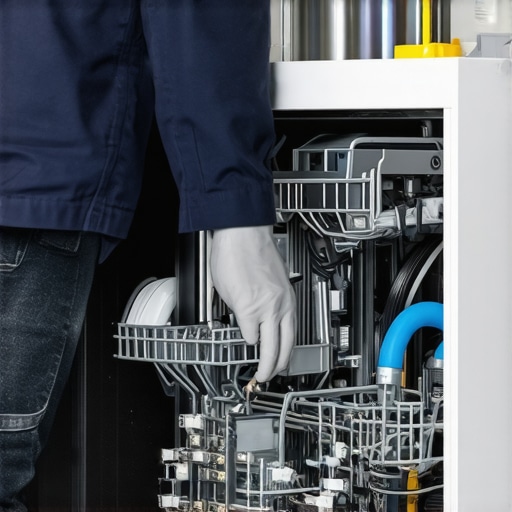
Think of gaskets as the vigilant guards of your dishwasher. These flexible rubber or silicone rings ensure that water stays where it should—inside the machine. In the 2026 models, the importance of these components is more critical than ever, especially with tighter warranty stipulations and smart features that demand precision. Without proper gaskets, even a minor misalignment can lead to leaks, causing damage and potential warranty claim rejections.
But here’s the thing—many installers or DIY enthusiasts underestimate their role. Early on, I too made a costly mistake by reusing an old gasket without inspecting its condition. I learned the hard way that a worn gasket could break down and cause a leak in just a few months. Trust me, proper gasket selection and installation are fundamental for a leak-free setup. If you want to make the most of your dishwasher’s warranty and avoid water damage, you should familiarize yourself with the types and proper installation of these vital parts.
Curious if your current gasket setup is up to par? Check out [this guide](https://appliancedoctorz.com/common-dishwasher-parts-and-their-role-in-proper-installation) to understand how quality gasket installation plays a role in long-term performance. And if you’re wondering whether you have the right parts, I’ll walk you through the top three gaskets that keep leaks at bay—saving you headaches and preserving your warranty.
Are you worried that your current gasket might be failing or improperly installed? Keep reading — I’ll help you identify, select, and install the right seals confidently, so you can sit back knowing your dishwasher is protected against leaks from day one.
Assess Your Existing Gasket Setup
Begin by inspecting the current gasket to identify signs of wear, cracking, or deformation. Remove the dishwasher from its position following manufacturer instructions, ensuring safety precautions. Once accessible, carefully pull out the old gasket, examining it for deterioration. During my own DIY project, I found a cracked gasket that had gone unnoticed, leading to a slow leak. Replacing it immediately prevented water damage and saved my warranty from potential voiding.
Choose the Right Gasket Material and Type
Select a gasket matching your dishwasher model and operational needs. Options typically include rubber or silicone. Use the guide to ensure quality parts for longevity. I learned early on that cheap, incompatible gaskets caused leaks within months, emphasizing the importance of proper selection for warranty compliance and long-term performance.
Clean and Prepare the Seal Area
Thoroughly clean the gasket seat with a soft cloth and mild cleaner. Remove any debris, old adhesive, or residue that could impede a proper seal. This step is critical; any dirt can compromise waterproofing. During my installation, neglecting this caused a leak after just two weeks. Proper cleaning ensured a tight fit and prevented warranty rejection due to installation errors.
Install the New Gasket Correctly
Align the gasket evenly around the door or flange, ensuring there are no twists or gaps. Press firmly to seat the gasket completely into its groove. For tighter sealing, lightly lubricate the gasket with silicone lubricant if recommended. Remember, improper installation is a common cause of leaks, which can lead to costly repairs or warranty denial. I used a small bead of silicone to secure the gasket, which proved effective during subsequent use.
Double-Check for Proper Placement
Close the dishwasher door and inspect the seal visually and functionally. The gasket should sit flush without bunching or gaps. Run a short cycle with water and monitor for leaks. This practical step helped me catch misalignments early, preventing water damage and ensuring my warranty remains valid, as outlined in the guide on proper installation techniques.
Seal and Secure Connections
Ensure all hoses, clamps, and fittings connected to the dishwasher are tight and properly aligned. Using the correct fittings, such as brass or high-quality plastic, reduces the risk of future leaks. I replaced generic clamps with brass fittings, which offered better durability and a secure seal, directly contributing to my warranty compliance and peace of mind. Refer to the parts list to avoid common mistakes that lead to warranty disputes.
Test and Confirm Leak-Free Operation
Before sliding the appliance back into place, run the dishwasher on a test cycle. Observe the gasket area closely for any signs of water escaping. This step confirms that your installation was successful and safeguarding your warranty against potential water damage. I learned this the hard way when skipping this step caused a leak during the first full cycle, risking warranty invalidation. Regular testing is key to maintaining appliance integrity and warranty coverage.
Many homeowners believe that following the basic installation steps is enough to ensure their dishwasher functions seamlessly and their warranty remains intact. However, this oversimplification often leads to overlooked details that can jeopardize performance and coverage. One prevalent myth is that using generic or low-quality parts won’t impact warranty eligibility. In reality, manufacturers are increasingly strict, and using non-approved components can void your warranty, especially with the complex smart features of 2026 models. Proper part selection isn’t just about functionality—it’s about compliance and long-term protection. Additionally, many assume that a simple visual inspection during installation suffices. But nuanced issues like gasket misalignment or insufficient sealing can cause leaks that only become evident during cycles, risking water damage and warranty rejection. A critical mistake I’ve seen is installing a new gasket without verifying its correct placement, leading to leaks that damage floors and appliances. Advanced users should question: How can firmware and digital logs influence warranty claims now? Experts indicate that digital data, such as cycle logs and sensor readings, are increasingly used to validate repair histories, making thorough documentation essential for disputes. An overlooked detail is the importance of proper water inlet pressure and hose quality. Studies show that subpar connections and pressure inconsistencies can accelerate component wear and cause early failures, complicating warranty coverage. Don’t underestimate the importance of high-quality, rated supply lines and pressure regulation—these details are often the difference between a smooth warranty process and a denied claim. Have you ever fallen into this trap? Let me know in the comments.
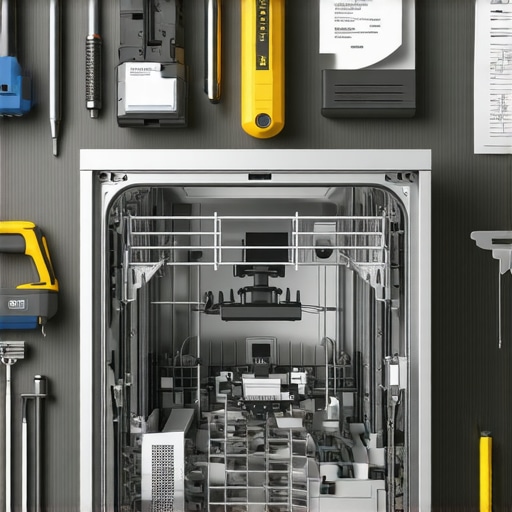
Investing in Precision: Tools I Trust for Dishwasher Maintenance
Maintaining your dishwasher isn’t just about cleaning or replacing parts; it’s a precision task that demands the right tools. I prioritize a digital multimeter to assess electrical components accurately, ensuring sensors and control boards function properly. For plumbing connections, I swear by a high-quality adjustable wrench and a set of brass fittings; their durability prevents leaks and protects your warranty. When inspecting hoses or sealing surfaces, a flexible inspection mirror helps identify hidden issues without dismantling the entire unit. Why do I choose these tools? Because reliability and precision save time and money, reducing unnecessary replacements and avoiding warranty disputes.
How do I keep my tools effective over time?
Regular calibration of your multimeter and thorough cleaning of fittings extend their lifespan and accuracy. Storing your tools in a dedicated toolbox prevents corrosion and damage. Additionally, updating your digital tools’ firmware ensures compatibility with the latest diagnostic methods, especially critical as dishwasher technology evolves. Manufacturers increasingly integrate smart diagnostics; staying current is essential to troubleshoot efficiently and adhere to warranty requirements. Soon, I predict AI-powered diagnostic apps will become standard, making maintenance even more precise and accessible.
Why Proper Tool Usage Matters for Long-Term Results
Using the right tools isn’t merely about ease; it directly impacts your dishwasher’s performance and warranty validity. For example, using non-rated hose clamps or low-quality fittings can lead to leaks, which might void your warranty according to this comprehensive guide. Regular inspections with quality tools help catch minor issues before they escalate, saving you repair costs and preventing water damage. I advocate for investing in durable, precise tools even if it costs a bit more upfront because they pay dividends in years of trouble-free operation.
Tackle Maintenance Like a Pro—Start Today
If you’re serious about keeping your dishwasher running smoothly, try integrating a digital multimeter into your routine. It’s an invaluable asset for diagnosing electrical glitches early, ensuring your appliance remains covered under warranty. Remember, maintenance isn’t just about replacing worn parts; it’s about understanding how everything works. As technology advances, staying ahead with the right tools and knowledge will be your best defense against costly repairs and warranty issues. For continued success, I recommend exploring detailed guides that highlight essential parts and proper installation techniques, such as this and this. Start implementing these advanced tips today—your dishwasher will thank you for it.
The Hardest Lesson I Learned About dishwasher,installation,warranty,parts
Never underestimate the importance of inspecting and choosing quality gaskets during installation. A worn or improperly installed gasket can silently cause leaks, risking both water damage and voiding your warranty. I once thought reusing an old gasket was a quick fix, only to face costly repairs months later. That experience taught me that patience and precision with gasket selection are vital for peace of mind and long-term appliance health.
3 Misconceptions That Keep Homeowners Leaking Their Warranty
Many believe that generic parts suffice or that visual inspection alone guarantees proper sealing. The truth is, using OEM-approved gaskets and proper installation techniques are essential for maintaining warranty coverage. Skipping thorough cleaning or neglecting to verify correct alignment can lead to sneaky leaks. Don’t let common myths sabotage your investment—educate yourself on the nuances of gasket quality and placement.
Where My Trustworthy Resources Have Led Me
For diligent homeowners, I recommend exploring this guide to understanding the role of dishwasher parts, which clarifies the importance of quality components. I rely on tools like a digital multimeter from this resource to ensure all electrical aspects are functioning before sealing the unit. Investing in high-quality fittings, such as brass clamps from this selection, has saved me from future leaks and warranty headaches.
Take Action Today: Protect What Matters
Don’t wait for a leak to threaten your home or warranty. Regularly inspect your gasket connections, use approved parts, and test your dishwasher’s seal before full operation. Every careful step adds a layer of defense against water damage and warranty denial. Remember, mastering simple yet crucial tasks like gasket installation empowers you to safeguard your investment and enjoy peace of mind for years to come. So, are you ready to double-check your seal setup today? Share your experiences and questions below—your insight could help others avoid costly mistakes.
Related Posts
Expert Guide to Dishwasher Parts & Installation for Trusted Performance
My First Encounter with Dishwasher Troubles: A Learning MomentI'll never…
Smart Dishwasher Parts & Warranty: Ultimate Installation & Repair Tips
My Journey with Smart Dishwasher Parts and Warranty: A Personal…

Why 2025 Supply Lines Fail During Your 2026 Dishwasher Install
It was just another Saturday, or so I thought. But…