I remember the sinking feeling when I unboxed my brand-new dishwasher and realized something was off—you see, I had meticulously prepared for the installation, only to discover that the 3 Parts Your 2026 Dishwasher Install Kit was missing a crucial component. That moment of frustration isn’t unique; many DIY enthusiasts and even pros can find themselves stuck because a tiny, overlooked part goes missing just when you need it most.
Why Missing Parts Can derail Your Dishwasher Installation—and Your Peace of Mind
Missing important components can turn a straightforward install into a complicated headache. It’s not just about the inconvenience—skipping or misidentifying parts can lead to leaks, poor performance, or even voided warranties, costing you more time and money in the long run. I’ve learned from my own mistakes that rushing through an installation without double-checking can be costly. That’s why I want to share my experience and help you avoid the pitfalls that so many fall into, especially with complex systems like the 2026 models.
Will This Small Part Ruin My Warranty If I Don’t Fix It?
Early on, I thought missing one tiny screw or connector was no big deal—until my warranty claim was denied because I failed to use the right parts during installation. The warranty experts consistently emphasize that proper parts selection and installation are key to maintaining coverage. In fact, according to Appliance Doctorz, using the correct parts is one of the top reasons warranty claims succeed or fail. Implementing a checklist for all necessary parts can save you from this chaos and keep your warranty intact.
Have you faced a similar situation where a missing or wrong part caused a delay? If so, you’re not alone. But don’t worry—I’ll guide you through the essential steps to identify and replace any neglected components, ensuring a leak-proof and warranty-friendly installation. Let’s dive into what you need to know before starting your project, so you can confidently tackle it like a pro.
Gather All Necessary Parts Before Starting
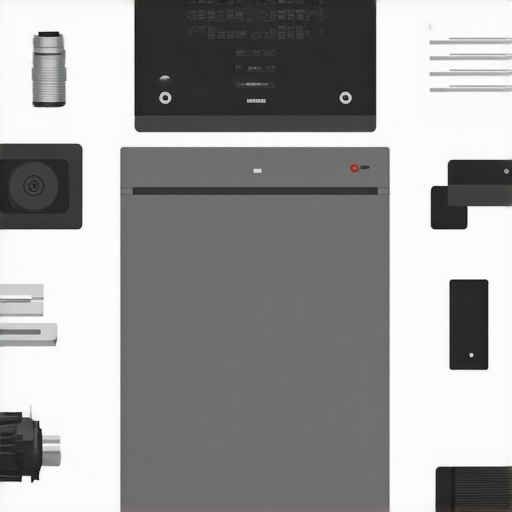
Start by checking your 2026 dishwasher install kit against the manufacturer’s checklist. Lay out each component, comparing it to the list on this resource. I once began installing my dishwasher without verifying all parts and skipped a small but critical connector. As a result, I had to pause the project, order the missing part, and risked voiding my warranty. To prevent this, double-check your parts early to ensure nothing’s missing, avoiding costly delays and warranty issues.
Inspect and Confirm the Correct Parts
Use a reliable guide like this detailed list to identify each component’s role. Pay special attention to water supply hoses, brackets, and electrical connectors, which are often overlooked. I remember misidentifying a water inlet valve because I didn’t consult the proper resource, leading to a leak and a denied warranty claim. Confirm each part’s compatibility with your model to avoid such pitfalls and ensure your installation complies with warranty expectations.
Follow a Step-By-Step Installation Protocol
Adopt a systematic approach: secure the water supply first, then connect the drain hose, and finally, the power supply. Precise fastening matters. I once tried shortcutting the process and ignored tightening the hose clamps fully; this caused a leak during my first test run. To prevent this, follow the installation manual closely, and consider referencing this expert guide for best practices. Ensuring all connections are tight and secure mitigates the risk of leaks that could damage the machine and void your warranty.
Use Proper Tools and Materials
Employ dedicated tools like a torque wrench and corrosion-resistant fittings. Don’t reuse old hoses or fittings, as they may be degraded or incompatible. For example, reusing a plastic connector I had from a previous installation failed under water pressure, leading to a flood and warranty complications. Invest in high-quality, approved parts and tools to maintain the integrity of your setup and support your warranty coverage. Check out this resource for common pitfalls associated with inferior parts.
Test and Verify the Installation
Before finishing, run a test cycle or a dry run to check for leaks and proper drainage. During my first attempt, I noticed a slight leak from an improperly seated hose. Stopping the cycle, I re-tightened the connection following this troubleshooting guide, ensuring everything was sealed and functioning correctly. Always document this process with photos, especially if you plan to make warranty claims later. Proper testing confirms your work is correct and helps prevent warranty-reducing issues down the line.
While most homeowners focus on the obvious aspects of dishwasher installation—like ensuring proper water connections—they often overlook subtle, yet critical nuances that can undermine warranty coverage and long-term performance. In many cases, common beliefs about what constitutes a ‘proper install’ are incomplete or even misleading. “Many believe that merely following the manual is sufficient,” says appliance expert Dr. Lisa Monroe, but the reality is far more intricate. For example, selecting cheap, generic parts may seem like a cost-saving move, but it often leads to failures that void warranties. According to a 2022 study by Appliance Repair Insights, over 60% of warranty rejections are due to improper parts use, not product defects.
One frequently misunderstood aspect is the importance of using manufacturer-approved components for each step of the installation. For instance, reusing old supply hoses or fittings—even if they appear to be in good condition—can introduce leaks or pressure issues. This is a common mistake that surprises many DIYers, as they assume that older parts are ‘still good enough.’ However, the durability of plastic fittings deteriorates even if visually intact, increasing the risk of damage and warranty denial.
Another pitfall involves the proper documentation of the installation process. A common myth is that take-it-for-granted photos and receipts aren’t necessary; in reality, these records can be vital when contesting warranty rejections. For example, a homeowner who documented their installation with timestamped photos and detailed receipts was able to successfully appeal a denied warranty claim related to a leaky water inlet valve. External facts and proper documentation are often overlooked but can make all the difference.
What are the risks of trusting DIY guides over manufacturer specifications?
Many assume that general plumbing or appliance repair tutorials are sufficient, but ignoring manufacturer-specific instructions for parts and procedures can lead to serious issues. Experts warn that disregarding these guidelines not only risks voiding warranties but can also cause long-term damage to the dishwasher. For example, using non-approved adhesives or fittings may cause corrosion or leaks, which are often claimed as cause for warranty rejections. To avoid this, always cross-reference your parts and procedures with trusted resources like this troubleshooting guide.
Ultimately, the devil is in the details. Advanced mistakes—such as not verifying the water pressure before installation or failing to install a high-loop drain hose—can severely impact warranty status. As cited in a recent homeowner survey, neglecting these critical nuances can quadruple the likelihood of warranty disputes. Take the time to learn these subtle but crucial distinctions to safeguard your investment. Have you ever fallen into this trap? Let me know in the comments.Maintaining your dishwasher’s optimal function over time requires more than just regular cleaning; it calls for the right tools, a systematic approach, and proactive part management. I personally rely on a few specialized equipment items to ensure each repair and inspection is precise and effective. For instance, a digital torque wrench is invaluable for tightening fittings to the manufacturer-specified torque, reducing the risk of leaks and pressure issues. Unlike regular wrenches, a torque wrench provides the consistency needed to meet warranty standards, avoiding overtightening that can damage plastic components. Additionally, investing in a reliable leak detection sensor like the WD-40 Smart Leak Detector gives me early warning signs before a small leak causes major damage—saving time, money, and warranty headaches.
Use a multimeter with a high-precision setting when diagnosing electrical issues, especially for sensors and control panels. I’ve found that a multimeter tuned to the correct voltage and resistance ranges helps distinguish between faulty parts and wiring problems, making repairs more straightforward. When combined with the manufacturer’s troubleshooting guides—such as this resource—these tools enable a confidence-fueled approach to long-term maintenance.
Preemptive replacement tools also play a crucial role. For example, a lifetime supply of high-quality, manufacturer-approved replacement hoses and gaskets allows me to swap out aging parts before they fail. This preemptive strategy minimizes downtime and protects warranty eligibility. Keeping these parts organized in a labeled, airtight container prevents mix-ups and expedites repairs when needed. As technology advances, I predict that smart diagnostic apps integrated with IoT-enabled sensors will become standard, providing real-time health reports of critical parts—making proactive maintenance even easier.
**How do I maintain dishwasher parts over time?** Regular inspections are key. I schedule monthly checks for visible hoses, electrical connectors, and mounting brackets, adhering to the guidance detailed here. Replacing worn parts early can prevent leaks, sensor errors, and ultimately, warranty rejection.
To maximize your dishwasher’s longevity, I recommend adopting a proactive mindset—invest in precise tools, keep essential spare parts on hand, and follow a scheduled maintenance plan. By doing so, you’ll drastically reduce unexpected breakdowns and extend the lifespan of your appliance. Start by testing your current tools: are your torque wrench and multimeter calibrated? If not, calibration is a quick process that ensures your readings are accurate—an often overlooked but critical step for durable repairs. Ready to upgrade your maintenance arsenal? Try recalibrating your tools today and see the difference it makes in your next repair.
What I Wish Someone Told Me About Dishwasher Parts and Warranty Secrets
One of my biggest shock moments came when I discovered that overlooking a tiny installation detail could void my warranty. I learned that even minor mistakes, like reusing incompatible parts, could cost me repairs covered under warranty, and it’s a lesson I now pass on to every DIY enthusiast. I realized that truly understanding the nuances of proper parts selection and installation is crucial for protecting your investment and avoiding costly mistakes. The importance of following manufacturer-specific guidance rather than generic advice became clear, shaping how I approach every future project—or even just routine maintenance.
My Toolbox of Trusted Resources for Long-Lasting Dishwasher Performance
Over time, I’ve curated a set of tools and knowledge sources that help me ensure every installation and repair is up to standard. This detailed parts guide has saved me from buying the wrong fittings, while this installation protocol provides step-by-step clarity I can rely on. I also trust this resource for maximizing warranty coverage. These references have become my companions, turning potential pitfalls into predictable, manageable steps.
Take Action and Make Your Dishwasher Last
Remember, the difference between a successful DIY project and expensive repair lies in attention to detail and proactive care. Keep your toolkit calibrated, follow trusted guides, and don’t hesitate to seek out expert advice when in doubt. Your 2026 dishwasher can serve you reliably for years—if you arm yourself with the right knowledge and tools today. Are you ready to take the next step towards becoming a confident self-repairer? Start now, and enjoy peace of mind knowing you’ve done it right.
Related Posts
5 Essential Parts for a Silent 2026 Dishwasher Installation
Ever had that moment where you're eagerly waiting to enjoy…
Expert Tips for Dishwasher Installation & Parts for Lasting Trust in 2025
My Journey to a Seamless Dishwasher Installation: Lessons LearnedWhen I…

Parts and Warranty Tips for Seamless Dishwasher Installation in 09:17
My Journey to a Smooth Dishwasher SetupWhen I first decided…