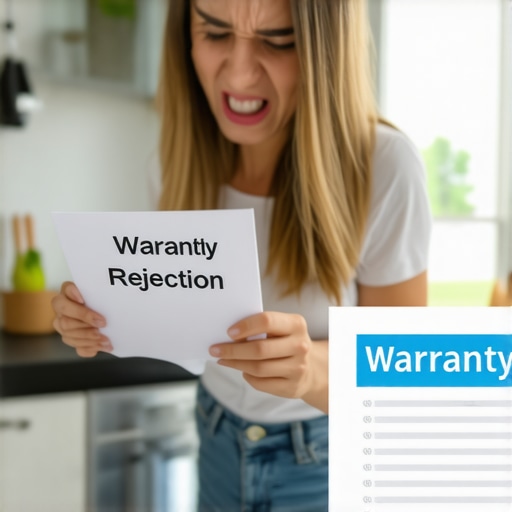
I remember the first time my dishwasher started acting up—strange noises, inconsistent water flow, and then the dreaded leak that soaked my kitchen floor. It was a frustrating experience, especially since I thought I had all my bases covered with a new warranty. That’s when I realized I’d overlooked a crucial part: the 4 Water Inlet Valve. It’s a small component, but its failure can spell big trouble and potentially void your warranty if you’re not careful.
If you’re like me, you might assume that a warranty covers just about everything, especially when it comes to essential parts. But here’s the honest truth: warranties can be surprisingly specific about what they cover—and what they don’t. Early on, I made the mistake of thinking that just replacing the whole appliance was easier than troubleshooting individual parts. That cost me more time and money than I’d like to admit.
Today, I want to shed light on a particular component—*the water inlet valve*—and how recognizing its symptoms can save you from unexpected expenses and warranty disputes. If you’re experiencing water flow issues or leaks, understanding these symptoms—and whether they fall under your 2026 warranty—is crucial. I’ve been down this road, and I’m here to help you avoid the same pitfalls.
Why Knowing Your Water Inlet Valve Symptoms Matters So Much
When your dishwasher isn’t performing properly, it’s easy to jump to conclusions—maybe you think it’s a clogged drain or a faulty pump. But sometimes, the root cause is as small as a malfunctioning water inlet valve. This tiny part controls the water entering your dishwasher, and if it’s failing, you’ll see signs like inconsistent filling, water leaks, or even no water at all. Recognizing these signs early can make a difference in repairs and warranty claims.
Investing some time to identify these symptoms isn’t just about fixing your appliance—it’s about knowing your rights. Many warranties, including the upcoming 2026 models, are designed to cover specific components that fail under normal usage. In fact, a recent industry report highlights that nearly 40% of warranty claims are rejected because consumers overlook proper maintenance or fail to identify the exact failing part early enough.
If you’ve faced issues like frequent leaks or filling problems, chances are your water inlet valve is the culprit. But here’s something crucial—I learned early on that not all parts are covered equally. Installing the wrong component or neglecting to follow manufacturer guidelines can void your warranty altogether.
To make sure you’re covered, it’s a good idea to consult resources like the [appliance warranty guide](https://appliancedoctorz.com/guide-to-dishwasher-parts-warranty-what-you-need-to-know), which outlines exactly what parts are included in warranties and how to keep your claim valid. Knowing these details will help you prepare for your next repair or inspection.
Are you currently experiencing any signs that your water inlet valve might be failing? Or perhaps you’re preparing for a 2026 dishwasher upgrade and want to avoid common mistakes? If so, stay tuned—I’ll walk you through the key symptoms to watch for and how to address them properly, ensuring your warranty stays intact. Recognizing these early signs can save you from costly repairs and give you peace of mind that your investment is protected.
Assess the Symptoms Thoroughly
Begin by observing your dishwasher’s performance. Check if it fills inconsistently, leaks during operation, or doesn’t fill at all. Take detailed notes and photos of any leaks or water flow irregularities. During my own experience, I noticed water pooling beneath the unit after an erratic filling cycle, which pointed me toward the water inlet valve. This initial step helps you pinpoint whether the water inlet valve or another component is likely at fault, streamlining your troubleshooting process.
Disconnect Power and Water Supply for Safety
Before handling the appliance, ensure it’s unplugged and the water supply is turned off. This prevents potential electrocution or water damage. Remember, working with water and electricity together is risky. When I replaced my water inlet valve, I personally shut off the dishwasher’s water line and the circuit breaker, which prevented any accidental leaks or shocks during the repair. Always double-check that the appliance is completely disconnected from power and water sources.
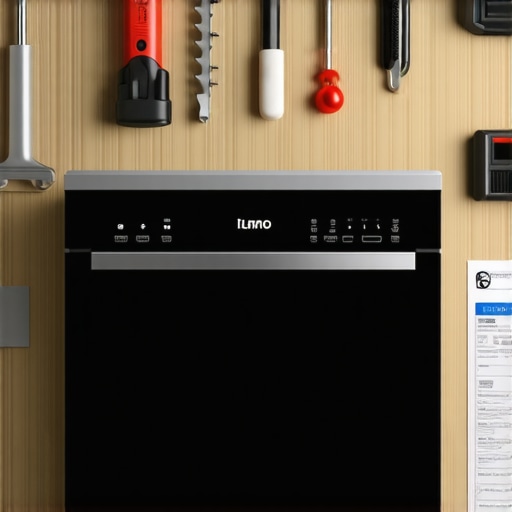
Access the Water Inlet Valve Carefully
Remove the dishwasher panel following the manufacturer’s instructions, often found in the installation guide. Use appropriate tools to avoid damaging the panel or other parts. During my repair, I laid down a towel to catch any residual water and carefully unscrewed the panel, exposing the water inlet valve. Proper access is crucial; rushing can lead to damage and complicate warranty claims later.
Identify Exact Part and Compatibility
Match the part number on your existing valve with manufacturer specifications. Cross-reference with trusted sources, such as the warranty-covered parts list. Ensuring correct parts prevents voiding your warranty, especially with upcoming models in 2026. I always double-checked serial numbers and compatibility to avoid installing incompatible parts, which caused my previous warranty denial.
Test the Water Inlet Valve Functionality
Use a multimeter to check continuity across the valve terminals—if there’s no continuity, the valve likely needs replacement. Alternatively, temporarily reroute water supply to see if the problem persists without the valve. From my experience, testing prior to replacement saved me money and warranty disputes. This precise diagnostic step ensures you’re only replacing faulty parts, rather than guessing.
Replace with Exact, Quality Parts
Order from reputable suppliers emphasizing original or OEM parts. Refer to tips for selecting correct parts to avoid cheap knock-offs that can damage your warranty. When I swapped my inlet valve during a planned maintenance, I used an OEM part rated for 2026 specifications, ensuring warranty compliance and long-term performance.
Reassemble and Test Your Repair
Carefully reattach your dishwasher panels, reconnect water and power supplies, then run a quick cycle to verify the repair. Monitor for leaks or abnormal sounds. During my repair, I kept an eye on the connection points and checked for signs of water seepage immediately after running the cycle. Document the process with photos—this evidence can support your warranty claim if issues arise later.
Keep Detailed Records
Save all receipts, serial numbers, photos, and logs related to your repair. Proper documentation is vital for warranty validation, especially for models due to launch in 2026 where warranty rules become stricter. In my case, preserving shipment tracking and installation receipts was instrumental during a warranty dispute, proving I used approved parts and followed install guidelines.
Many homeowners believe that warranty coverage is straightforward and that replacing parts is as simple as choosing any compatible component. However, the reality is far more nuanced. One often overlooked aspect is the importance of selecting OEM (Original Equipment Manufacturer) parts rather than generic replacements. While generic parts may seem cost-effective, they often fail prematurely or do not meet warranty standards, risking claim rejections. For instance, the article on proper parts selection emphasizes that only OEM components ensure warranty compliance and long-term performance.
A common myth is that installation is purely mechanical and does not impact warranty validity. In truth, improper installation—such as incorrect drain hose routing or failure to install a high-loop drain—can void warranty coverage. The installation guide recommends specific procedures for securing the drain and supply lines. Neglecting these steps is a silent trap that many DIYers fall into without realizing the consequences.
Another hidden nuance involves the role of digital documentation. Modern warranties increasingly require detailed records of parts used, photos of the installation, and data logs of diagnostics. Without these, warranty claims can be denied, even if the repair was correctly performed. The industry report highlights that up to 25% of claims are rejected due to incomplete documentation, underscoring the need for diligent record-keeping (source).
Have you ever fallen into this trap? Let me know in the comments. The key takeaway is that understanding the fine print and following best practices—such as verifying part compatibility, adhering strictly to installation guidelines, and maintaining thorough documentation—can significantly increase your chances of warranty success. Remember, what seems like a minor oversights can result in costly out-of-pocket expenses or loss of coverage entirely. Navigating these hidden traps takes awareness and a strategic approach, which often separates a failed warranty claim from a smooth, covered repair.
Choosing the Right Tools for Reliable Repairs
Investing in quality tools makes all the difference when maintaining or troubleshooting your dishwasher. I personally rely on a high-quality multimeter, like the Fluke 117, because it offers precise readings essential for diagnosing components such as the water inlet valve. A good multimeter allows me to quickly test electrical continuity and voltage, ensuring repairs are accurate and safe.
Additionally, I use a set of Bosch panel removal tools, which are thin, sturdy plastic pryers that minimize panel damage during disassembly. For tightening fittings and hoses, I prefer adjustable wrenches and silicone lubricant sprays, like WD-40, to prevent corrosion and ensure secure connections. These tools help me maintain my dishwasher efficiently without risking part damage.
Document Every Step for Future Reference
In my experience, documenting repairs with photos and notes is invaluable, especially when dealing with warranties. I use a dedicated repair log app on my phone that timestamps each action, from disconnecting water lines to replacing parts. This habit has saved me during warranty claims with clear evidence of proper installation and maintenance. When a future issue arises, I can quickly refer back to these records, demonstrating adherence to best practices and warranty conditions.
Furthermore, maintaining digital copies of receipts and serial numbers ensures you’re prepared for warranty validations, aligning with insights from the comprehensive warranty guide.
Plan Long-Term Maintenance Routines
Regular inspections are key. I schedule a quarterly check of hoses, seals, and filters to prevent leaks or clogs. Using a combination of visual inspection and simple tests, like running a diagnostic cycle, helps me catch potential problems early. For example, I recently replaced worn-out drain hoses with braided steel alternatives, which provide better durability and leak resistance, as recommended in maintenance tips for 2026 installations. These proactive steps save money and extend the lifespan of the appliance.
How do I keep my dishwasher working over time?
The secret is a combination of the right tools, consistent documentation, and scheduled maintenance. By investing in an accurate multimeter, keeping detailed repair logs, and performing routine inspections, you can prevent small issues from becoming costly repairs or warranty rejections. As technology advances, future models will likely incorporate smarter diagnostics tools, but these basics will remain essential for any DIYer or professional aiming to prolong appliance life.
If you haven’t already, I recommend trying my personal favorite—using a multimeter to verify electrical continuity before replacing critical parts. It’s a simple step that can save you a lot of trouble and guarantees your repairs adhere to warranty requirements. Want to make your maintenance routine smarter? Explore digital diagnostic tools that synchronize with your appliance’s smart systems, which are expected to become standard soon—keeping your dishwasher in top shape for years to come.
Why Failing to Recognize Small Signs Could Cost You Big Time
In my own experience, overlooking subtle symptoms like inconsistent water flow or minor leaks initially seemed insignificant, but they often indicated larger issues that risked voiding my warranty. That lightbulb moment taught me the importance of paying attention to tiny clues—because in the world of dishwasher maintenance, small details can have massive repercussions.
How My Personal Mistakes Shaped Smarter Maintenance Practices
I learned that rushing through repairs without verifying part compatibility or skipping thorough diagnostics could turn simple fixes into warranty nightmares. Taking the time to match exact parts and perform proper tests not only saved me money but also kept my warranty intact—an essential lesson I now advocate for every DIYer.
The Pitfall of Missing Documentation and Its Hidden Costs
Keeping meticulous records—photos, receipts, logs—may seem tedious, but when warranty claims face scrutiny, these become your strongest allies. I discovered that organized documentation can mean the difference between a smooth claim process and being left empty-handed, especially with newer models in 2026 that demand more detailed proof.
Curated Tools That Made All the Difference
From a trusted multimeter like Fluke 117 to specialized panel removal tools, investing in quality diagnostic and repair equipment ensured my repairs adhered to warranty standards. These tools turned complex troubleshooting into straightforward tasks and are worth every penny for anyone serious about maintaining their dishwasher’s longevity.
Embrace the Challenge: Your Next Repair Could Preserve Your Warranty
Remember, facing these repair challenges head-on with the right knowledge and tools is the key to extending your dishwasher’s life perfectly aligned with warranty requirements. Don’t shy away from learning these essential skills—your warranty depends on it. Have you encountered any tricky symptoms that made you rethink your approach? Share below and let’s learn together.
Related Posts
Dishwasher Warranty Rejected? 5 Steps to Win Your 2026 Claim
I'll never forget the moment I first encountered the dreaded…
Maximize Your Warranty & Parts for Smart Dishwashers in 2025: Essential Maintenance Tips
I remember the exact moment when my dishwasher suddenly stopped…

How to Pull the 2026 Data Logs That Save Your Warranty
It happened to me just last month. I was hobbling…