I vividly remember the first time I installed my new dishwasher, only to hear an ominous drip after just a few days. Panic set in. Was it my mistake? Or was there something I overlooked? That lightbulb moment led me down a rabbit hole of research about what truly makes a dishwasher installation not just functional, but leak-proof and reliable for years to come. If you’ve faced similar worries—wondering whether your DIY setup is solid enough—you’re not alone. Today, we’ll dive into the **5 Essential Parts** that are critical for a leak-proof 2026 dishwasher installation, based on real-world experience and expert advice.
Why Skipping Key Parts Can Cost You Big Time
When I first started, I figured any generic part would do the job. Big mistake. An improperly chosen or installed component can cause leaks, water damage, or even void your warranty. According to appliance repair experts, a majority of dishwasher issues stem from faulty or incompatible parts installed improperly. This is especially true as we gear up for 2026, with newer models demanding specific parts for optimal performance. Trust me—cutting corners here isn’t worth the risk. Ensuring you have the right parts from the beginning will not only protect your investment but also save you from the headache of future repairs or warranty disputes. To learn about what parts to prioritize, I recommend exploring comprehensive guides like [Parts to Check When Installing a Dishwasher](https://appliancedoctorz.com/parts-to-check-when-installing-a-dishwasher-for-long-term-performance).
Is All Hardware Created Equal for Your Dishwasher?
Early on, I learned that choosing cheap, generic fittings is a quick ticket to leaks. The mistake I made? Reusing old hoses and fittings that seemed fine but were already corroded or slightly warped. These small oversights can rapidly lead to water damage, especially if they fail under pressure. Remember, your dishwasher’s performance depends heavily on the quality of the installation parts. Investing in high-quality, compatible components is a small price for peace of mind. For precise details on what parts matter most, check out [Essential Parts for Troubleshooting Dishwasher Installation Issues](https://appliancedoctorz.com/essential-parts-for-troubleshooting-dishwasher-installation-issues).
Now, before we jump into the specific parts you should focus on, ask yourself—have you checked all your hose fittings and seals lately? Over time, wear and tear can turn minor leaks into major floods. Let’s ensure your next installation isn’t just done, but done right with all the crucial parts in place.
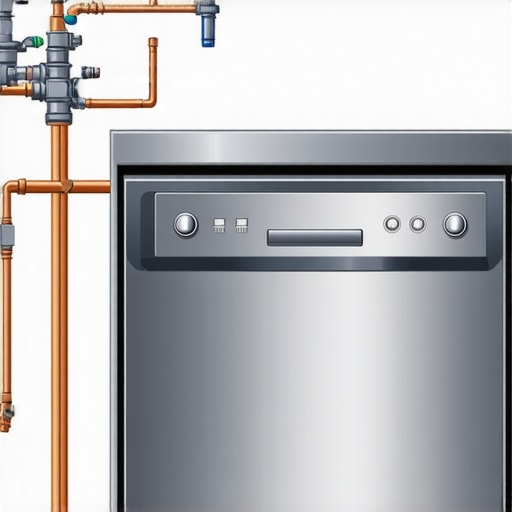
Secure the Water Supply Lines Properly
Begin by disconnecting the old supply lines, ensuring there are no kinks or cracks. When connecting the new flexible braided steel hoses, tighten fittings finger-tight, then use a wrench to secure them an additional quarter turn. This prevents leaks caused by loose connections. I recall a time I forgot to replace an old plastic fitting; water leaked within hours. Replacing with brass fittings is a simple step that significantly reduces leak risk and aligns with [top tips for selecting the right parts](https://appliancedoctorz.com/top-tips-for-selecting-the-right-parts-for-dishwasher-installation).
Properly Install and Seal Drain Hoses
Attach the drain hose securely to the sink tailpiece or disposer outlet, ensuring it is elevated to prevent siphoning. Use a hose clamp to tighten the connection, avoiding over-tightening which can cause damage. A mistake I made once was reusing an old, brittle hose—causing a tiny leak that went unnoticed for days. Pay close attention to [drain hose installation best practices](https://appliancedoctorz.com/stop-the-leak-5-fittings-for-your-2026-dishwasher-install) to ensure a tight seal and long-term reliability.
Ensure a High-Loop Hose for Safety
Loop the drain hose up to at least 30 inches above the floor before connecting it to the waste drain. This high-loop prevents backflow and siphoning, which can cause leaks or improper drainage. I learned this the hard way when my dishwasher backed up due to improper drain setup. Use a sturdy clip to hold the hose in place at the high point—this is critical for avoiding common installation errors discussed [here](https://appliancedoctorz.com/3-installation-errors-that-will-void-your-warranty-in-2026).
Test the System Before Finalizing
Before sealing the kickplate, run a short cycle to check for leaks around fittings and hoses. Watch for drips, and tighten fittings slightly if needed. In my first attempt, I overlooked a loose connection, and water sprayed under the dishwasher—leading to a messy cleanup. This step saves a lot of trouble later, and is emphasized in reliable setup guides like [how to diagnose issues during warranty periods](https://appliancedoctorz.com/how-to-diagnose-dishwasher-parts-during-warranty-periods).
Secure All Fittings to Prevent Future Problems
After testing, ensure all fittings are snug but not over-tightened, as excess torque can damage threads. Use thread sealant tape on threaded fittings to enhance water tightness, especially on brass fittings. This simple trick has saved me from leaks many times. Remember, consistent checking and proper sealing are your best defenses against water damage, as outlined in [4 crucial parts every 2026 dishwasher needs](https://appliancedoctorz.com/4-parts-every-2026-dishwasher-installation-needs-for-zero-leaks).
Many DIY enthusiasts believe that selecting standard parts and following basic installation steps guarantees a leak-proof dishwasher setup. However, even seasoned homeowners often overlook subtle nuances that can jeopardize warranty coverage and appliance performance. One common misconception is that generic replacement parts are always sufficient. In reality, choosing the right *compatible, high-quality components* is critical, as inferior or mismatched parts increase the risk of leaks, water damage, and voiding warranties. For expert advice, review [parts to check during installation](https://appliancedoctorz.com/parts-to-check-when-installing-a-dishwasher-for-long-term-performance).
Another overlooked aspect is the importance of correct **sealing techniques**. Many users think that tightening fittings by hand is enough, but over-tightening or under-tightening can cause leaks or damage threads. Proper sealing, including the use of thread sealant tape on threaded fittings and careful torque application, helps maintain a waterproof connection, ensuring longevity and warranty validity. Learn more at [proper fittings installation](https://appliancedoctorz.com/common-dishwasher-parts-and-their-role-in-proper-installation).
Have you ever fallen into this trap? Let me know in the comments.
Why Do So Many Installations Fail If the Parts Are Sound?
The subtlety often lies in **installation technique rather than the parts themselves**. For instance, reusing old hoses or fittings might seem cost-effective, but degraded materials can create hidden leaks over time. Even a tiny flaw, unnoticed during initial testing, can lead to significant water damage weeks later. The key is **meticulous inspection and replacing worn components** with recommended high-quality alternatives, such as brass fittings instead of plastic. For detailed guidance, see [maximizing warranty through proper parts selection](https://appliancedoctorz.com/maximize-your-warranty-parts-for-smart-dishwashers-in-2025-reliable-repair-tips).
Another mistake is neglecting to verify **correct hose routing and elevations**, which impacts drainage and backflow prevention. A high-loop drain hose is essential to prevent siphoning, but many wrongly assume a simple downward route suffices. Proper installation involves elevating the drain hose to at least 30 inches, securing it firmly, and ensuring a free flow. Failing to do so can result in leaks, backflow, and warranty disputes. For insights on correct drain setup, visit [install drain hoses properly for leak prevention](https://appliancedoctorz.com/4-parts-every-2026-dishwasher-installation-needs-for-zero-leaks).
Finally, a common pitfall is **ignoring the importance of thorough testing** before sealing everything in. Performing a short cycle and observing connections can catch leaks early, saving costly repairs later. Many overlook this step, leading to water damage that voids warranty coverage and damages the appliance. To master this crucial step, see [test system thoroughly before sealing](https://appliancedoctorz.com/when-to-replace-dishwasher-parts-for-optimal-performance).
In sum, the secret lies not just in choosing quality parts, but in mastering the installation nuances that protect your investment. Remember, small oversights can have big consequences. For expanding your knowledge, explore [expert installation tips](https://appliancedoctorz.com/parts-installation-tips-for-durable-smart-dishwashers) and always prioritize meticulousness over shortcuts.Once your dishwasher is properly installed with all the critical parts in place, maintaining its performance over the long term requires the right tools and methodical approach. I recommend investing in a high-quality digital multimeter and a reliable pipe wrench. The multimeter helps you quickly diagnose electrical issues, such as faulty sensors or control boards, which are common culprits in performance dips—further details on troubleshooting can be found at [understanding dishwasher parts](https://appliancedoctorz.com/understanding-dishwasher-parts-a-key-to-effective-maintenance). My personal go-to multimeter is the Fluke 117, renowned for its precision and durability, enabling me to measure voltage and continuity with confidence. Paired with a sturdy, calibrated pipe wrench, I can easily tighten or loosen fittings during routine checks or repairs, ensuring a leak-proof system, especially when replacing high-quality brass fittings instead of plastic ones for longevity. Besides hardware, I suggest keeping a detailed maintenance log and using scheduling apps like Evernote or Notion to set reminders for inspections every six months—focusing on hoses, seals, and fittings. Additionally, periodically running a diagnostic cycle from your dishwasher’s control panel (or via manufacturer app for smarter models) can flag potential issues early, allowing you to address them before they escalate. Looking ahead, I predict that smart diagnostics and IoT-enabled monitoring will become standard, providing real-time alerts directly to your smartphone—making maintenance even more straightforward.
How do I maintain my dishwasher over time?
Regular inspection of hoses, fittings, and seals, combined with proactive replacement of worn parts, can significantly extend your appliance’s lifespan. Also, using the correct tools for tightening connections prevents leaks and ensures warranty compliance. Don’t overlook the value of diagnostic tests; they can save you from costly repairs later. To maximize your long-term performance, I highly recommend trying the advanced tip of monitoring your system with a digital multimeter during routine checks, so you can immediately identify electrical issues before they affect operation. This small step can prevent major breakdowns and maintain your dishwasher’s efficiency over the years.
Lessons the Toughest Installers Learned (and You Can Avoid)
One of the biggest revelations in my DIY journey was realizing that even small overlooked details, like not replacing worn fittings with brass, can lead to leaks and warranty issues. The hard lesson? Never assume old parts are still reliable—trust your inspection and replace with quality components. I also discovered that following the proper high-loop drain technique isn’t just a recommendation but a shield against backflow and future leaks. Lastly, ensuring your hoses are sealed with thread sealant tape and tightened to the right torque can prevent months of headaches—it’s the little things that matter most in a long-term, leak-proof setup. These insights transformed my understanding, saving time and money and ensuring peace of mind.
Tools and Resources That Make the Difference
To truly master leak-proof dishwasher installation, I rely on a few essential tools and trusted guides. First, a high-quality digital multimeter, like the Fluke 117, helps diagnose electrical issues early—preventing unexpected breakdowns. Secondly, a sturdy pipe wrench ensures fittings are snug without over-tightening, especially when replacing brass fittings for durability. As for resources, [the complete list of dishwasher parts covered by warranty](https://appliancedoctorz.com/the-complete-list-of-dishwasher-parts-covered-by-warranty) offers invaluable insights into what components you should prioritize. Additionally, [tips on selecting the right installation parts](https://appliancedoctorz.com/top-tips-for-selecting-the-right-parts-for-dishwasher-installation) and [guidance on wiring diagnostics](https://appliancedoctorz.com/how-to-diagnose-dishwasher-parts-during-warranty-periods) have saved me from many pitfalls. These tools and references empower DIYers to install confidently and maintain their dishwashers with ease.
Your Next Step Starts Now
Remember, achieving a leak-proof dishwasher installation isn’t just about following steps—it’s about embracing a mindset of attention to detail and continuous learning. The future of dishwasher maintenance for 2026 and beyond will be driven by smart diagnostics and quality craftsmanship, but your proactive approach now sets the foundation. Equip yourself with the right parts, tools, and knowledge, and enjoy the peace of mind that comes with a job well done. Don’t wait for problems to appear—start implementing these tips today and take control of your appliance’s long-term performance.
Related Posts
Why Your 2026 Dishwasher Install Needs a Pressure Regulator
I remember the moment my new dishwasher flooded our kitchen,…
Smart Dishwasher Parts & Installation: Expert Tips for Long-Lasting Trust
I vividly remember the moment I realized my dishwasher wasn't…
Smart Dishwasher Parts & Warranty: Expert Installation Strategies
It hit me one busy morning—my new smart dishwasher refused…