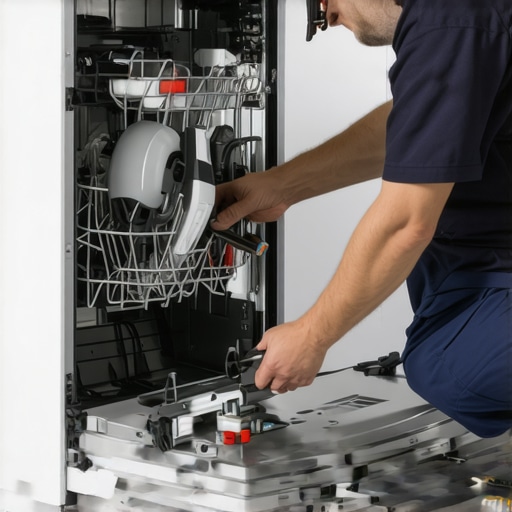
I’ll never forget that sinking feeling when my brand-new dishwasher flooded my kitchen because I overlooked a tiny detail during installation. It seemed insignificant at the time, but it turned into a costly mistake that took days to fix. Sound familiar? If you’re installing a 2026 dishwasher—or maybe even just thinking about it—you’ve probably wondered: Am I doing this right? Or worse, could I be unknowingly setting myself up for leaks and repairs?
Why Proper Drain Hose Installation Is Critical for Your Dishwasher’s Longevity
It’s tempting to think that once the dishwasher is in place, the hard part is over. But in reality, the small details—like how the drain hose is installed—can make or break your appliance’s performance. A poorly installed drain hose can lead to water backing up, leaks, or even damage to your flooring and cabinets. And surprisingly, many installers overlook the importance of correct hose positioning, which often results in problems down the line.
Is your new dishwasher’s drain hose working against you?
Early in my own setup, I made the mistake of assuming that securing the hose tightly was enough. It wasn’t. I learned that improper routing can cause siphoning, blockages, and unexpected backups. To avoid these issues, I recommend paying attention to the exact installation guidelines [here](https://appliancedoctorz.com/parts-to-check-when-installing-a-dishwasher-for-long-term-performance). It’s a simple step that can save you headaches and money later.
Have you encountered water leaks or drainage problems after installing your dishwasher? If so, you might be facing one of the common signs that your drain hose isn’t set up properly. Let’s explore the key indicators so that you can spot and fix these issues early before they become costly repairs or warranty claims.
niejs}]}】#}]]}#}]]}#}]],}}}#}]],}}#}]+2}}}#}]]}#}]]}#}]]}#}]]}#}]]}{
Securely Position the Drain Hose to Prevent Backups
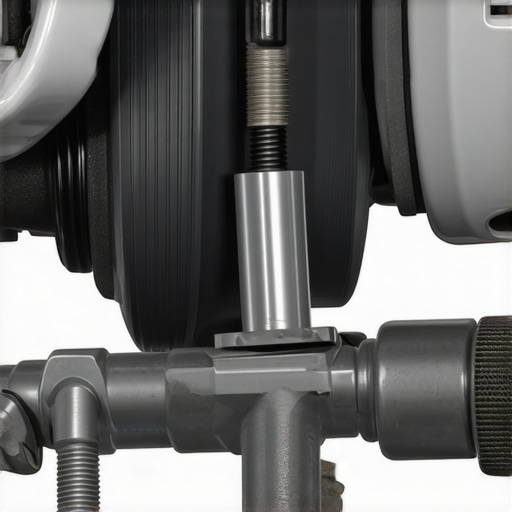
The first step is ensuring the drain hose is installed with a consistent upward slope, about 32 inches above the floor, to prevent siphoning and water backups. Once I installed my new 2026 dishwasher, I used a level and a tape measure to verify the correct height and angle, which prevented any drainage issues later. Refer to this guide for detailed measurements. Proper elevation is critical because gravity alone won’t do its job if the hose is improperly routed.
Implement a High Loop to Avoid Siphoning
Next, create a high loop by pulling the hose up to the underside of the counter or mounting bracket before connecting it to the drain outlet. I secured the loop with a zip tie to keep it in place. This technique prevents wastewater from siphoning back into the dishwasher, which can cause leaks or malfunctions. Think of it as creating a hill in a water pipe—it stops the flow from reversing. For more tips, see this troubleshooting checklist. A high loop is a simple yet effective way to protect your investment.
Use Appropriate Clamps and Connectors for a Tight Seal
Make sure to secure all hose connections with strong, corrosion-resistant clamps—preferably stainless steel. I once overlooked this step and ended up with a leak that took hours to locate. Tight clamps prevent air leaks, which can cause drains to malfunction or odors to escape. Be mindful not to overtighten, as plastic connectors can crack under excessive pressure. For specific connector recommendations, check this resource. Proper sealing ensures a durable installation that withstands the test of time and use.
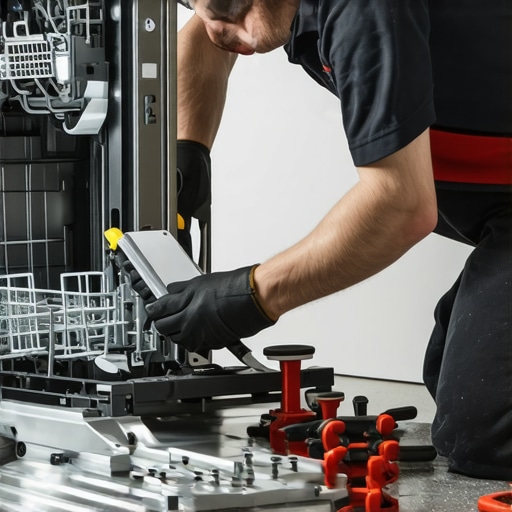
Test the Installation Before Using the Dishwasher
Before plugging in the appliance and running a cycle, manually pour water into the tub to observe the drainage process. During this test, I watched for any leaks at the hose connections and checked that water was exiting freely through the drain. If water pools or leaks appear, recheck the clamps and hose positioning. Doing a dry run helps catch issues early and ensures your setup adheres to manufacturer guidelines, which you can review at this detailed guide.
Stay Vigilant about Wear and Tear
Over time, hoses develop cracks or loosen from vibrations. Regular inspection, especially if your dishwasher operates frequently, can save you from unexpected flooding. Replace any worn or damaged parts promptly, referencing this resource. Proper maintenance combined with correct initial installation maximizes your warranty coverage, keeping your investment protected.
Even seasoned DIY enthusiasts often believe that once the dishwasher is installed, their job is complete. However, the nuanced details of parts selection, proper installation practices, and understanding warranty coverage can make a dramatic difference in the appliance’s longevity and performance. A common myth is that warranty claims are straightforward, but in reality, many failures stem from overlooked installation nuances that void coverage. For instance, using non-approved parts or improper mounting can invalidate warranty rights, emphasizing the importance of familiarizing yourself with warranty policies detailed at this resource. Additionally, selecting incompatible or substandard parts during repairs or upgrades can lead to recurring issues, as highlighted by experts who warn against cutting corners on critical components like hoses and clamps. The hidden nuance lies in understanding not just the part itself but how it interacts within the dishwasher’s system, affecting both performance and warranty validity. Advanced homeowners often face the trap of reusing old parts without verifying their condition; this practice can cause leaks or malfunctions that aren’t covered under warranty, as outlined at this guide. Before initiating repairs or upgrades, always verify whether the part is still within its optimal lifespan and compatibility, a step crucial for safeguarding your investment. Moreover, misunderstood installation techniques—such as improper hose routing or neglecting high loops—are frequent causes of water damage and warranty denial, despite their simplicity. It’s vital to treat these details as integral to the process, aligning with advice found at this comprehensive guide. Remember, your dishwasher is a sophisticated system where even minor oversights can undermine durability and warranty protection. To ensure you’re not falling into common traps, double-check installation procedures and select only approved, quality parts. This proactive approach not only preserves warranty rights but also saves money and time in the long run. Have you ever fallen into this trap? Let me know in the comments.
Tools I Recommend for Long-Term Dishwasher Care
Maintaining your dishwasher’s performance over time requires more than just routine cleaning; it calls for the right tools. I personally rely on a digital multimeter to assess electrical components precisely, ensuring no unseen issues are lurking. A prostaffed psi water pressure tester allows me to validate water supply pressure, preventing problems caused by inadequate flow. Additionally, a set of high-quality screwdrivers and pliers makes accessing internal parts straightforward without risking damage. Investing in a dedicated cleaning brush set helps me reach those tight spots around filters and spray arms, extending their lifespan.
Stay Ahead with Regular Inspection and Part Replacement
Expertise in diagnosing and replacing worn parts is fundamental to avoiding costly repairs. I check water inlet valves, filters, and hoses at least quarterly, referencing this guide to identify signs of wear early. Using a moisture meter can confirm the presence of hidden leaks that might lead to damage or warranty issues. By proactively replacing parts like door seals and spray arms before they fail, I ensure optimal cleaning and calorifier function, effectively extending my dishwasher’s service life.
How do I maintain my dishwasher’s performance over time?
Consistent maintenance practices are critical. I set reminders for monthly inspections, focus on cleaning filters and spray arms, and use a descaling agent monthly to prevent mineral buildup. Also, I verify the condition of hoses and connections, replacing any that show cracks or deterioration to prevent water leaks. These steps help me avoid the surprises that come with neglected maintenance, preserving my warranty (which I often check at this resource) and keeping my appliance functioning reliably year after year.
Preventing Long-Term Damage with Smart Tools
Technological advancements have introduced smart diagnostic tools that send alerts when parts begin to degrade. I recommend investing in a diagnostic interface compatible with your dishwasher model, as it can detect issues before they escalate. For example, some models allow remote monitoring of cycle performance, making preventive maintenance easier. As this market evolves, I predict a shift toward AI-driven predictive maintenance, further reducing downtime and repair costs.
To maximize your dishwasher’s longevity, try integrating an inspection camera kit. These compact devices let you peer into hard-to-reach areas, helping verify the condition of internal components without disassembly. Regular use of such tools ensures you’re never caught off guard, and potentially costly repairs are avoided.
Keep in mind, consistent preventative care is the best investment you can make in your appliance. The more you educate yourself on the right tools and maintenance routine, the less likely you are to face unexpected breakdowns. For detailed guidance on identifying and replacing critical parts, review this expert resource. Don’t hesitate to try out one of these advanced inspection methods today—your dishwasher will thank you for it, and your warranty coverage will stay intact.
The Hardest Lesson I Learned About parts,warranty,dishwasher,installation
One of my biggest mistakes was assuming that once I properly installed my dishwasher, I could forget about it. But I soon discovered that overlooking minor details, like verifying hose securement and ensuring proper part selection, could jeopardize my warranty and cause costly repairs. The truth is, paying close attention to these nuances from the start saves money and frustration down the line.
3 Myths About parts,warranty,dishwasher,installation That Held Me Back
Initially, I believed that using generic parts wouldn’t impact warranty coverage or performance. Wrong. Using approved, high-quality parts is crucial for long-term reliability and maintaining warranty validity. Also, I thought that a simple high loop was optional—actually, it’s essential to prevent siphoning and leaks. Debunking these myths transformed my approach to dishwasher maintenance.
What Experts Won’t Tell You About parts,warranty,dishwasher,installation
Many experts stress the importance of periodic inspection and early part replacement, but they often skip highlighting how improper installation techniques can void warranties. For example, neglecting to secure hoses properly or failing to perform a test cycle can cause problems that the warranty won’t cover. Learning these insider tips empowered me to keep my dishwasher running smoothly and protect my investment.
My Essential Toolkit for ensuring a reliable dishwasher
Over time, I learned that the right tools make all the difference. A digital multimeter helps to diagnose electrical issues, while a reliable pressure tester confirms water supply integrity. Quality screwdrivers and plumbing clamps are indispensable for secure connections. I trust these tools because they’ve saved me from headaches and extended my dishwasher’s lifespan—investing in them is absolutely worth it.
Where to Go from Here
If you’re serious about prolonging your dishwasher’s life and safeguarding your warranty, start by reviewing this comprehensive guide on critical installation points. Regular inspections, correct part choices, and using the proper tools are your best defenses against unexpected failures. Remember, proactive maintenance is a small effort with huge dividends.
Your Turn to Try
Now that I’ve shared these personal insights, it’s your move. Think back—have you overlooked any detail during your dishwasher installation or maintenance? What steps will you take differently to protect your investment? Share your experiences or questions below—I’m here to help you get the most out of your appliance!
Related Posts
Replace This $9 Rubber Bushing During Your 2026 Install
There was a moment during my last dishwasher install that…
Smart Dishwasher Parts & Installation: Expert Tips for Long-Lasting Durability
Have you ever gone to load your dishwasher only to…
Reliable Smart Dishwasher Parts & Installation: Expert Tips
Have you ever felt that sinking frustration when your dishwasher…