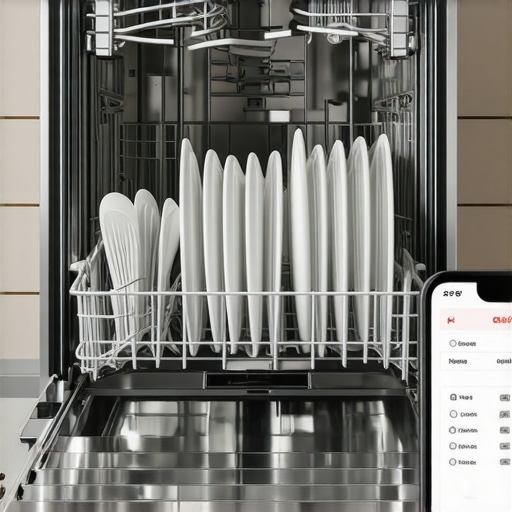
Ever felt that sinking frustration when your shiny new dishwasher starts acting up right after installation? I remember the moment vividly—thinking I had everything figured out, only to be greeted by error codes and water wastage. It was a lightbulb moment that revealed just how crucial the right low-water cycle settings are for modern smart machines. If you’ve invested in a high-tech dishwasher, you know that managing water efficiency isn’t just about saving on bills; it’s about prolonging the appliance’s life and ensuring spotless dishes every time.
The Power of the Right Low-Water Cycle in Modern Dishwashers
As someone who’s tinkered with countless dishwasher setups, I’ve learned that choosing the appropriate low-water cycle can make all the difference. Modern machines come with a variety of cycle options, but not all are created equal for water conservation. Picking the wrong setting can lead to inadequate cleaning or wasted resources, defeating the purpose of having a smart, eco-friendly machine. The good news? Once you understand which low-water cycles fit your needs, you’ll notice improved efficiency and fewer maintenance headaches.
Biggest Skepticism: Are Low-Water Cycles Really Effective?
Early on, I made the mistake of assuming that all water-saving cycles are just a gimmick. I thought, “How can less water possibly get my dishes clean?” That misconception almost led me to stick with traditional cycles, wasting more water and energy. But after some research—and a lot of trial and error—I discovered that when used correctly, low-water cycles are designed to optimize water use without sacrificing performance. Their effectiveness depends heavily on proper setup and selecting the right cycle for each load, which is something worth mastering. For instance, ensuring your dishwasher’s parts are installed correctly can influence cycle efficiency. Check out this guide on parts to verify during installation to maximize effectiveness.
To avoid common installation pitfalls and ensure your dishwasher performs at its best, understanding the nuances of low-water cycles is essential. And if you’re wondering whether your current settings are optimized, stay tuned—I’ll walk you through how to identify and adapt the best low-water cycle for your machine in the upcoming sections.
Select the Right Parts for a Smooth Installation
Start by gathering all the necessary components, ensuring compatibility with your dishwasher model. Use high-quality, stainless steel braided supply hoses instead of plastic ones to prevent leaks and prolong lifespan. Before installation, review the manufacturer’s manual and cross-reference with detailed parts guides, like this resource, to familiarize yourself with essential connectors and gaskets. Remember, mismatched or worn parts can void warranties; consult warranty tips for part selection advice.
Properly Connect Water and Drain Lines
Attach water supply hoses securely to prevent drips. Use the proper torque with an adjustable wrench (not hand-tightening) to avoid damaging fittings—see this guide for wrench calibration. Elevate the drain hose to create a high loop, which prevents backflow and foul odors. The loop’s height should be at least 32 inches above the floor; this setup is crucial to prevent siphoning and ensure a functional waste system. Secure the drain hose with a high loop bracket, avoiding cheap plastic clips that can slip. For step-by-step visuals, check this installation walkthrough.
Check and Secure Electrical Connections
Ensure the dishwasher’s power cord matches the circuit’s amperage—typically a dedicated 15 or 20-amp circuit. Use a multimeter to verify voltage and ground connection before plugging in. Secure wires properly to prevent short circuits or loose connections. Avoid using extension cords or adapters, which pose fire hazards. Refer to this wiring checklist to confirm your setup meets safety standards. Remember, improper electrical connections can lead to warranty denial and safety hazards, so if in doubt, consult a professional.
Verify Appliance Leveling and Seal
Level the dishwasher meticulously using a carpenter’s level placed across the door opening. Adjust leveling feet accordingly; do this before securing the unit to prevent uneven wear or leaks. For a secure installation under stone countertops or uneven flooring, use specialized brackets described in this article. Proper leveling ensures the door seals correctly, avoiding water leakage, and keeps the cycle running smoothly. After placement, seal edges with approved gaskets and check for gaps, referencing this gasket guide.
Test Your Setup for Leaks and Proper Drainage
Before loading dishes, run a test cycle to check for leaks around the inlet, drain, and door seals. Observe water flow to ensure the high loop prevents siphoning. Use the dishwasher’s error logs—like this resource—to verify no faults occur. Also, inspect the drain pump after the test; a grinding noise could indicate a failing part, necessitating replacement. Regular testing and maintenance, guided by this article, extend warranty coverage and improve performance.
While most homeowners focus on the obvious aspects of dishwasher installation—like securing water and drain lines—there’s a wealth of nuanced pitfalls that can quietly undermine your warranty and long-term performance. Let’s dig deeper into some misconceptions and advanced mistakes that even seasoned DIY enthusiasts often overlook.
Why choosing the wrong parts can void your warranty and cause costly damage
Many assume that generic or mismatched parts won’t make a difference, but this couldn’t be further from the truth. Using incompatible replacement components, such as inferior gaskets or substandard hoses, may not only impair performance but also void your warranty. For example, selecting a drain hose connector that isn’t rated for dishwasher pressure can lead to leaks or pump failure, issues that insurance or manufacturer warranties may refuse to cover. To avoid this, always review recommended parts and ensure compatibility. Proper part selection acts as the foundation for a reliable, warranty-compliant setup.
Additionally, installing aftermarket parts without verifying their specifications can become a silent culprit behind recurring issues. Regularly consulting maintenance guides such as this resource helps in making informed decisions and maintaining warranty integrity.
The pitfalls of neglecting proper electrical connections during installation
Many underestimate how critical proper electrical setup is. Using extension cords or overloading circuits can lead to sporadic control board failures, which warranty providers may classify as improper installation or user error. Furthermore, failing to verify the correct amperage or grounding can cause electrical surges or short circuits, risking appliance damage. Ensuring dedicated circuits and correct wiring, as illustrated in this guide, safeguards both your appliance and warranty coverage. Remember, electrical mistakes are often silent but deadly to longevity.
Making advanced mistakes with little-known domestic installation hazards
Even subtle issues like improper leveling, incorrect high-loop drain setup, or inadequate sealing can accelerate wear and lead to unnoticed leaks that cause cabinetry or flooring damage—problems typically not covered under warranty if due to installer error. For example, an improperly secured high loop may look okay initially but can slip over time, causing siphoning issues and water damage. Ensuring all edges are sealed thoroughly with approved gasket materials, as explained in this article, guarantees the integrity of your installation.
What about advanced diagnostics of warranty issues
This might surprise you, but understanding your dishwasher’s internal error logs and diagnostic codes is an often-overlooked skill that can strengthen your warranty claims. According to experts, properly interpreting these logs can demonstrate that a fault stems from manufacturing flaws versus installation errors. Tools like app histories serve as evidence in warranty disputes. Familiarity with your appliance’s diagnostic features equips you to advocate effectively if a repair claim is denied unexpectedly.
It’s critical to realize that glancing over these nuanced aspects might be your best defense against unwarranted warranty denial. Investing time in understanding these advanced facets can save hundreds of dollars and extend your dishwasher’s lifespan. Have you ever fallen into this trap? Let me know in the comments.
Essential Tools for Long-Term Dishwasher Care
Investing in the right tools is crucial for maintaining your dishwasher’s performance over time. I personally rely on a high-quality multimeter, like the Fluke 115, to diagnose electrical issues accurately. Its reliability and precision make it indispensable when checking voltage or grounding problems, ensuring safety and preventing unnecessary repairs. Additionally, a pin-type torque wrench, such as the Tekton 24335, allows me to tighten fittings to manufacturer-recommended specifications, minimizing leaks and damage. I also keep a soft-bristled brush and a rubber gasket scraper handy for routine cleaning and gasket inspections, which helps prevent buildup that can lead to cycles failures.
Using these specific tools has consistently saved me time and money, and they are easily available from major hardware stores or online suppliers. Regular diagnostics with a multimeter, combined with routine gasket and filter checks, keep the machine operating optimally and extend its warranty coverage. Over time, investing in these tools pays off by reducing breakdowns and prolonging the lifespan of the appliance.
Strategies for Consistent Maintenance
Establish a monthly routine to inspect and clean key components, including the spray arms, filters, and door seals. For example, removing and soaking spray arms in vinegar helps prevent clogging and maintains water pressure. I also recommend checking the float switch and inlet valve for signs of wear—early detection here can prevent costly repairs. Additionally, inspecting the high loop drain setup regularly ensures proper drainage and prevents siphoning issues that can cause leaks and warranty issues.
Document your maintenance and repairs with timestamped photos; this practice can be invaluable if warranty claims arise, demonstrating your proactive care. Implementing a simple checklist using digital notes or a dedicated app helps keep everything up to date without effort. Remember, consistent upkeep not only prevents problems but also enhances energy efficiency and cleaning performance.
The Future of Dishwasher Maintenance and Monitoring
With the advent of smart home integration, I foresee a trend toward remote diagnostics and automated alerts that notify you of potential issues before they escalate. Using manufacturer apps, like Samsung’s SmartThings or LG ThinQ, can provide real-time data on wash cycles, component health, and even predict part failures—much like how app histories serve as evidence for warranty claims today.
They will likely incorporate AI-driven diagnostics, enabling more precise pinpointing of problems and suggesting immediate fixes or scheduling repairs automatically. By staying ahead with these innovations, you can keep your dishwasher in top condition, avoid unexpected breakdowns, and maximize warranty benefits.
How do I maintain my dishwasher’s performance over time?
The key to sustained performance lies in combining the right tools with proactive routine checks. Regularly inspecting electrical, mechanical, and sealing components—using specific instruments like a multimeter, torque wrench, and gasket scraper—ensures you catch issues early. Following manufacturer guidelines, and perhaps even consulting detailed reliability-focused resources, helps in structuring your maintenance schedule. Embrace smart technology updates to monitor your appliance remotely and act instantly on data insights. Implementing these practices will significantly extend your dishwasher’s life and preserve your warranty coverage. Try setting up a monthly electrical test with your multimeter today—it’s a small step that can prevent a costly breakdown tomorrow.
Lessons Hidden in Plain Sight That Changed My Approach
- Misunderstanding the Role of Quality Parts Cost Me Money—Investing in OEM or recommended components kept my dishwasher running smoothly and preserved warranty coverage. Don’t overlook this crucial detail when installing or repairing your machine.
- Ignoring Detailed Maintenance Logs Is a Mistake—Keeping thorough records of repairs and diagnostics has empowered me during warranty disputes, proving proper care and installation practices are vital. It’s a small effort with huge benefits.
- The Electrical Setup Is Not Just Wiring—I’ve learned that proper circuit, grounding, and avoiding extension cords prevent subtle damage that warranty providers can deny. Safety and compliance go hand-in-hand with your warranty protection.
- Overlooking the Significance of Correct Drain Loop Height—Initially, I underestimated this, but proper high-loop installation prevents siphoning and water damage—saving headaches and warranty issues down the line. Double-check these details to safeguard your appliance.
Tools and Resources That Elevated My Dishwasher Maintenance Game
- Multimeter (like Fluke 115): Reliable electrical diagnostics have saved me from unnecessary replacements and ensured my wiring is sound.
- Torque Wrench (such as Tekton 24335): Precise tightening prevents leaks and mechanical wear—essential for long-term performance.
- Gasket Scraper and Soft Bristled Brush: Routine gasket inspection and cleaning avoid leaks and cycle failures, supporting warranty compliance.
- Professional Guidance from ApplianceExperts: Resources like this detailed parts guide help me select compatible, high-quality components, safeguarding my investment and peace of mind.
Your Dishwasher Journey Starts Tomorrow
Now that you’ve uncovered some of the most overlooked aspects of dishwasher installation and maintenance, it’s time to take action. Proper parts selection, precise setup, and diligent care can make a significant difference in warranty longevity and appliance life. Remember, small upgrades in routine and awareness can lead to major peace of mind—so why wait? Dive into your next project with confidence, and enjoy a dishwasher that performs reliably for years to come.
What step will you tackle first to improve your dishwasher’s performance and warranty security? Share your plans or questions below—I’d love to hear your story!
**