
It was a quiet Saturday morning when I suddenly heard that relentless banging from my kitchen pipes. It’s that jarring, metallic clash every time I shut off the faucet or the dishwasher finishes its cycle. At first, I thought someone was in the house playing a weird drumbeat! Turns out, it was the classic sign of water hammer, and honestly, I’d never even heard of a water hammer arrestor before. That lightbulb moment led me down a rabbit hole of plumbing fixes, and I quickly realized how common—and frustrating—this issue really is.
Why I Was Tired of the Noise and Why You Might Be Too
It’s remarkable how something so seemingly minor—a loud bang every time the water stops flowing—can quickly turn into a daily annoyance. But besides the annoyance, water hammer can cause long-term damage to your plumbing pipes. Every thud isn’t just noise; it’s pressure stress that could crack pipes, loosen fittings, or even cause leaks over time. Recognizing this early can save you money and headaches down the line.
So, what’s the fix? This is where installing a water hammer arrestor comes in. It’s a simple device designed to absorb sudden pressure changes, soothing those angry pipes. I’ll be honest: initially, I underestimated how vital this little gadget was. I thought I could just tighten some fittings or replace the pressure relief valve. But that was a mistake I made early on and learned from—trust me, it’s better to understand the root cause and tackle it properly. Want to avoid my rookie errors? Keep reading for a straightforward guide to stop that banging once and for all.
Is a Water Hammer Arrestor Really Worth the Effort?
This was my biggest skepticism at first. I wondered if installing a water hammer arrestor was some overhyped fix or if it genuinely provided lasting relief. The answer? It’s absolutely worth it, especially if your plumbing is exposed to high-velocity water flow or if your pipes are older and more prone to noise. Plus, modern arrestors are compact, affordable, and easy to install, making them a smart upgrade for any homeowner tired of the racket. For more insights into selecting the right parts, I’d recommend checking out this guide on choosing optimal parts.
Have you experienced the banging sounds too? If so, you’re not alone. Addressing this issue now can prevent bigger plumbing problems later—and trust me, silence is golden. Ready to learn how to install your own water hammer arrestor and enjoy peace and quiet? Let’s dive into the step-by-step process that finally ends the noise in our homes.
Turn Off Water Supply and Clear the Area
Start by shutting off the main water valve to prevent leaks while working. Open all faucets to drain residual water, reducing pressure and making installation safer. In my experience, this initial step avoids accidental spray and messes when disconnecting pipes.
Locate the Affected Pipe and Plan Your Installation
Identify the pipe section experiencing banging—usually near the kitchen or dishwasher. Decide whether to install the arrestor directly at the fixture or along the pipe run, considering accessibility and space. When I installed mine under the kitchen sink, I used a flexible connector to make the process easier, akin to attaching a quick-release hose.
Disconnect the Pipe and Prepare the Fitting
Using an adjustable wrench, loosen the coupling connectors. Clean the area thoroughly to ensure a good seal. I used a rag to wipe away debris, preventing leaks later. Remember, the goal is to create a secure connection to prevent water pressure from escaping.
Attach the Water Hammer Arrestor
Connect the arrestor to the pipe using appropriate fittings—brass fittings are recommended for durability. Apply pipe sealant or plumber’s tape to threaded connections to ensure a leak-free fit. Tighten the fittings snugly but avoid overtightening, which can crack fittings—think of it as tightening a bike nut just enough to prevent wobble.
Special Tips for a Tight Seal
When installing mine, I used a torque wrench set to a manufacturer-recommended value, preventing overtightening. For plastic fittings, hand-tight plus a quarter turn is usually sufficient. If you notice any leaks during test runs, tighten fittings gradually.
Reconnect and Test the System
Reattach the pipe to the fixture and turn the water supply back on slowly. Watch and listen for any leaks or unusual noises. I turned on the water and slowly closed the faucet to see if the banging persisted; it didn’t, which was a huge relief.
Monitor and Adjust If Needed
Observe the pipes over the next few days. If noise returns or leaks appear, tighten fittings or reposition the arrestor. Remember, sometimes a little fine-tuning makes all the difference, similar to adjusting a bicycle seat for comfort.
For more detailed parts information or troubleshooting during warranty periods, check this resource. Proper installation not only silences your plumbing but also extends its lifespan by reducing stress on pipes and fittings.
<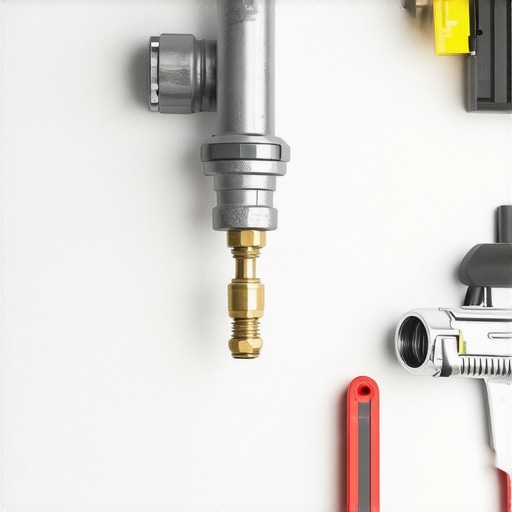 >Many homeowners assume that once their dishwasher is installed correctly, their work is done, but this is a misconception. One common myth is that aftermarket parts are just as reliable as OEM (original equipment manufacturer) components. In reality, selecting generic or incompatible parts can void your warranty and lead to premature failure. It’s essential to understand the nuances of choosing the right parts; for instance, comprehending the role of each component ensures compatibility and optimal performance.
Another misbelief revolves around warranties—many believe that all repairs automatically qualify for coverage regardless of the repair process. However, warranty terms are specific and often exclude damage caused by improper installation or unauthorized parts. A critical mistake is neglecting to document professional installation, which could be vital when filing a claim.
Advanced users often overlook the importance of understanding the manufacturer’s recommendations for installation procedures and parts. For example, using the correct inlet valve tension or ensuring a proper high loop in the drain hose can prevent leaks and backflow issues, extending the *life* of your dishwasher.
A hidden trap many fall into is ignoring the fine print in their warranty documents, which can specify non-covered scenarios such as scale buildup or incorrect troubleshooting attempts. According to industry experts, proactive maintenance—like regular cleaning of filters and checking seals—can dramatically improve warranty longevity.
So, what advanced mistakes should you avoid? First, don’t assume that upgrading to high-end aftermarket parts guarantees better performance—you might inadvertently mismatch components, which can damage your unit. Second, avoid DIY repairs without understanding the complex internal circuitry; for instance, tampering with control boards or sensors without proper knowledge can lead to costly electrical damage. Always verify compatibility by consulting trusted sources, and when in doubt, professional diagnosis can save you money and trouble.
Finally, stay vigilant with updates and recalls. Manufacturers frequently release firmware updates or issue recalls for specific models. Ignoring these can result in missed opportunities for free repairs or parts replacements—so always check your model against the latest official notices.
Have you ever fallen into this trap? Let me know in the comments. Navigating these nuances might seem daunting, but understanding them can save you time, money, and frustration in the long run.
Essential Equipment for Long-Term Dishwasher Care
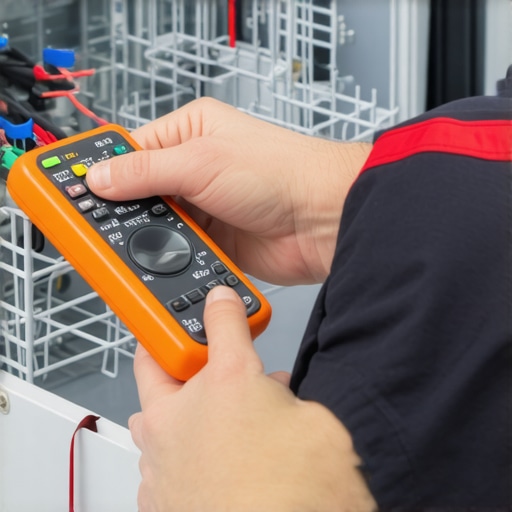
To ensure your dishwasher operates efficiently and lasts for years, investing in the right tools is crucial. I personally rely on a high-quality 15-inch multimeter for electrical diagnostics, especially when diagnosing issues with heating elements or sensors. A tiny inspection mirror allows me to visualize hard-to-reach areas, ensuring internal components like seals and filters remain clean and intact. For physical parts replacement, a set of precision screwdrivers has saved me from damaging delicate screws or clips. Additionally, I keep a pipe sealant tape handy for secure fittings, which minimizes leaks over time.
Why Specific Diagnostic Tools Matter
Using a multimeter calibrated to measure resistance and continuity helps me detect failing components such as thermal fuses and circulation pumps without guesswork. This proactive approach prevents unexpected breakdowns and reduces repair costs. Remember, accurate diagnosis is the foundation of effective maintenance, and choosing the right tool can expedite the process significantly. For instance, testing the heating element with a precise multimeter can reveal micro-breaks that aren’t visible to the naked eye, saving time and money.
Predicting Future Trends in Dishwasher Maintenance
Looking ahead, I predict that diagnostic tools will become more integrated with smart home systems, providing real-time alerts on minor issues before they escalate. Wireless sensors embedded within components could notify homeowners via smartphone apps about impending failures, making maintenance more preemptive than reactive. This shift not only minimizes downtime but also extends appliance lifespan by allowing timely interventions.
How do I keep my dishwasher reliable over time?
Regular maintenance routines are vital. I recommend setting a bi-monthly schedule for deep cleaning the filter and checking hoses for signs of wear. Incorporating tools like a magnetic flash inspection mirror and a digital multimeter ensures you can diagnose and address small problems early, preventing costly repairs. Additionally, maintaining a detailed record of part replacements and service dates helps track your dishwasher’s health, especially if it’s under warranty. Proper documentation can be instrumental when consulting warranty coverage or troubleshooting guides like this resource.
Remember, using specialized tools tailored to your dishwasher’s components isn’t just about fixing issues—it’s about fostering a proactive maintenance mindset. For example, when I noticed my dishwasher’s cycle times increasing, I used a multimeter to test the circulation pump, quickly identifying a failing motor before it caused water leaks. I suggest you try this advanced troubleshooting tip next time—being equipped with the right equipment can save you from bigger headaches later.
< >
>
By investing in precise diagnostic tools and adopting a regular maintenance routine, you ensure your dishwasher remains dependable and efficient. Staying ahead with these strategies not only prolongs the appliance’s lifespan but also protects your investment. For comprehensive guidance on selecting the best tools, check out this expert advice, which emphasizes choosing compatible and durable components.
What I Wish I Had Known About Dishwasher Repairs Early On
- My biggest learning was realizing that ignoring small signs like leaks or strange noises could lead to costly replacements later. Addressing issues promptly might save hundreds of dollars and extend your dishwasher’s lifespan.
- Another lightbulb moment was discovering that not all parts are created equal. Using OEM parts ensured better compatibility and durability, preventing future failures that generic components might cause.
- Finally, I learned that a proactive maintenance routine, including regular filter cleanings and checking hose connections, can prevent unexpected breakdowns and keep your machine running smoothly for years.
Tools and Resources That Make a Difference in Keeping Your Dishwasher Happy
- Multi-functional Digital Multimeter: Trusted for accurate electrical diagnostics, helping me catch issues with heating elements or sensors before they cause bigger problems.
- Inspection Mirror: Essential for peering into hard-to-reach areas, ensuring internal components like seals and filters are clean and intact without disassembly.
- Quality Screwdriver Set: Crucial for safe removal and replacement of parts, reducing the risk of damaging delicate components during repairs.
- A comprehensive guide to dishwasher parts: A resource I trust for understanding the role of each component and selecting the right replacements to ensure longevity.
Your Next Step Can Transform Your Dishwasher’s Future
Taking action now to maintain and troubleshoot your dishwasher empowers you to avoid surprises and ensure peak performance. With the right knowledge and tools, you can turn simple tasks into effective long-term solutions. Remember, there’s a sense of achievement in solving problems yourself—so don’t hesitate to start applying these insights today. How do you plan to upgrade your dishwasher maintenance routine? Let me know below and share your experience—your community can benefit from your tips too!
Related Posts
Why Your Insulation Blanket Should Never Be Removed During Installation
I’ll never forget the sound of my first solo dishwasher…
The Proper Way to Loop a Drain Hose Behind a Sink
Ever had that sinking feeling when you open your dishwasher,…
The Mounting Bracket Mistake That Makes New Dishwashers Shake
Ever turned on your brand-new dishwasher only to be met…