
Have you ever stared at your dishwasher’s door and felt that unsettling gap, wondering if that squeaky seal is just a minor annoyance or a sign of something bigger? I remember the moment vividly—the dreaded realization that my appliance was leaking, and calling a repair technician seemed both expensive and unnecessary. But here’s the thing: that lightbulb moment led me down a path of discovery, learning I could handle this myself without the hassle or high costs of a pro.
Taking Control: Why Swapping Your Door Gasket Matters
Replacing a door gasket might sound intimidating, but in reality, it’s one of those home appliance fixes that can save you a ton of money and frustration. Not to mention, it’s satisfying to know you’re maintaining your equipment on your own terms. When I first tried this, I was unsure if I could do it—I feared I’d make a mistake that would void my warranty or cause more damage. But with the right guidance and a bit of patience, I managed to get my dishwasher sealing perfectly again, and you can too. In fact, troubleshooting and fixing common dishwasher issues yourself is often the most sensible approach, especially when you consider that many warranty terms only exclude damage caused by DIY repairs. For more insights, check out [how to diagnose dishwasher parts during warranty periods](https://appliancedoctorz.com/how-to-diagnose-dishwasher-parts-during-warranty-periods).
Will I Mess Up If I Try This Myself?
Many folks worry about making things worse, and honestly, I made that same mistake early on—thinking I could just unscrew the old gasket and slap a new one in. Turns out, rushing through it can lead to improperly sealing, which causes leaks and potentially more damage. But once I learned to take my time and follow a step-by-step process, I was confident in my ability to do my own repairs. Remember, understanding how your dishwasher’s parts work together is key. For example, knowing the role of each component helps in selecting the right replacement—something that can be guided by resources like [parts to check when installing for long-term performance](https://appliancedoctorz.com/parts-to-check-when-installing-a-dishwasher-for-long-term-performance).
So, if you’re tired of watching water pool where it shouldn’t, or your dishes aren’t coming out clean, it might be time to give this repair a shot. Keep reading, and I’ll walk you through the process step-by-step. Trust me; the satisfaction of fixing your own appliance beats waiting around for a repair appointment any day.
Remove the Old Gasket Carefully
Start by opening your dishwasher door and locating the gasket—it’s the rubber seal around the door edge. Using a flat-head screwdriver, gently pry under the gasket’s lip to loosen it, working slowly to avoid damaging the metal frame. During my first attempt, I accidentally nicked the metal, but careful prying prevented further damage. Once loosened, peel the gasket away from the door frame, taking note of how it’s seated—this will help when installing the new one.
Clean the Surface to Ensure a Perfect Seal
Before installing the new gasket, thoroughly clean the gasket groove with a damp cloth to remove soap scum, old adhesive, and debris. Residue can prevent the new gasket from sealing effectively, leading to leaks and potential warranty issues. I once skipped this step and ended up with water pooling inside after my first test cycle, emphasizing the importance of a clean surface. Proper cleaning guarantees a tight fit and long-term performance.
Select the Correct Replacement Gasket
Choose a gasket that matches your dishwasher model. Refer to the manufacturer’s specifications or consult a reliable parts provider like [parts-to-check-when-installing-a-dishwasher-for-long-term-performance](https://appliancedoctorz.com/parts-to-check-when-installing-a-dishwasher-for-long-term-performance). Avoid generic gaskets that might be cheaper but won’t fit securely, risking leaks and voiding warranty coverage. I’ve seen friends buy incompatible parts, which caused more damage and delayed repairs.
Install the New Gasket with Precision
Align the gasket’s lip with the door frame, starting at one corner. Press firmly to seat it into the groove, working around the perimeter gradually. Use your fingers or a flat tool to ensure it seats evenly without twists or gaps. In my experience, taking your time during this step prevents misalignment, which can cause leaks down the line. Confirm that the gasket is uniformly seated and secured at all points.
Test for Leaks and Proper Sealing
Close the door and run a short cycle with no dishes inside. Observe around the gasket for any water escaping. If leaks occur, double-check the gasket’s seating and re-tighten any screws or clips if applicable. When I first tested mine, I noticed a slight leak at one corner—re-seating the gasket solved the issue instantly. This step affirms that your repair was successful and that the door seal is airtight.
Secure the Gasket and Final Checks
Ensure all clips or screws holding the gasket in place are tight. Wipe away any excess water or debris. Keep an eye on the seal during future cycles to ensure it maintains its integrity. Remember, a well-seated gasket maintains warranty coverage by preventing leaks—warranty terms often exclude damage caused by improper DIY repairs, so following the correct procedure is crucial.
By following these concrete steps, you’ll extend your dishwasher’s lifespan, improve cleaning efficiency, and potentially save money on professional repairs. For related tips on maintaining your appliance, visit [maximizing-your-dishwashers-warranty-through-proper-parts-selection](https://appliancedoctorz.com/maximizing-your-dishwashers-warranty-through-proper-parts-selection) for expert advice on selecting the right parts. Also, consider inspecting other key components, such as the spray arms and filters, to ensure your dishwasher performs optimally.
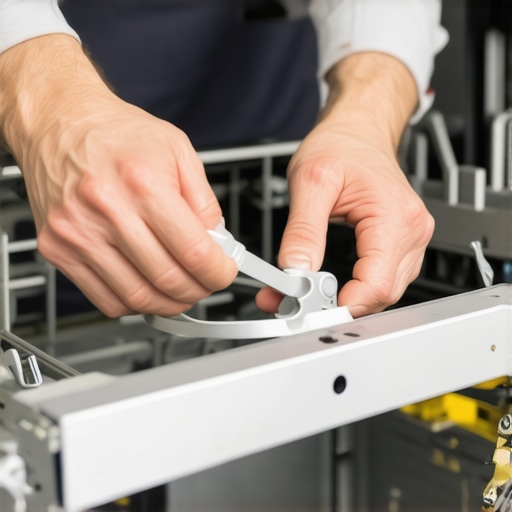 Many homeowners believe that tackling dishwasher repairs is as simple as swapping out a gasket or tightening a few screws, but in reality, there’s a lot more nuance that often gets overlooked. One widespread myth is that all replacement parts are created equal; however, using generic or incompatible components can void warranty coverage and even cause further damage. For example, more affordable aftermarket gaskets might seem appealing, but they often fail to meet the precise standards of OEM parts, leading to leaks or misalignments that compromise the seal and encourage mold growth. This misconception can turn a simple fix into a costly repair, so it’s crucial to select the correct parts, which you can verify through detailed guides like [maximizing-your-dishwashers-warranty-through-proper-parts-selection](https://appliancedoctorz.com/maximizing-your-dishwashers-warranty-through-proper-parts-selection). Another frequent error involves installation mistakes—say, not properly sealing the gasket or neglecting to clean the surface before fitting a new part—which can cause leaks and reduce appliance lifespan. Even experienced DIYers sometimes overlook the importance of a thorough cleaning of the gasket groove, a step that ensures a watertight seal and prevents future issues. My advice is to approach each repair as a system, understanding how every component interacts; for instance, improperly installed spray arms or damaged float switches can mimic more obvious problems like leaks or poor cleaning. Being aware of these intricacies can save time and money. Plus, many assume that warranty policies will cover any DIY repair mishaps, but as [how-to-diagnose-dishwasher-parts-during-warranty-periods](https://appliancedoctorz.com/how-to-diagnose-dishwasher-parts-during-warranty-periods) reveals, warranties often exclude damage caused by improper installation or injury due to incorrect part choice. A common trap is neglecting to test the repair—failing to run a cycle to check for leaks or performance issues can let small problems escalate. Always verify the repair by observing the dishwasher during the first few cycles; this is where many amateurs make the mistake of assuming the job is done once the parts are in place. Remember, dishwasher repairs require an understanding of your specific model’s configuration, and even minor mistakes can lead to substantial issues. So, before embarking on your next fix, do your research, double-check your parts, and follow the proper installation procedures. Want more insider knowledge on troubleshooting and warranty tips? Visit [the-complete-list-of-dishwasher-parts-covered-by-warranty](https://appliancedoctorz.com/the-complete-list-of-dishwasher-parts-covered-by-warranty) to stay ahead. Have you ever fallen into this trap? Let me know in the comments.
Invest in the Right Equipment for Reliable Repairs
Having specialized tools at your disposal makes all the difference when maintaining or repairing your dishwasher. I personally swear by a high-quality multi-bit screwdriver set, which allows me to quickly switch betweendriver bits for different screws, reducing damage and streamlining the process. A digital multimeter is indispensable for diagnosing electrical issues, like testing the heater element or float switch. For instance, testing the heating element with a multimeter helps predict failures early and prevents costly breakdowns. Additionally, a plastic pry tools set helps remove panels and seals without scratching or damaging components, which is crucial for preserving warranty integrity.
Implement Software Solutions to Manage Maintenance
I recommend using smart home management apps to keep track of cycle histories, error codes, and maintenance schedules. Some brands offer proprietary apps to run diagnostics remotely or to receive alerts on potential issues, including leaks or filter clogging. These tools are especially handy for long-term monitoring, enabling proactive care rather than reactive repairs. As this trend evolves, expect more integrations with AI-powered diagnostics that can suggest solutions or schedule service automatically, saving you time and money.
Long-Term Upkeep Focused on Parts and Warranty
Regularly inspecting key components like door seals, spray arms, and filters ensures optimal performance. I advise checking parts that might need replacement every six months, especially if you notice reduced cleaning efficiency or leaks. Using OEM parts when replacing components preserves the factory warranty and guarantees compatibility, which is critical given that many warranty policies explicitly exclude damage caused by aftermarket or incompatible parts. For comprehensive coverage details, visit this list of warranty-covered parts. Keep records of all replacements and maintenance activities to streamline future warranty claims or service visits.
Scaling Your Maintenance Routine as You Grow
As your household grows or your usage increases, your maintenance routine should adapt. Upgrading components like water supply hoses from standard plastics to braided stainless steel can prevent catastrophic failures caused by pressure or corrosion, which I detail in this article. Additionally, considering a dedicated circuit for your dishwasher helps avoid overloads and ensures consistent operation, especially for high-efficiency models. Anticipate future needs by investing in a quality leak detection system that can alert you early to slow leaks, protecting your flooring and cabinetry from water damage.
Future Trends in Dishwasher Maintenance
Expect to see an increase in IoT-enabled diagnostics that simplify routine checkups and enable remote troubleshooting. These innovations will make DIY maintenance more accessible and extend the lifespan of your appliances. For example, some upcoming models integrate sensors that self-report issues directly to your smartphone, enabling prompt action before significant damage occurs.
How do I maintain my dishwasher over time?
Regular inspections of seals, filters, and spray arms, combined with scheduling professional servicing if needed, will keep your dishwasher functioning efficiently for years. Maintaining proper water quality by installing a water softener or descaler can also reduce scale buildup, which I discuss in detail at this article. Remember, proactive maintenance not only preserves warranty coverage but also minimizes costly repairs down the line. Try implementing a quarterly cleaning routine using manufacturer-approved cleaning solutions, and keep an eye on error codes with your smart diagnostics tools—this combination ensures longevity and peak performance.
Lessons Learned From My Most Surprising Mistakes
- Overconfidence Can Lead to Oversights: I once assumed that matching a gasket by appearance was enough—turned out, model specifics matter. Confirming part compatibility with official resources is crucial to prevent leaks and warranty issues. I now double-check specifications before purchasing parts.
- Patience Outperforms Speed: Rushing through gasket installation caused misalignment, leading to early leaks. Taking my time, following each step carefully, has saved me from repeated repairs. Remember, precision is key for a lasting seal.
- Surface Cleanliness Is Often Overlooked: Skipping cleaning the door frame before installing a new gasket seemed minor, but it resulted in poor sealing. Cleaning thoroughly ensures the gasket seats correctly and prolongs its life. Cleanliness really is next to leak prevention.
- Proper Testing Prevents Future Hassles: Not running a test cycle after repair left me unaware of a slight leak until it caused water damage. Always testing immediately after installation can catch issues early—saving time and money in the long run.
- Collecting the Right Tools Empowers DIY Projects: Investing in a quality multimeter and plastic pry tools made repairs smoother and safer. Having the right equipment boosts confidence and fosters better results in DIY repairs.
Tools and Resources That Transformed My Repair Experience
- Recommended Parts Suppliers: Ensuring you get OEM parts tailored to your model guarantees longevity and warranty protection. I trust these sources for their quality and compatibility.
- Warranty Guides: Understanding warranty exclusions and coverage helps me make informed decisions about repairs and part replacements, avoiding pitfalls that could void coverage.
- Installation Checklist: Following detailed steps during installation prevents common mistakes and ensures optimal performance, which I now follow religiously.
- Diagnostic Tips: Learning to self-diagnose helps me address minor issues promptly and decide when professional help is truly necessary.
Stirring Inspiration for Your Next Fix
Embarking on your own dishwasher repairs might feel intimidating at first, but with patience, proper tools, and the right information, you become empowered to extend your appliance’s lifespan. Each successful repair not only saves money but also boosts your confidence in managing home maintenance. Remember, the journey from initial hesitation to confident DIYer is paved with small victories—don’t be discouraged by setbacks. Take the first step today, armed with knowledge and a willingness to learn. Your home and wallet will thank you for it.
Have you ever faced a tricky dishwasher repair and wondered if you could do it yourself? Share your experiences or questions below—let’s learn together!
Related Posts
How to Recover from a Failed Control Board Reset
It's Saturday morning, and I remember the sinking feeling all…
How to test your water inlet valve for failure
I remember the exact moment it hit me—my dishwasher suddenly…
How to Test a Heating Element Without Tearing the Machine Apart
I remember the moment clearly—my dishwasher suddenly stopped heating, and…