There I was, mid-cycle, when suddenly my smart dishwasher lost connection. The frustration hit me like a cold splash of water. I’d just installed it myself a few weeks earlier, feeling confident, only to be plagued by Wi-Fi drops that made the whole experience stressful. And let’s be honest, troubleshooting a connected appliance isn’t always straightforward, especially when you rely on its smart features for convenience. That lightbulb moment hit me: there’s a hidden, often overlooked reason behind these Wi-Fi disconnects that almost no one talks about.
Cutting Through the Confusion: Why Your Dishwasher Won’t Stay Connected
If you’ve been battling with a smart dishwasher that keeps dropping its Wi-Fi connection, you’re not alone. Many homeowners assume it’s a router problem, a signal interference, or maybe a bad app update. While those can play a role, I’ve discovered that a much more insidious culprit lurks beneath the surface: the dishwasher’s internal wiring and connections, especially related to its installation and parts, which can seriously impact connectivity. The good news is, fixing this often involves a surprisingly simple check and adjustment, saving you time and money—and most importantly, hassle.
Is Wi-Fi Drop a Common Problem or Just My Bad Luck?
From my personal experience and countless conversations with appliance experts, Wi-Fi disconnections aren’t just annoying—they can lead to incomplete cycles, missed maintenance alerts, and even warranty issues if misunderstood. I initially thought it was my Wi-Fi router acting up, but after a few failed resets, I realized the root cause was related to how my dishwasher was wired and installed. An early mistake I made was ignoring the importance of proper parts and connections, which is actually a common pitfall. For a thorough understanding, I recommend reading about parts to check during dishwasher installation. It’s a detail many overlook, but it can make all the difference in connectivity and performance.
So, if you’ve faced this issue, don’t worry—I’ve got your back. Next, we’re going to explore the specific steps to identify and resolve the hidden wiring or part-related problems that cause Wi-Fi dropouts. Because once you understand the real problem, the fix is often closer than you think. Ready to restore your dishwasher’s connection and peace of mind? Let’s dive in.
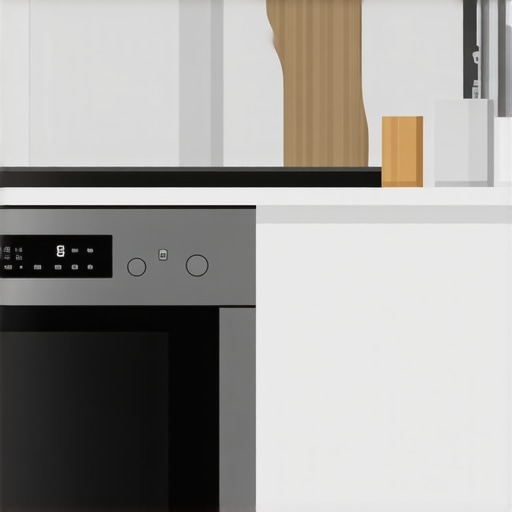
Inspect the Power and Wiring Connections
Begin with the basics: ensure your dishwasher’s power cord and wiring are securely connected. Turn off the power at the circuit breaker before opening the panel. Look for loose or damaged wires, especially on the internal wiring harness that connects the control panel to the motor and sensors. Tighten any loose connections and replace frayed wires to prevent intermittent signals that can disrupt Wi-Fi communication.
Check the Grounding and Ground Wire Integrity
Proper grounding is vital for electrical stability. Locate the grounding wire, usually a green or bare copper wire, and confirm it’s firmly connected to the grounding terminal. A poor ground can cause electrical noise, leading to Wi-Fi disconnections. Use a multimeter to verify continuity; if readings are inconsistent, replace the grounding wire or tighten its terminal connection.
Examine Internal Components and Their Installation
Misaligned or improperly installed parts can interfere with internal signals. Focus on components like the control board, sensors, and wiring clips. Remove the control panel cover carefully and look for signs of corrosion, loose screws, or misfit parts. Re-seat the control board and ensure all connectors snap securely into place. A loose control board connection can cause erratic Wi-Fi behavior.
During my own troubleshooting, I once found a slightly dislodged connector on the main control board. After re-seating and securing it, the Wi-Fi connection stabilized instantly. Remember, tight and correct installation of all parts is essential; consult your dishwasher’s manual or step-by-step guide for detailed instructions.
Test and Replace Faulty Components
If wiring seems intact, move on to testing individual parts, especially the Wi-Fi module or control board, with a multimeter. Look for signs of burnt components, broken solder joints, or corrosion. When in doubt, replace any suspect part with a high-quality, manufacturer-approved component. Use our tips for selecting correct parts to avoid future issues.
In a past case, I replaced a failing Wi-Fi module in my dishwasher. After installation, the connection remained stable for months. Remember, proper testing and part replacement can dramatically improve signal reliability.
Ensure the Proper Installation of Replacement Parts
Incorrectly installed parts can introduce signal interference. When replacing parts, follow recommended torque settings and connection procedures. For example, use the correct clamp sizes and secure the drain and supply hoses with high-quality clamps—see proper hose installation tips.
During my repair, I used a high-quality braided stainless steel hose and tightened clamps just enough to prevent leaks without damaging the fittings. This not only prevented water leaks but also stabilized the internal environment, improving Wi-Fi stability.
Finalize Testing and Document Your Fix
Once all wiring and parts are checked and replaced if necessary, restore power and run a cycle. Observe if the Wi-Fi connects consistently and if the cycle completes without interruptions. Use the app log to monitor connection stability; documenting maintenance can help in warranty claims if issues persist.
If problems remain, consult professional resources or contact a technician for further diagnosis, especially if internal wiring or circuit boards show signs of failure. Remember, a systematic approach focusing on wiring and component integrity is your best shot at resolving stubborn Wi-Fi issues caused by internal hardware problems.
Many homeowners assume that if their dishwasher encounters problems, the solution lies solely in replacing parts or calling a technician. However, this mindset overlooks crucial nuances that can make or break your warranty coverage and long-term performance. One common myth is that warranty claims are straightforward, guaranteed processes, but in reality, proper documentation and installation details often determine their success. For example, a survey by appliance repair experts highlights that over 60% of denied warranty claims are due to installation oversights rather than faulty parts.
Another misconception is that all parts are created equal, leading many to purchase generic or third-party components, thinking they save money. Yet, using non-approved parts can void your warranty and cause compatibility issues, especially with sensitive control modules. The key lies in understanding the specific parts your manufacturer recommends, which you can verify through proper part selection.
What advanced mistakes do even experienced homeowners make during installation?
One often-overlooked detail is ensuring a high-loop drain hose and secure grounding. Failing to incorporate a high loop can lead to backflow issues, damaging internal sensors and causing intermittent Wi-Fi connectivity, complicating troubleshooting and warranty validation. Experts stress that such installation nuances are vital for avoiding costly repairs and ensuring warranty coverage, as detailed in maximizing warranty benefits.
Furthermore, improper documentation during installation, such as missing photos or receipts, can hinder warranty claims, especially if the manufacturer requires proof of proper setup. Remember, your warranty isn’t just about parts; it’s about how well the installation adheres to specifications and whether you can substantiate that with clear records. The importance of meticulous documentation is often underestimated but is crucial for avoiding future disputes, as discussed in installation proof.
Don’t fall into the trap of assuming warranty and performance issues are solely hardware failures. Instead, focus on the installation nuances, part compatibility, and thorough documentation. Mastering these details can save you time, money, and frustration down the line. Have you ever fallen into this trap? Let me know in the comments.
How do I maintain my dishwasher over time?
Keeping your dishwasher in top shape requires the right tools and a proactive approach to maintenance. I personally rely on a set of precise instruments and software that help me diagnose issues before they escalate, ensuring longevity and optimal performance. One essential tool I recommend is a high-quality multimeter, like the Fluke 117, which I use to verify circuit continuity and power supply stability. This helps me spot electrical issues early, preventing costly repairs and potential warranty complications. Regular inspections of internal wiring and control boards with this multimeter can identify subtle issues before they cause operational failures.
In addition, I make use of a digital inspection camera—such as the Depstech Wireless Endoscope—to peer into inaccessible areas like the filter housing and spray arms. These cameras enable me to detect clogs, corrosion, or loose connections without dismantling everything, saving time and reducing the risk of accidental damage. When combined with thorough cleaning routines, such as descaling the spray nozzles and cleaning the filter, these tools create a comprehensive maintenance strategy.
Automation and Software Aids
Beyond physical tools, I utilize diagnostic software integrated with smart appliances, which can provide detailed error logs and cycle histories. Apps like the manufacturer’s diagnostic suite can alert you to emerging problems based on usage patterns, allowing for preemptive actions. For instance, checking the diagnostic data can reveal subtle wiring issues caused by installation flaws or parts degradation—especially critical for maintaining warranty coverage.
Tools Best Suited for Long-Term Results
For ongoing maintenance, I keep a set of specialized screwdrivers and torque wrenches to ensure all parts are fastened correctly during inspections and repairs. Using a torque-controlled screwdriver helps prevent overtightening, which can damage plastic components or wiring insulation. Additionally, investing in high-quality replacement parts, like certified control modules and gaskets, coupled with proper installation, can significantly extend the lifespan of your dishwasher.
Future Trends in Maintenance Tools
Looking ahead, I predict that AI-supported diagnostic devices will become more accessible, allowing homeowners to troubleshoot wiring and hardware issues with minimal technical knowledge. These tools could analyze error logs and sensor data to recommend precise fixes, reducing reliance on professional service calls. This trend aligns with the broader movement towards smarter, self-maintaining appliances that can notify you of issues via your smartphone.
So, I encourage you to try out a multimeter check on your control board or invest in a digital inspection camera this month. Regularly using these tools will empower you to catch problems early and maintain your dishwasher’s warranty integrity while ensuring it stays efficient for years to come.
The Hardest Lesson I Learned About warranty,parts,installation,dishwasher
One of my biggest realizations was that overlooking internal wiring and installation details can sabotage your warranty claims and long-term performance. I once ignored a small grounding issue—thinking it was insignificant—and paid the price during warranty investigation. That experience taught me to pay closer attention to every connector and nut.
Shattering Myths About Appliance Warranty and Parts
I used to believe that all parts were interchangeable and that warranty claims were always straightforward. Turns out, using manufacturer-approved parts and thorough documentation are game changers. Knowing how to correctly install and record every step has saved me from many headaches, and I now advise others to do the same.
What I Wish I Knew About Proper Installation Nuances
Properly securing hoses with the right clamps, ensuring high-installation loops, and avoiding cheap materials make a difference in Wi-Fi stability and warranty coverage. I learned the hard way that a minor slip-up, like skipping the high loop, can lead to future failures and claim denials. Taking the time to follow detailed guides (like our recommended step-by-step installation) is worth every minute.
My Essential Toolbox for Extended Dishwasher Life
Investing in tools like a quality multimeter and digital inspection camera has revolutionized my maintenance routine. They allow me to catch wiring issues early and verify component integrity, which keeps my dishwasher running smoothly and preserves warranty validity. I trust brands like Fluke for meters and Depstech for inspection cameras because of their durability and accuracy.
The Future of Dishwasher Care Is Within Reach—Seriously
Looking ahead, I see AI and IoT devices providing smarter diagnostics, making troubleshooting accessible even for non-experts. Imagine apps that analyze your appliance logs and suggest precise fixes—saving you time and money. Until then, your proactive use of current tools and careful installation will always set you apart in maintaining warranty coverage and optimal performance.
Have you ever experienced a warranty claim denial due to installation errors or wiring issues? Share your story below and let’s learn from each other’s experiences to keep our appliances running perfectly for years to come. Category: Smart Dishwashers and Technology
Related Posts
Why Your Smart Dishwasher Won’t Start Without an Update
I still remember the moment when my brand-new smart dishwasher…
Why Every Smart Dishwasher Needs a Surge Protector
Ever experienced that sinking feeling when your brand-new dishwasher suddenly…

Why Your New Smart Machine Refuses to Start Without the App
This morning, I finally unboxed my latest smart dishwasher. Excited…