I remember the first time I attempted to install a new cabinet side-mount myself. I was eager but completely unprepared, fumbling with the drill for what felt like forever. That moment of frustration was a real lightbulb—I’d overlooked an essential detail: the right drill bit. It wasn’t just about getting the job done; it was about doing it **correctly and safely**. Has that ever happened to you? You’re halfway through a project, and suddenly, a small but crucial tool slips your mind, turning a smooth install into a tangled mess.
Why Picking the Perfect Drill Bit Is More Than Just a Technicality
Choosing the appropriate drill bit for cabinet side-mounting isn’t merely about convenience—it’s about **long-term durability, safety, and maintaining your warranty**. Using the wrong drill bit can damage your cabinets, lead to misaligned holes, or even compromise the structural integrity of your installation. Trust me, I’ve made those mistakes early on, drilling with generic bits only to find my cabinets loose or damaged after a few months. The key is to understand what makes a drill bit suitable for this specific task.
Is All Drill Bit Size Created Equal? Think Again.
One of my early blunders was assuming that any drill bit of the correct diameter would work. Big mistake. Each cabinet type and mounting hardware requires precise dimensions. For side-mounting cabinets, a #6 or #8 wood drill bit is often recommended, but it depends on your hardware specifications. The wrong size can cause screws to strip or fittings to fail prematurely. If you’re unsure, check out this guide on essential parts which emphasizes the importance of matching parts correctly for long-term performance.
Another common mistake is not considering material compatibility. Using a metal bit on wood, or vice versa, can result in splintered surfaces or shortened bit life. I’ve learned to keep a set of sharp, high-quality bits specifically for wood, like cobalt or titanium-coated ones, which cut more efficiently and last longer. This small investment saves you money and frustration in the end.
So, if you’re gearing up for an upgrade or a new installation, understanding the details of drill bit selection can make all the difference. Next, I’ll walk you through the process of choosing the right bit tailored for your project—no more guesswork, just reliable results. Before diving in, consider your hardware specifications and material needs carefully. Trust me; doing it right the first time saves tons of hassle later.
Sourcing the Right Drill Bit
Start by choosing high-quality, sharp bits specifically designed for wood or metal, depending on your hardware. I once tried to save a few bucks with a generic bit, only to strip the screw heads and cause delays. Invest in cobalt or titanium-coated bits—they’re more durable and cut cleaner, reducing the risk of splintered surfaces. Remember, a well-chosen bit is like a trusted companion during installation—reliable and efficient.
Matching the Hardware Specifications
Determine the Correct Size
Check your cabinet manufacturer’s hardware guidelines or the installation manual to identify the optimal drill bit size—commonly #6 or #8 for side-mounts. I recall fumbling through the first few holes, using a size too small, which made the fittings loose. Carefully measure or consult your hardware documentation to avoid this mistake. To make this easier, keep a size chart handy or use a digital caliper for precise measurement.
Confirm Material Compatibility
Use a wood bit for wooden cabinets or a metal bit if you’re drilling into steel components. I once used a metal bit on plywood, only to see splintering and inconsistent holes. Matching the bit material to the substrate ensures clean, accurate holes and prolongs the life of your bits. For tricky materials, consider specialized bits designed for composite or laminate surfaces.
Preparing for the Drill
Secure the cabinet firmly in place and mark your drilling points with a pencil or masking tape. This prevents slipping and provides a clean guide for your bit. Once, I neglected to tape my markings, and the drill wandered off, creating crooked holes—an avoidable headache that delayed my project and compromised the fit. Taping also helps protect the surface from scratches or splinters during drilling.
Executing the Perfect Drill
Set the drill to a steady speed—started slowly to establish the hole, then sped up for efficiency. Apply firm, even pressure without forcing the drill, which can overheat or break the bit. During one installation, I pressed too hard, causing the bit to snap mid-drilling. Maintaining a consistent pressure and speed results in clean, precise holes while extending your bit’s lifespan.
Post-Drilling Care and Maintenance
Remove the bit carefully and clear debris from the holes. Clean your bits with a brush or cloth and store them in a dry, organized box. I learned this the hard way, leaving bits exposed to moisture, which caused rust and shortened their life. Proper storage and cleaning keep your tools ready for the next project, ensuring consistent performance and safety.
Applying these focused steps can dramatically improve the durability and quality of your dishwasher installation. Proper drill bit selection isn’t just a technical detail; it’s the foundation of a professional, lasting setup. For a comprehensive understanding of how these choices impact your warranty and long-term performance, check out maximizing your dishwasher’s warranty.
Many homeowners assume that following standard instructions and selecting generic parts will ensure their dishwasher functions perfectly and remains protected under warranty. However, seasoned technicians know that the devil is in the details. One common misconception is that all replacement parts are universally interchangeable. In reality, using third-party or incompatible components can void your warranty and lead to costly repairs down the line. Experts emphasize the importance of choosing OEM parts, as outlined in maximizing your dishwasher’s warranty, to maintain long-term reliability.
Another trap homeowners often fall into involves installation practices. Many believe that a DIY install just requires basic tools, but overlooking precise leveling, proper connections, or secure mounting can cause vibration issues, water leaks, or even voided warranties. A critical but overlooked nuance is the correct application of sealing compounds—using the wrong type or overapplying can lead to mold or water damage. For detailed guidance on avoiding these pitfalls, refer to expert advice on dishwasher installation troubleshooting.
Why Are Many Warranty Claims Denied, Even When the Component Fails?
Let’s dig deeper. It’s a common belief that warranty covers everything, but many claims are denied due to improper installation or use of non-approved parts. Manufacturers often require proof of professional installation or the use of certified components to honor warranty claims. For example, using third-party hoses that don’t meet safety standards is a frequent cause of denied claims, as discussed here. Avoid this by verifying parts against manufacturer specifications and documenting your installation process.
An advanced mistake many overlook involves the subtle impact of water quality on parts longevity. Hard water deposits can cause premature failure of the inlet valve or spray arms, and neglecting water softening strategies may void warranty coverage. Studies confirm that mineral buildup shortens component lifespan, emphasizing the importance of water testing and appropriate filtration.
Have you ever fallen into this trap? Let me know in the comments. Remember, understanding these nuanced details empowers you to make smarter decisions, saving time and money in the long run.
Tools That Make Maintenance Easier
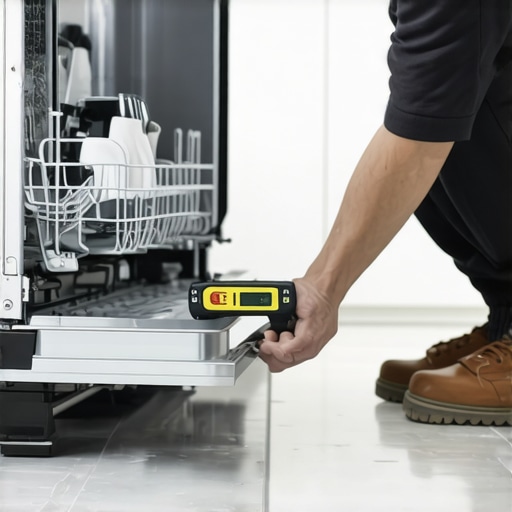
Investing in quality tools is essential for effective dishwasher upkeep. I rely heavily on a digital multimeter to promptly diagnose electrical issues like faulty control boards or sensors, saving me time and preventing unnecessary part replacements. A high-quality long-format screwdriver set ensures I can access and tighten clamps or secure connections deep within the unit—a task that often trips up DIY enthusiasts relying on flimsy tools. Precise calibration and adjustment of leveling feet with a digital spirit level guarantees the machine operates quietly and prevents uneven wear.
Why Regular Inspection Matters
Setting a routine to inspect hoses, filters, and seals every few months extends your appliance’s lifespan. I always check for mineral buildup on inlet valves using a simple flashlight and magnifying glass—neglecting this can lead to water leaks that damage cabinetry and void warranties. Clean filters and spray arms with a soft brush prevent clogging and ensure optimal water flow. Remember, warranty coverage can be voided by neglecting basic maintenance.
Long-Term Results: Staying Ahead
Replacing worn components proactively—like spray arms, door seals, or inlet valves—keeps your dishwasher performing efficiently. I schedule these checks every 12 to 18 months based on usage intensity, especially in areas with hard water that accelerates mineral buildup. Using high-quality OEM parts ensures compatibility and maintains warranty integrity; proper parts selection plays a crucial role in long-term performance. A good rule of thumb is to replace any component showing signs of wear before it causes further damage.
How do I maintain optimal performance over time?
Consistently follow manufacturer-recommended maintenance routines, such as running a cleaning cycle with descaling agents every few months. Additionally, inspect and replace door gaskets and filters regularly to prevent leaks and ensure thorough cleaning. Keep an eye on error codes and address issues immediately, referencing guides like expert troubleshooting advice. Implementing these habits not only prolongs service life but also minimizes unexpected breakdowns—saving you money and stress in the long run.
Scaling Up: Maintenance for Larger Systems or Multiple Units
If managing multiple dishwashers in a commercial setting or a large household, consider investing in a central water softening system. It drastically reduces mineral deposits, thereby decreasing maintenance frequency and GIGO laundry and dish loads. Automating routine checks with a maintenance log or digital app can streamline inspections, ensuring no facet of upkeep is overlooked. Modern tools like Wi-Fi-enabled diagnostic systems provide remote health reports, helping prevent costly failures before they happen. As technology evolves, I foresee more smart maintenance solutions integrating AI analytics to predict component failures, making proactive care more accessible and effective.
Remember, regular upkeep is key to preserving your warranty and achieving long-term savings. Don’t wait for signs of trouble—try implementing a preventive maintenance checklist today. For expert guidance, always consult trusted resources like this and ensure your tools are top-notch. Small, consistent efforts now can save you significant costs and headaches later.
The Hardest Lesson I Learned About dishwasher,parts,installation,warranty
One eye-opening realization was how a small oversight with the drain hose can void your warranty unexpectedly. I once thought that tightening every clamp was enough, but a tiny kink in the hose caused leaks that led to a denied claim. That taught me to double-check the entire drainage system after installation.
The Clues That Could Save Your Warranty and Wallet
Pay attention to subtle signs like unusual noises or inconsistent cycles. These hints often point to installation issues or faulty parts that, if caught early, can be fixed before warranty issues arise. Regular inspections of seals, filters, and spray arms reveal problems that might otherwise go unnoticed until costly repairs are needed.
My Essential Toolkit for Dishwasher Care and Precise Installation
- High-quality multimeter: Ensures electrical connections are sound, preventing control board failures.
- Digital caliper: For measuring hardware and ensuring correct fit, avoiding misaligned or loose components.
- Level and tape measure: Precision leveling prevents vibrations and leaks.
- Organized parts storage: Keeping OEM parts handy guarantees compatibility and maintains warranty coverage.
Seize the Moment and Keep Your Dishwasher Running Smoothly
Every maintenance step, from choosing the right drill bits during installation to regular inspections, contributes to a long-lasting, warranty-maintained dishwasher. Remember, the effort you invest now pays off later. Empower yourself with knowledge and proactive habits—your appliances and wallet will thank you. Want to stay ahead of costly repairs? Share your biggest dishwasher installation or maintenance challenge below, and let’s discuss solutions together.
Related Posts
The Correct Height for Your Dishwasher Air Gap
One day, during a kitchen remodel, I set out to…
How to Level a Dishwasher on an Uneven Tile Floor
Ever had that sinking feeling when you open your dishwasher…
The Proper Way to Secure Your Machine to a Quartz Countertop
I remember the moment vividly—my brand-new dishwasher wobbling ominously, leaning…