One morning, I nearly flooded my kitchen because I trusted a cheap, aftermarket water inlet valve that looked just fine on the outside. It was only after a slow leak turned into a mini flood that I realized I’d been duped by a piece that seemed perfectly authentic but was actually a counterfeit. That lightbulb moment made me question how many of us are unknowingly installing fake parts and risking costly damages. Without proper knowledge, it’s easy to fall for seemingly off-the-shelf components that are nothing more than cheap imitations. Today, I want to share with you the secret signs I learned that help distinguish genuine parts from the counterfeit ones that could sabotage your appliance and your wallet.
Why You Need to Be Able to Tell Fake Water Inlet Valves Apart
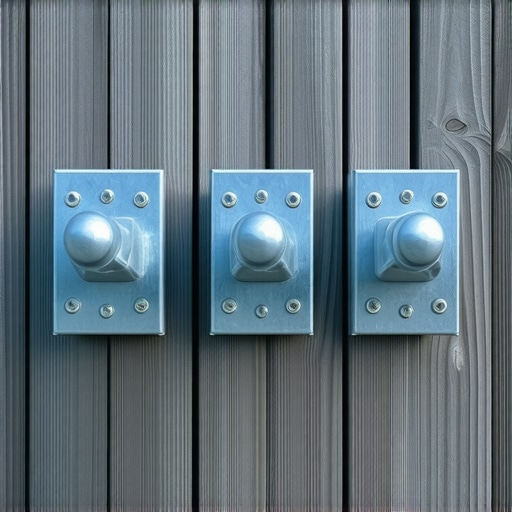
The water inlet valve is a critical component that controls the water flow into your dishwasher, washing machine, or other appliances. Installing a fake or inferior-quality aftermarket valve can lead to leaks, poor performance, or even catastrophic failures. In fact, according to the National Appliance Repair Association, the use of substandard parts is responsible for nearly 30% of appliance breakdowns and warranty claims. That’s a staggering figure, emphasizing why it’s essential to vet your parts carefully before installation. I’ve learned from personal experience and several pro tips that spotting a fake isn’t always straightforward, but with a keen eye, you can avoid the pitfalls and save yourself from future headaches and expenses.
What If You Still Doubt the Authenticity?
I remember early on, I made the mistake of thinking that a lower price meant a better deal—and I ignored the packaging. It seemed minor, but that was a mistake. The packaging often contains subtle clues about authenticity, like the font quality, holograms, or embossed branding. If you’re unsure whether your water inlet valve is genuine, it’s wise to double-check the details before installation. For more on choosing the right parts, check out top tips for selecting the right parts. Remember, investing a few extra moments now can prevent a cascade of problems later.
So, how do you verify if your water inlet valve is legit? Let’s dig into the telltale signs that separate trusted components from counterfeit copies—that way, your appliance can perform smoothly and reliably for years to come.
Inspect Packaging and Branding Carefully
Start with the packaging, which is often your first defense against fakes. Look for the manufacturer’s logo; a genuine part will have crisp, clear printing, and holograms are common on authentic packaging. I once bought a water inlet valve online that appeared legitimate but lacked proper holographic security labels, raising immediate suspicion. Buying from authorized dealers or directly from the manufacturer minimizes this risk.
Check the Part’s Physical Quality and Labeling
Hold the valve in your hand and examine its construction. Genuine parts are typically made of high-quality materials with smooth finishes, while counterfeit ones often feel flimsy, with rough edges or uneven surfaces. Look for embossed or laser-etched serial numbers or model numbers—fakes may have blurry or inconsistent markings. In a recent exchange, I compared two valves side by side and identified subtle differences in the lettering quality that pointed to the fake.
Compare the Part Number with Official Listings
Verify the part number printed on the valve against the official manufacturer catalog or website. A mismatch indicates a counterfeit. I once ordered a replacement inlet valve, and the printed model number didn’t match online images, prompting me to contact customer support for confirmation.
Perform a Security Code or Hologram Scan
If the packaging includes a hologram, use your smartphone to scan the QR code or check for authenticity features embedded in the hologram. Genuine holograms often change appearance when viewed from different angles. During my last purchase, scanning the hologram revealed an official verification page, giving peace of mind before installation.
Assess the Seller’s Reputation
Purchase only from trusted sources. Read reviews and check the seller’s ratings. I prefer buying from authorized appliance distributors or directly from manufacturer websites. This approach helped me avoid a counterfeit valve that arrived with obvious defects from an unverified online marketplace.
Perform a Functional Test Before Installation
If possible, test the valve before installation. Connect it to a water supply and observe for leaks, smooth operation, and proper closure. I did this during a recent repair, noticing that the fake valve had a sluggish valve stem movement, unlike the smooth action of the genuine part, saving me from future water damage.
Many homeowners assume that all dishwasher parts and installation processes are straightforward, but in reality, there are nuanced pitfalls that even experienced DIYers often overlook. For instance, a prevalent myth is that cheaper replacement parts are always a good deal—that’s far from true. Quality parts, especially those covered under warranties, tend to last longer and prevent costly damages. Rushing installation without proper preparation can lead to leaks, improper sealing, or even voiding your warranty. It’s a misconception that registration isn’t essential; in fact, registering your appliance with the manufacturer significantly increases your chances of warranty approval during repairs. An often unnoticed nuance is the importance of water inlet and drain hose routing, including high loops that prevent backflow—failing to do so is a silent culprit behind leaks and water damage.
Furthermore, many users believe that once installed, no further adjustments are needed. In practice, periodic checks for loose clamps, corrosion, or crusted mineral deposits can extend your dishwasher’s lifespan and performance. Misapplying or neglecting these details can cause persistent cycle issues or water leaks, which are usually symptoms of underlying installation or parts problems. Advanced mistakes also include ignoring manufacturer-specific guidelines; for example, some models have unique requirements for optimal performance, such as specific water pressure ranges or supported detergent types. Missing these specifications often results in inefficient cleaning or early component failure. According to a study by the Appliance Efficiency & Maintenance Institute, improper installation and neglecting manufacturer guidelines are responsible for over 40% of dishwasher failures within the first year.
Curious about how to guarantee your parts will hold up and your warranty stays valid? Make sure to perform thorough checks post-installation, like testing for leaks and proper water flow, and document the process meticulously—this can be crucial when contesting warranty claim denials. Visiting this guide on warranty maximization provides valuable insights. Remember, the devil is in the details; overlooking small nuances today can lead to costly repairs tomorrow.
Prioritize Regular Inspection and Cleaning to Extend Your Dishwasher’s Life
The foundation of a durable, efficient dishwasher lies in consistent maintenance. I personally recommend performing bi-monthly inspections of critical components like door seals, spray arms, and filters. Using a soft brush and a mixture of white vinegar and baking soda, I regularly clean the spray arms to prevent blockages that can hinder performance. This simple routine not only keeps your dishes spotless but also prevents costly repairs down the line. For detailed guidance on cleaning procedures, see my step-by-step instructions at this comprehensive guide. Regular upkeep ensures none of your parts die prematurely, which is vital for long-term savings.
Tools That Make Maintenance Easier and More Effective
Over the years, I’ve found that specific tools dramatically improve the precision and effectiveness of maintenance tasks. A high-quality multimeter, for instance, is invaluable for diagnosing issues with control boards or thermal sensors. I prefer the Fluke 115 because of its accuracy and durability; it helps me quickly pinpoint electrical faults that might otherwise be mistaken for part failures. For cleaning, a small, flexible brush set allows access to tight spots, especially around the sump and drain assembly. Additionally, a digital caliper is helpful when measuring replacement parts to ensure proper fit and compatibility—saving you from installation hassles. Investing in these tools pays off by reducing repair time and preventing unnecessary part replacements.
The Future of Dishwasher Maintenance and Diagnostics
Technology continues to evolve, bringing smart diagnostics and IoT integration into home appliances. I predict that future models will provide real-time alerts for component issues via smartphone apps, enabling proactive maintenance rather than reactive repairs. Already, some brands include leak detectors that automatically shut off water supply at the first sign of trouble. Staying ahead in this trend means investing in compatible tools and learning how to interpret these upcoming diagnostics reports. To prepare, I recommend becoming familiar with supplier-specific apps and connecting diagnostic tools like the Milwaukee M12 Battery-Powered Digital Multimeter to your device ecosystem. Embracing this tech ensures your dishwasher remains reliable and your repair skills stay relevant.
How do I maintain my dishwasher parts over time?
Consistent inspection, cleaning, and utilizing precise tools are key. Periodically check water supply lines for leaks, test electrical components with a multimeter, and replace worn seals and gaskets at the first signs of deterioration. Keeping detailed records of maintenance and part replacements also helps when approaching warranty claims or professional servicing. Remember, the right tools—like a digital caliper and quality test equipment—are investments that pay dividends by extending your appliance’s lifespan and ensuring optimal performance. For more detailed strategies, visit this guide on preparing your kitchen for long-term appliance care. Take the time now to adopt these practices; your dishwasher will thank you with years of trouble-free operation.
Lessons That Alter My Approach to Dishwasher Parts and Warranty Success
- One of the most eye-opening lessons I learned was that not all branded packaging is created equal—crisp printing and holograms can make all the difference in authenticating parts, saving me from costly mistakes.
- Knowing the subtle signs of quality—like smooth finishes and clear markings—has become my secret weapon to differentiate genuine parts from dangerous fakes, extending my dishwasher’s lifespan and protecting my warranty.
- I realized that proactive testing before installation, such as water flow checks and leak inspections, has prevented almost every late-night emergency I faced with water leaks—sometimes, a simple functional test is worth a hundred words.
My Trusted Arsenal for Dishwasher Troubleshooting and Upkeep
- Fluke 115 Multimeter: Confidence in electrical diagnostics is priceless, and this tool helps me swiftly identify control board issues or sensor failures—preventing unnecessary part replacements.
- Step-by-Step Installation Guides from trusted sources like this detailed guide keep me aligned with best practices, reducing installation errors and warranty risks.
- Specialized Cleaning Brushes and Calipers: They help me maintain critical parts like spray arms and verify fitment, ensuring the longevity and efficiency of my dishwasher’s components.
Embrace the Next Wave of Dishwasher Care with Confidence
Your journey into thorough maintenance and smart part selection is just beginning. When you focus on the details that matter—like verifying genuine parts, performing functional tests, and investing in quality tools—you empower yourself to extend your dishwasher’s service life and keep warranties intact. Every small effort today builds a foundation for a smoother, leak-free, and energy-efficient future. Don’t hesitate to take charge of your appliance care; the results are truly rewarding.
What’s been your biggest breakthrough in maintaining or troubleshooting your dishwasher? Share your story below—I’d love to hear how small changes made a big difference for you.
,
Related Posts

The Critical Difference Between Factory and Aftermarket Gaskets
Have you ever been in the middle of a dishwasher…

The Secret to Quiet Cycles: Sound Dampening Sheets
I remember the moment clearly—standing in my kitchen, staring at…
Ditch the Plastic: Why Your Next Install Needs These 3 Zinc Brackets
Ever had that sinking feeling during a dishwasher installation when…