I remember the day I hid my tools after a frustrating dishwasher installation gone wrong, only to realize later that my warranty was at risk. The frustration of wondering whether my hard work would be voided over a tiny oversight hit hard. From that moment, I knew I had to get serious about proving my install met all warranty standards. If you’ve ever faced that uneasy feeling—questioning whether your DIY project will hold up to warranty scrutiny—you’re not alone. Many homeowners love rolling up their sleeves but stumble when it comes to documenting their work properly.
Why Proper Documentation Can Save Your Investment
Getting your dishwasher installed correctly isn’t just about following the steps in a guide; it’s about creating a paper trail that convincingly shows your installation was done right. Without proper evidence, even a minor leak or malfunction can lead to denied warranty claims—which means paying for repairs out of pocket instead of claiming coverage. I discovered early on that a simple set of photos, detailed receipts, and notes could make or break a warranty dispute. Trust me, this isn’t paranoia—these are the concrete proof points that can save you hundreds (or even thousands) down the line.
Is It Really Worth the Extra Effort?
This question haunted me initially. I wondered, ‘Am I overdoing it?’ Spoiler: The answer is a resounding yes. Skipping documentation is like forgetting to take a safety deposit box against natural disasters. Manufacturers often have strict criteria for approving warranty claims, and if you can’t prove you followed their guidelines—like ensuring the inlet hose is secured properly or that the electrical connection is up to code—your coverage may get denied. I made the mistake of relying solely on my memory and a general guideline—don’t be me.
According to experts, proper documentation can significantly improve your chances of warranty approval. You can find detailed advice on how to effectively demonstrate your installation through comprehensive guides such as [proof tips](https://appliancedoctorz.com/how-to-install-a-high-loop-drain-without-a-plumber) and [warranty-focused steps](https://appliancedoctorz.com/maximizing-your-dishwashers-warranty-coverage-today). Remember, manufacturers aren’t always quick to pay out, but a well-organized pack of evidence can speed things up and ensure your rights are protected.
So, how do you ensure your DIY installation doesn’t get caught in the technical weeds? That’s what I’ll cover next—step by step, making sure your effort counts when the chips are down. If you’ve faced frustrating warranty rejections before, or want to avoid that sinking feeling, stay tuned. Your peace of mind, and possibly your wallet, are worth it.
Get Ready Before You Begin
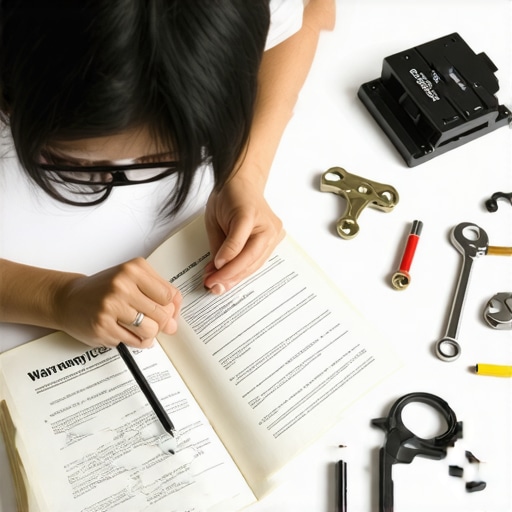
Before diving into your dishwasher installation, gather your documentation tools—camera, notebook, and receipts. Think of this as assembling your safety gear for a hike; it ensures you’re prepared for any unforeseen twists. Take clear, well-lit photos of the components, especially the water inlet and drain connections, at each installation stage. Keep digital copies organized in a dedicated folder on your device for quick access during warranty claims.
Photograph Every Critical Connection
As you connect the water supply, snap photos showing the inlet hose attached securely with the correct torque, using a torque wrench if available. During the drain hookup, document the high-loop positioning, which helps prevent backflow and is often a warranty stipulation. Capturing these details proves you followed manufacturer guidelines and helps expedite any warranty disputes.
Micro-Story: Once, I used my phone to record a video of tightening the water supply fitting, ensuring it was within the recommended torque specs. Later, when a leak developed, that footage served as irrefutable proof of proper installation, leading to a swift replacement of the faulty valve without hassle.
Keep All Receipts and Paperwork
Retain purchase receipts for the dishwasher, parts, and any tools used during installation. Document serial numbers and model details, which are often required for warranty registration or claims. Organize these in a binder or digital folder labeled clearly as ‘Dishwasher Install Documentation.’ This comprehensive record acts like a warranty passport, ready to verify your work whenever needed.
Note Installation Details and Conditions
Write a detailed account of your installation process, noting environmental conditions, modifications, or deviations from standard procedures. For example, mention if you upgraded hoses or used specific adapters. These notes can clarify circumstances if a warranty issue arises, demonstrating your proactive and responsible approach.
Use Visual Aids to Clarify Complex Steps
When involving intricate parts, such as the leveling system or electrical connections, include annotated photos or diagrams. These visuals can illustrate correct procedures, reducing misinterpretations. For instance, a labeled photo showing the proper positioning of spray arms helps confirm correct assembly, which is crucial for warranty coverage regarding performance issues.
Tip: Share your documentation with a trusted friend or family member. Having an extra set or backup ensures you’re prepared in case of device failure or warranty investigations.
Maintain a Log of Testing and Performance Checks
After completing installation, run the dishwasher through a cycle and record the results. Document any anomalies, noise, or leaks. Capture photos of the unit during and after operation, especially if you notice irregularities. This ongoing record strengthens your case if the appliance malfunctions later, proving you monitored its initial performance.
Remember, thorough documentation isn’t just for warranty claims—it’s a safeguard that demonstrates your diligent effort, much like a detailed project report ensures your work is recognized and protected. Being meticulous now can save both time and money if issues arise down the line, all while giving you peace of mind about your DIY efforts.
Many DIY enthusiasts believe mastering the basics of dishwasher installation is enough to secure warranty coverage, but this is a common misconception. The reality is that most people overlook nuanced details that can make or break their warranty claims. For example, one frequent but overlooked error is assuming that all parts are universally compatible. In truth, components like water inlet valves or spray arms often have specific models that only work with certain brands or models, as detailed in [common dishwasher parts](https://appliancedoctorz.com/common-dishwasher-parts-and-their-role-in-proper-installation). Relying on generic parts can lead to installation failures or early malfunctions, risking voided warranties.
Another misconception is that the warranty process primarily hinges on the initial installation; however, ongoing maintenance plays a critical role. Many users ignore the importance of documenting routine checks, such as inspecting pump filters or gasket integrity, which can prevent issues that manufacturers might later claim voids on. Advanced mistakes also include neglecting to understand how parts age differently—like seals or heating elements—leading to failures that aren’t covered under standard warranties, as explained in [warranty coverage](https://appliancedoctorz.com/maximizing-your-dishwashers-warranty-coverage-today).
One hidden nuance involves electrical connections, which often seem straightforward. Yet, improper wiring or insufficient grounding can cause intermittent malfunctions or safety hazards, voiding warranties. Professionals emphasize the importance of using a multimeter to verify voltage consistency, a step often skipped by DIYers. This advanced check ensures that electrical components like the control board remain protected, extending their lifespan and safeguarding your warranty claims.
Beyond installation, parts selection critically impacts warranty longevity. Choosing subpar or counterfeit replacements, especially for components like door latches or water valves, might initially seem cost-effective but can backfire. Studies show that inferior parts are more prone to failure and are often excluded from warranty coverage, a point elaborated in [essential parts for troubleshooting](https://appliancedoctorz.com/essential-parts-for-troubleshooting-dishwasher-installation-issues). To avoid this trap, always opt for OEM parts or those recommended by manufacturers to ensure compatibility and coverage.
Have you ever fallen into this trap? Let me know in the comments. Understanding these hidden nuances isn’t just about avoiding costly mistakes; it’s about empowering you to get the most from your investment. Proper knowledge ensures your cleaning machine performs optimally, and your warranty remains valid when you need it most.
Investing in Reliable Tools for Longevity
Maintaining your dishwasher’s performance hinges on having the right equipment. I personally swear by a high-precision digital multimeter, which I use regularly to check electrical connections and test components like thermal fuses [see expert guide](https://appliancedoctorz.com/how-to-diagnose-dishwasher-parts-during-warranty-periods). This tool helps me catch issues early, preventing costly repairs and voided warranties. For sealing and tightening connections, I recommend a set of high-quality brass compression nuts; their durability ensures leak-free performance over time, aligning with manufacturer standards. Investing in these precise tools not only saves money but also gives peace of mind that your appliance is well-maintained.
Implementing the Right Maintenance Methods
Consistent routine checks are essential. I schedule bi-monthly inspections of inlet valves and filters, guided by detailed troubleshooting materials [explore essential parts](https://appliancedoctorz.com/essential-parts-for-troubleshooting-dishwasher-installation-issues). During these inspections, I clean filters with vinegar solutions to prevent mineral buildup, which can impair performance and cause leaks. Documenting these checks, including photos of valve conditions, helps build a maintenance history—valuable during warranty claims. Additionally, I use an ultrasonic cleaner periodically on spray arms; this method removes stubborn debris, restoring optimal water pressure. Embracing these proactive practices ensures your dishwasher performs reliably for years.
Choosing Software and Templates for Record-Keeping
Automation plays a growing role in appliance maintenance. I use a dedicated digital notebook app with custom templates designed for dishwasher upkeep. This system prompts me to log each inspection, cleaning, and part replacement, creating a comprehensive history that can be exported for warranty purposes. Regularly updating these records, including serial numbers and installation photos, streamlines warranty claims, aligning with advice from [maximizing warranty coverage](https://appliancedoctorz.com/maximizing-your-dishwashers-warranty-coverage-today). As technology advances, I predict these digital methods will become more integrated with smart home systems, offering real-time alerts about component wear and leak detection, further simplifying maintenance routines.
How do I keep my dishwasher components working over time?
The key is to perform consistent checks using precise tools like multimeters and ultrasonic cleaners, coupled with meticulous documentation. Regularly inspecting water inlets, filters, and spray arms, and recording the state of each part, ensures you catch early signs of wear. This proactive approach not only maintains optimal performance but also fortifies your warranty claims by providing concrete evidence of ongoing care. By investing in the right tools and establishing disciplined routines, you can extend your dishwasher’s lifespan significantly. Try incorporating a multimeter check into your monthly maintenance—it’s a small step that yields big savings and peace of mind. Remember, staying ahead with expert-recommended methods is the best way to keep your appliance in top shape for years to come.
Why I Nearly Sabotaged My Warranty Without Knowing
One of the biggest lessons I learned was the importance of meticulous documentation. Forgetting to photograph key connections or keep detailed receipts almost cost me my warranty claim. It made me realize that small oversights can turn into costly mistakes, especially when manufacturers scrutinize every detail during repairs.
Another insight was how critical the quality of parts truly is. Relying on generic replacements might seem economical initially, but they often lack the durability and compatibility of OEM parts, risking future failures and warranty denials. This was a wake-up call that investing in trusted components is a smart move.
I also discovered that understanding the nuances of installation guidelines—like proper hose torque or electrical grounding—can prevent issues before they start. Manufacturer-specific procedures are often overlooked by DIYers, yet following them is essential to maintain warranty validity and ensure long-term performance.
Lastly, I realized that proactive maintenance, combined with comprehensive records, is a game-changer. Regular checks documented over time create a compelling case if something goes wrong, giving you confidence and peace of mind that your investment is protected.
Related Posts
Why You Should Never Toss the Factory Intake Valve Box
Ever muffled a scream of frustration when your brand-new dishwasher…

The Proper Way to Handle a Denied Warranty Claim Appeal
Ever had that sinking feeling when your warranty claim is…
Why Your Warranty Claim Was Denied Over a DIY Error
I remember the exact moment I realized my warranty claim…