Imagine this: You’re excited to finish your latest kitchen upgrade. The new dishwasher is installed, and you’re eager to see it in action. But instead of a smooth cycle, it hums, hesitates, or worse—completely refuses to start. That sinking feeling hits you, and suddenly, your repair project feels daunting. I’ve been there. In my early days as a DIY enthusiast, I thought I could save time and money by skipping over one vital component—your dishwasher’s thermal fuse. Turns out, that was one of the most costly mistakes I ever made.
The Hidden Danger in Ignoring Your Thermal Fuse
My lightbulb moment came when my brand-new dishwasher stopped mid-cycle, and I couldn’t figure out why. After some digging, I discovered that bypassing the thermal fuse wasn’t just risky—it could lead to major damage or even a fire hazard. The thermal fuse acts as a safety gate, shutting off power if the dishwasher overheats. When you ignore or bypass it, you’re essentially removing a crucial safety feature, risking internal damage or overheating that can quickly turn into a costly repair. Not to mention, modern appliances are built with safety standards in mind; circumventing these is like ignoring the warning labels on power tools—dangerous and inadvisable. According to the Consumer Product Safety Commission, appliance safety features like thermal fuses are mandated for a reason: to protect homeowners from preventable hazards.
If you’ve ever thought, “Is bypassing this part really that bad?” I get it. It seems like a quick fix, especially if you’re in a hurry or trying to avoid a call to the repairman. But I urge you to reconsider. Let me walk you through exactly why this tiny but mighty part shouldn’t be skipped and how doing so could save your home—and your sanity.
Is It Really Worth the Risk to Bypass the Thermal Fuse?
Early in my repair days, I made the mistake of thinking I could outsmart the system and save a few bucks by ignoring the fuse’s role. That was a costly lesson. It’s like trying to rewrite the rules of safety—you might gain a temporary fix, but the potential consequences far outweigh the benefits. Trust me, I’ve learned that the hard way. When you understand the purpose of every component, especially safety features like the thermal fuse, you become a more effective DIYer and a smarter homeowner. If you’re ready to ensure your dishwasher runs reliably and safely, keep reading, because I’ll show you step-by-step how to handle this crucial part properly. Want to avoid common DIY pitfalls? Check out our top tips for seamless dishwasher installation and ensure your project is a success from the start.
Disconnect Power Before You Start
Always unplug the dishwasher or turn off the circuit breaker to eliminate electrical hazards. Remember, safety first—think of it as powering down your device before fiddling with its circuits, much like shutting off a computer before opening it. This prevents accidental shocks and short circuits during fuse replacement.
Accessing the Thermal Fuse
Remove the dishwasher’s lower kickplate or panel, which is typically secured with screws. Use a Phillips screwdriver to carefully loosen and set aside the panel. Think of it as opening a secret door—gently and methodically to avoid damaging neighboring parts. During my own repair, I once stripped a screw because I forced it; now, I drill out stuck screws to prevent damage. Learn more about proper panel removal techniques here.
Locating and Removing the Old Fuse
The thermal fuse is a small, cylindrical component often situated near the heater assembly. Take note of its wiring; a photo or a note can help during reassembly. Use needle-nose pliers to disconnect the wires gently—think of it as unplugging earbuds without tugging the cord harshly, avoiding damage to the connectors. If the fuse is fragile or corroded, replace it with a new one rated for your model—don’t reuse old, brittle parts.
Selecting the Correct Replacement Fuse
Matching the part is crucial. Check the model’s manual or look at the existing fuse for specifications—usually printed on the side. Alternatively, consult the essential parts guide to verify compatibility. Using an incompatible fuse is like fitting a key into the wrong lock—nothing fits, and the system won’t function properly.
Installing the New Thermal Fuse
Carefully position the new fuse where the old one was located. Reconnect the wiring harness securely, ensuring there’s no loose connection—think of it as plugging in a charger firmly to ensure a steady power supply. Secure the fuse firmly but avoid over-tightening, which can crack the fuse or damage the mounting bracket. Remember, proper installation here prevents overheating issues or false trips.
Reassembling and Testing
Replace the kickplate or panel, securing it with screws. Restore power to the dishwasher, then run a short cycle to verify the repair. Observe the operation; if the dishwasher starts and completes the cycle without error, you’ve successfully reinstalled the thermal fuse. Otherwise, double-check your connections or consult troubleshooting guides. Properly handling the fuse replacement not only restores your dishwasher’s function but also maintains safety standards, preventing potential hazards from overheating or electrical faults.
Even experienced DIYers often believe that installing a dishwasher or replacing its parts is straightforward, but there are nuanced pitfalls that can derail your project or even compromise safety. One prevalent myth is that all replacement parts are universally compatible; however, overlooking model-specific specs or ignoring compatibility guides like our installation tips can lead to performance issues or warranty voids. Many assume the warranty covers all damage if they install parts themselves, but this isn’t always true—it’s essential to review warranty policies carefully to avoid costly mistakes.
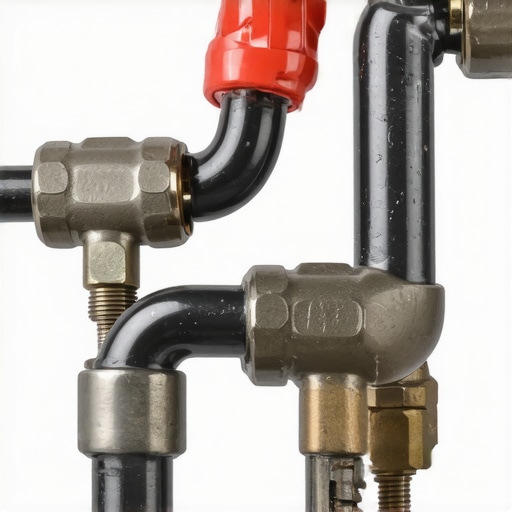
A critical mistake involves neglecting the importance of proper electrical and water connections. Some forget that a high-quality, rated electrical circuit and correct plumbing routes are non-negotiable; inadequate wiring or improper hose routing can cause leaks, electrical shorts, or fire hazards. The parts checklist emphasizes the significance of these steps.
Advanced installers know that over-tightening fittings is a common mistake that can damage threads or cause leaks. The right torque is crucial; too tight, and you risk cracking components or impairing seals. For this reason, consulting detailed guides like parts selection tips helps ensure optimal assembly and long-term durability.
What most overlook is that warranties often exclude damage caused by improper installation or the use of incompatible parts. This nuance might seem minor but is vital; it underscores why meticulous adherence to manufacturer specifications is essential. Skimping on these details can lead to voided warranties and expensive repairs later. For insights on maintaining warranty coverage through proper parts use, see warranty guidelines.
### Can You Really Save by Reusing Old Components?
Many believe that recycling old hoses or seals is cost-effective, but this is a false economy. Used parts can be brittle, corroded, or compromised, increasing the risk of leaks or failures. Experts recommend replacing aging components with verified, model-specific parts for reliability—more info is available in our essential parts guide. Properly sourcing and installing the correct parts ensures safety, performance, and warranty adherence, avoiding the common ‘oops’ of rushing into fixes that seem cheaper initially but cost more long-term.
Remember, meticulous attention to detail during installation isn’t just about comfort—it’s a safeguard against future problems that could cost hundreds of dollars or compromise your home safety. Keep these advanced insights in mind, and you’ll improve your DIY success rate and extend the lifespan of your dishwasher. Have you ever fallen into this trap? Let me know in the comments.
Keeping It Working: Essential Tools and Maintenance Tips
Maintaining your dishwasher’s performance over the years requires more than just occasional cleaning; it hinges on using the right tools and adopting a proactive approach. One indispensable device I personally rely on is a high-quality digital multimeter. This tool allows me to precisely check electrical continuity and voltage levels when diagnosing issues like faulty wiring or faulty heating elements, ensuring any replacements or repairs are accurate and safe. Additionally, I favor a set of precision screwdrivers with magnetic tips—these make panel removal and component access effortless, minimizing the risk of stripping screws or damaging delicate parts. Expert installation tips emphasize how proper tool selection streamlines maintenance and extends appliance lifespan.
For routine upkeep, I recommend investing in a small brush set specifically designed for cleaning appliance components. These brushes help dislodge debris from spray arms, filters, and seals without causing damage. Regularly inspecting and replacing worn parts, like door gaskets or hoses, ensures your dishwasher performs optimally and prevents costly repairs later. When choosing parts, adhere to manufacturer specifications, as using incompatible components can void warranties and lead to more significant issues—something highlighted in our troubleshooting guide.
How do I maintain my dishwasher over time?
Consistent maintenance involves a combination of cleaning filters, inspecting hoses for cracks or leaks, and scheduling professional check-ups annually. I also use a multimeter to verify electrical continuity periodically, especially after replacing parts or moving the appliance. Implementing these practices helps catch problems early, saving money and extending your dishwasher’s lifespan. Predictively, I believe this trend toward smart diagnostics and IoT integration will enable homeowners to monitor their appliances remotely, alerting them to issues before they develop into major failures. Staying ahead with proper tools and routine checks is key to making that future a reality.

What I Wish I Knew Before Bypassing Safety Features
The most significant lesson I learned was that taking shortcuts, especially with safety components like the thermal fuse, can lead to bigger problems down the line. I once thought I could bypass the fuse to fix a quick issue, but it nearly resulted in overheating and potential fire hazards. Now, I understand that every part plays a crucial role in both safety and functionality, and ignoring that can be disastrous.
How Proper Parts Selection Can Save Money and Troubles
Choosing the right replacement parts isn’t just about compatibility; it’s about ensuring safety and durability. I learned the hard way that using generic or incorrect parts, even if they seem similar, can cause leaks, malfunctions, or warranty issues. Always verify part specifications against the manufacturer’s guidelines to keep your dishwasher running smoothly and safely.
The Power of Meticulous Documentation and Tools
Keeping detailed notes and photos during disassembly transformed my repair process. Coupled with the right tools like a digital multimeter and magnetic screwdrivers, I prevented missteps and reassembled my dishwasher confidently. These small practices make a significant difference in achieving a professional-level fix, even as a DIYer.
Breaking My Own Myths About DIY Dishwasher Repair
I used to believe that all repairs could be simple and inexpensive, but I discovered that rushing or skipping steps often leads to costly mistakes. For instance, over-tightening connections or neglecting the high loop for the drain can cause leaks or backups. Learning these real-world lessons from my experience has made me cautious and thorough, which is essential for long-term success.
Curated Resources to Elevate Your Dishwasher Experience
- Top Tips for Seamless Dishwasher Installation: This guide offers expert advice on proper setup techniques that prevent future issues. I trust it because it’s based on real-world experience and detailed step-by-step instructions.
- Essential Parts for Troubleshooting: Understanding which components are most prone to failure helps in early detection and repair. I use this as my go-to resource for sourcing high-quality, compatible parts.
- Warranty Policies and How to Maximize Coverage: Knowing warranty nuances prevents my repair efforts from voiding coverage and saves money. It’s a must-read for any DIY homeowner aiming for peace of mind.
- Common Dishwasher Parts and Effective Replacement Strategies: This site has helped me identify parts quickly and replace them correctly, ensuring my dishwasher stays efficient and safe.
Stay Curious and Keep Your Dishwasher Safe
The journey of DIY dishwasher repair is as much about learning as it is about fixing. By staying curious, meticulous, and informed, you can handle repairs confidently and safely, saving money and prolonging your appliance’s life. Remember, every small step you take today builds the foundation for future DIY success. Are you ready to tackle your next repair with newfound confidence? Share your experiences below—I’d love to hear them!
,
Related Posts

How to Prevent Rust on Your Wire Racks Without Replacing the Unit
Have you ever taken out your dishwasher or oven and…
Why Hand-Tightened Clamps Are the Primary Cause of Hidden Leaks
It was a typical Saturday morning when I first noticed…
The $12 Surge Protector That Saves Your Dishwasher Control Board
It hit me one morning as I stood in my…