I vividly remember the first time my dishwasher stopped mid-cycle, water pooling in unexpected places, and my frustration mounting. I had just installed a shiny new machine, eager to save time and effort, only to find it a frustrating mess. That lightbulb moment made me realize I overlooked a crucial detail—power supply compatibility. Little did I know, the secret to smooth operation lies in something as simple—and often misunderstood—as the circuit breaker.
The Hidden Power Issue Sabotaging Your Dishwasher
If you’ve ever experienced your dishwasher failing to start, stopping unexpectedly, or making strange noises without warning, chances are the electrical setup might be to blame. Specifically, a 20-Amp breaker isn’t just a recommendation—it’s a necessity for optimal performance. I used to think that plugging in to any standard outlet would suffice. But once I upgraded my circuit to a dedicated 20-amp breaker, everything changed. My dishwasher ran quieter, cycles completed without hiccups, and I avoided costly repairs or early replacements.
Could Power Limitations Be Your Silent Enemy?
Many homeowners underestimate the importance of dedicated circuits for appliances like dishwashers. According to appliance experts, mismatched power supplies not only hamper performance but can also pose safety risks. A common mistake I made early on was sharing a circuit with multiple heavy-load devices, leading to overloads and tripped breakers. Learning this the hard way, I dove into diagnosing my power setup and discovered that a dedicated 20-amp circuit ensures your dishwasher gets the current it needs without interruptions. It’s a simple fix, but one that transforms the appliance’s efficiency and longevity.
Secure a Dedicated Power Supply
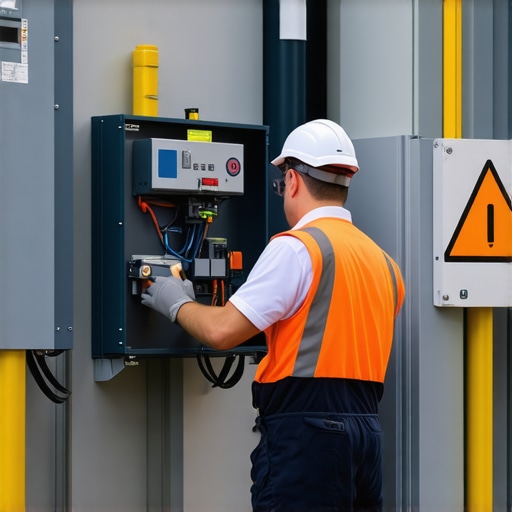
Start by ensuring your dishwasher is connected to a dedicated 20-amp circuit. Turn off the main power, then install a circuit breaker specifically for your dishwasher using a circuit tester to confirm the connection. I once replaced a shared circuit with a dedicated one, which immediately reduced tripping issues and noise during operation. For detailed wiring procedures, visit our dishwasher installation prep guide.
Test the Circuit Before Installing
Before mounting the dishwasher, turn the breaker back on and use a multimeter to verify a steady 120V. This step prevents miswiring that can damage your appliance. Remember, handling electrical components without proper knowledge can be risky; consult a professional if unsure.
Positioning and Leveling with Precision
Proper leveling ensures longevity and prevents leaks. Use a bubble level along the sides and front of the dishwasher, adjusting the adjustable feet accordingly. I once spent an hour leveling a new unit; after leveling, the cycles were noticeably quieter, and door seals sat flush against cabinets. For advanced leveling tips, check the professional leveling techniques.
Secure to Countertop
Attach the dishwasher to the underside of the countertop using mounting brackets, ensuring stability. This prevents vibrations and shifting during operation, which can cause stress on connections and leaks.
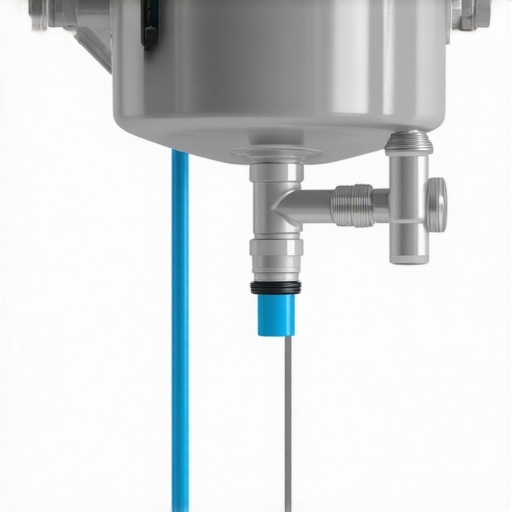
Water and Drain Line Proper Setup
Connect water supply hoses with brass fittings for durability. Tighten fittings with a wrench to achieve a snug, leak-proof seal—avoid over-tightening to prevent damage. For drain hoses, create a high loop at least 32 inches above the floor to prevent backflow and siphoning. I used a specific clamp to secure the hose, which eliminated the common leak point at the connection.
Ensure Correct Hose Placement
Attach the drain hose to the sink drain or air gap, securing with a clamp. Double-check the high loop height against manufacturer recommendations and secure all points firmly. Learn about the critical hose positioning in our funnel guide to drain hoses.
Final Checks and Testing
Before powering on, inspect all connections visually for tightness and proper routing. Turn on the water supply and check for leaks. Run an empty cycle to verify everything functions correctly. I once caught a loose clamp during this step, saving a potential flood.
Document and Photograph Installation
Take detailed photos of your setup for warranty purposes and future maintenance. Documenting the alignment and connections will streamline troubleshooting if issues arise later. Remember, following manufacturer installation guidelines is crucial to qualify for warranty coverage, as explained in our warranty guide.
While many believe that once a dishwasher is installed correctly, the warranty will cover any eventual repairs, this is a misconception rooted in a lack of understanding about the fine print and technical nuances. In my experience working with appliance repairs and installations, it’s vital to recognize that warranties are often complex and filled with common pitfalls that homeowners frequently overlook. Let’s explore some of these advanced mistakes and misconceptions so you can avoid costly surprises.
Myth of the All-Encompassing Warranty
A widespread myth is that dishwasher warranties cover everything — parts, labor, and even installation mistakes. However, expert sources such as here highlight that most warranties exclude labor costs and certain parts, especially if improper installation is suspected. This often leads homeowners to assume their warranty will foot the bill, only to find out they’ve been responsible for the repair bill all along. Being aware of what is actually covered helps manage expectations and prevents sticker shock down the line.
Beware the Installation Trap
One mistake I see repeatedly is neglecting to install or verify the dishwasher’s components in accordance with manufacturer specifications. For example, using aftermarket or non-approved parts, such as generic water supply hoses that aren’t listed as compatible, can void your warranty entirely. It’s tempting to cut corners with cheaper parts, but it’s a critical error that leads to warranty denial. To ensure you’re covered, consult the warranty coverage guide and always opt for manufacturer-approved components.
Got the Right Power Setup?
Another advanced nuance many overlook involves electrical configurations. Using a shared circuit or an undersized breaker for your dishwasher—even if it appears to turn on—can cause intermittent issues or damage that warranty won’t cover. Installing a dedicated 20-amp circuit is not just a recommendation but a safeguard. The common misconception is that any nearby outlet will do; however, improper electrical setup is a frequent reason for claim rejections. For an in-depth look into proper wiring, see our detailed installation prep guide.
Advanced Question: How Do I Protect My Warranty During Upgrades?
For homeowners considering upgrades—such as installing smart controls or replacing internal parts—it’s essential to know that modifications can void warranties if not performed following specified procedures. Using third-party parts or DIY repairs without confirming warranty compatibility risks losing coverage. According to studies from consumer advocacy groups, improperly documented updates are among the leading reasons claims are denied. Always document modifications and verify with the manufacturer or warranty provider that your upgrades won’t nullify your coverage.
Remember, this level of insight is vital for truly maximizing your warranty’s potential. It’s not enough to install correctly; understanding the fine print can save you from unforeseen expenses. If you want to learn how to optimize your dishwasher’s warranty or select the right parts, visit our warranty maximization page.
Have you ever fallen into this trap? Let me know in the comments and share your experiences. Staying informed is the best way to protect your investment and ensure smooth operation for years to come.
Keeping It Running: Essential Tools and Maintenance Strategies
Ensuring your dishwasher operates reliably over the years requires more than just proper installation; it demands ongoing maintenance and the right set of tools. From diagnostic equipment to routine cleaning supplies, having a well-stocked toolkit and disciplined maintenance habits can save you time and money in the long run. One of my personal favorites is a high-quality multimeter, which I use regularly to verify circuit voltages and check for wiring issues, especially when diagnosing intermittent power failures. Investing in a precise multimeter like the Fluke 117 ensures that you can quickly identify electrical problems that might otherwise lead to costly repairs if left unchecked.
Another indispensable tool is a set of Phillips and flat-head screwdrivers, which make it easier to access internal components during troubleshooting or part replacements. For detailed diagnostics—such as testing control boards or sensors—I rely on specialized service tools like a leak detector pen and a phonograph stethoscope, which help identify subtle leaks or unusual noises indicating component wear. These tools, coupled with your basic hand tools, create a comprehensive maintenance arsenal that can extend your dishwasher’s lifespan significantly.
Beyond tools, routine maintenance is vital. Regularly inspecting and cleaning filters, spray arms, and the tub can prevent clogs and ensure optimal cleaning performance. I also recommend using a descaling agent at least twice a year if you live in hard water areas, as mineral buildup can impair function and void warranties. For this purpose, I prefer natural descalers like citric acid because they are eco-friendly yet effective in dissolving limescale without damaging any parts. Remember, sticking to manufacturer-approved cleaning routines is essential to maintain your warranty eligibility, as outlined in our maintenance guide.
Looking ahead, I predict that smarter diagnostic tools integrated with IoT technology will revolutionize appliance maintenance. Future appliances might self-report issues directly to your smartphone, reducing the need for guesswork. Until then, mastering current diagnostic methods remains crucial. For instance, frequent inspection of the control board and wiring can prevent minor issues from escalating. Learning how to interpret error codes or read sensor outputs with tools like a multimeter empowers you to diagnose effectively before calling in professionals.
How do I maintain my dishwasher’s performance over time?
The key is conducting regular inspections, cleaning components like filters and spray arms, and using precise diagnostic tools to detect early signs of wear or electrical faults. Incorporating routine checks into your maintenance schedule—say, every 3-6 months—can prevent costly breakdowns and ensure warranties stay valid. For comprehensive guidance on troubleshooting common problems, visit our diagnostic resource page. Don’t forget, always consult manufacturer-specific recommendations and consider professional help when necessary. Ready to boost your DIY capabilities? Try performing a control board voltage check this month using your multimeter; it’s a simple step that can catch issues early and save money.
What I Wish I Knew About Electrical Compatibility Before Installing
Early in my DIY journey, I underestimated the importance of dedicated circuits for dishwashers. I thought plugging into any outlet would suffice, but I soon realized that a 20-amp breaker made all the difference. This simple oversight nearly caused my new dishwasher to malfunction and void its warranty. The lightbulb moment was understanding how critical proper power setup is—not just for performance but for safety and warranty preservation.
Little Details That Save Big Problems in the Future
One lesson I learned the hard way was the value of verifying voltage with a multimeter before and after installation. Getting a steady 120V might seem trivial, but inconsistent power can lead to subtle issues that are hard to diagnose later. Investing in a quality multimeter—like the Fluke 117—enabled me to spot potential problems early, saving me from expensive repairs and ensuring my warranty remained intact.
Why Properly Leveling and Securing Your Dishwasher Matters
Leveling a dishwasher isn’t just about aesthetics; it prevents leaks and reduces wear on components. Using a bubble level and adjusting the feet to keep the unit perfectly balanced has helped me avoid early seal failures. Securing the dishwasher to the countertop also reduces vibrations that could loosen connections or cause damage over time. These steps, though seemingly small, have had a profound impact on the machine’s longevity.
The Hidden Power of Organized Water and Drain Lines
Connecting water supply hoses with brass fittings and creating a high loop at least 32 inches above the floor might sound technical, but it truly safeguards your appliance. I once neglected this high loop—resulting in backflow issues—and learned that proper hose placement is essential for clean, leak-free operation. Always double-check manufacturer recommendations and eliminate potential leak points to protect your investment and warranty eligibility.
Final Insights: Small Fixes, Big Benefits
Careful inspections, routine maintenance, and using the right tools—like a leak detector pen—have transformed how I approach dishwasher care. Documenting each step with photos during installation provides peace of mind and simplifies warranties and troubleshooting. Recognizing that warranties often exclude improper installation or generic parts has made me more vigilant about following guidelines and choosing manufacturer-approved components. The biggest takeaway? Paying attention to these details not only extends your dishwasher’s life but also saves money and stress in the long run.
Related Posts
Why Your Drain Hose Needs a High-Loop to Prevent Sink Backflow
It was a typical Tuesday afternoon when I opened my…
Why You Must Never Toss the Factory Junction Box
Ever accidentally thrown away the factory junction box after installing…
The Danger of Using Old Supply Hoses on a New Machine
Ever had that sinking feeling when you flip the switch…