It was a small leak under my kitchen sink that finally made me realize something wasn’t right. I had replaced a plastic fitting myself months ago, thinking I was saving money, only to find it cracked just days later. That’s when it hit me—why do so many local plumbers insist on using brass fittings instead of plastic? That lightbulb moment led me down a rabbit hole, and now I want to share what I’ve learned about this seemingly minor choice that can make a huge difference in your plumbing projects.
Understanding the Power of Quality Fittings in Your Home
When I first started tinkering with my home’s plumbing, I thought all fittings were created equal. I was wrong. The difference between brass and plastic is more than just material—it’s about durability, safety, and long-term peace of mind. I learned that brass fittings, though slightly more expensive upfront, often outlast plastic counterparts by years. This isn’t just my opinion; studies show that brass is resistant to corrosion and can handle higher temperatures and pressures—making it a favorite among professional plumbers. If you’re eager to avoid future leaks and costly repairs, understanding why brass wins over plastic can save you a lot of trouble.
Is Brass Really Superior to Plastic? The Myths vs. The Facts
Honestly, I’d been skeptical at first. I remember thinking, “Isn’t plastic just as good?” I made a rookie mistake early on—opting for plastic fittings to cut costs—only to find myself revisiting the same repair a year later. That was a wake-up call. Now I know that choosing the right fittings is crucial, especially if you want your plumbing to withstand the test of time. For more insights into common plumbing parts and how they impact performance, check out this detailed guide.
Don’t make the same mistake I did. If you’re planning a new installation or replacing old fittings, it’s worth investing in quality brass components. Not only will this reduce the chances of leaks, but it also enhances the safety and longevity of your plumbing system.
As we move forward, I’ll walk you through how to choose between brass and plastic fittings, what to look for, and how to ensure your plumbing stands strong against the wear and tear of daily use. Ready to step up your DIY game and avoid those frustrating leaks? Let’s dive into the details to make informed decisions that last.
Select the Right Fittings and Tools
Before starting, gather high-quality brass fittings and the necessary tools—a reusable wrench, pipe cutter, Teflon tape, and a bucket to catch residual water. I once attempted a quick fix with cheap fittings, which leaked within a week. This taught me the importance of investing in durable components. Using a pipe cutter ensures clean cuts, reducing the risk of leaks. For guidance on choosing the best parts, visit top tips for selecting parts.
Prepare and Cut the PVC Pipe
Turn off the water supply and drain the system. Mark the pipe with a permanent marker where you plan to install the fitting. Use the pipe cutter to make a straight, smooth cut—think of it as trimming a nail to avoid splitting. Ensure the cut edge is free of burrs; if needed, smooth it with a reamer. This precise cutting prevents leaks caused by misaligned fittings. ” alt=”Close-up of a pipe cutter cutting plastic pipe” title=”Use a pipe cutter for clean cuts”/>.
Apply Teflon Tape and Connect the Fitting
Wrap Teflon tape clockwise around the male threads of the brass fitting—about 3-4 wraps. Think of it as sealing a zipper to prevent water from slipping through. Thread the fitting onto the pipe or connector by hand, then tighten with the wrench, but avoid over-torquing—like screwing in a lightbulb, too tight can damage the threads. Proper tightening is crucial; a loose connection invites leaks, while overtightening can crack the fitting. To ensure a perfect fit, follow professional tips found here.
Secure and Test the Connection
Use the wrench to snug the fitting without forcing it beyond resistance—think of it as tightening a bolt just enough, not so tight that you strip the threads. Turn the water supply back on slowly, watching for any drips or signs of leaks. If leaks occur, gently tighten the fitting a bit more—never force it excessively, as this can damage the threads or crack the fitting. Once secure, run water through the system for 10-15 minutes to check for ongoing leaks. Remember, a small drip today can lead to significant damage over time, much like a tiny crack in a dam gradually enlarges.
Maintain and Inspect Regularly
Periodically check all fittings, especially in high-pressure areas, to ensure integrity. If you notice any signs of leakage or corrosion, replace the fittings promptly. Regular maintenance now can prevent costly repairs later, similar to changing the oil in a car before the engine seizes. For detailed maintenance routines, visit this guide. Keep your connections tight, clean, and corrosion-free, and your plumbing will stay leak-proof longer.Many homeowners believe that selecting the most affordable parts or rushing through installation guarantees long-term performance, but this couldn’t be further from the truth. One prevalent myth is that all dishwasher parts—whether OEM or aftermarket—are interchangeable without affecting warranty coverage or machine longevity. In reality, choosing inferior components can void warranties and lead to frequent breakdowns, as explained in maximizing your dishwasher’s warranty.
A hidden nuance often overlooked is the importance of precise installation techniques. Professionals know that even a slight misalignment or improper sealing can cause leaks, water damage, or early part failure. For instance, improperly torqued fittings or neglecting to replace worn gaskets can result in costly repairs down the line. Don’t assume that the cheapest repair kit will hold up—expertise and quality matter significantly.
Another common misconception involves warranties. Many assume that warranties cover all repairs, but most exclude damage from improper installation or use of non-approved parts. For example, using generic spray arms might seem cost-effective, but they can cause poor cleaning performance and might void your warranty if they contribute to damage, as detailed in understanding dishwasher parts and maintenance. To truly benefit, familiarize yourself with what your warranty covers and the best practices to maintain it.
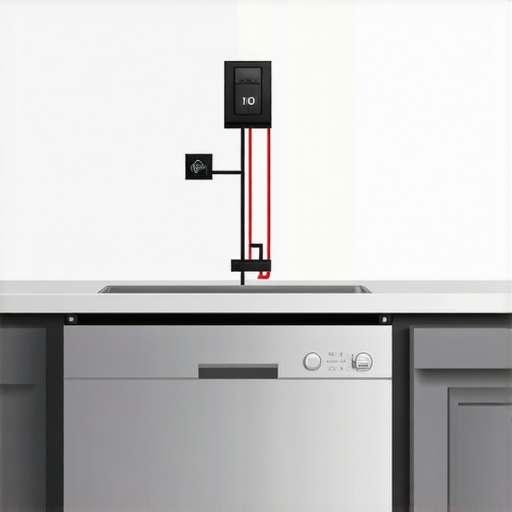
A subtle trap to avoid is underestimating the significance of the drain system. Many overlook that a clogged or improperly installed drain hose can cause backflow, leaks, or even damage the motor. A quick fix with generic parts might seem tempting, but consistently ignoring this vulnerability can lead to persistent issues and warranty disputes.
Are you aware of how advanced techniques, like using digital leak sensors or high-quality fitting connections, can prevent these mishaps? Modern technology and knowledge allow you to protect your investment actively. For example, investing in durable brass fittings and professional installation methods can dramatically extend your dishwasher’s lifespan, as recommended by industry experts.
Let’s be honest—cutting corners might save money short term, but it often leads to expensive repairs and warranty headaches. To ensure you’re not falling for common pitfalls, review your parts selection and installation practices regularly. Remember, thorough research and professional guidance are your best allies in maintaining a reliable dishwasher.
Have you ever fallen into this trap? Let me know in the comments!
For comprehensive insights on selecting the right parts and protecting your warranty, don’t miss the most popular dishwasher parts and their performance benefits. Proper installation, quality parts, and understanding warranty exclusions are key to long-term satisfaction.
Tools I Recommend for Lasting Maintenance
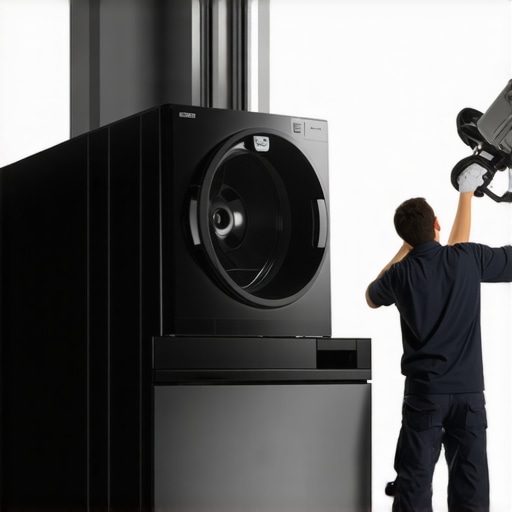
When it comes to ensuring your dishwasher stays in top shape, having the right tools makes all the difference. I personally rely on a high-quality digital multimeter to quickly diagnose electrical issues, saving me time and guesswork. A calibrated torque wrench is essential for securing fittings to manufacturer-recommended tightness, preventing leaks and damage. For cleaning hard-to-reach components like spray arms and filters, I use a flexible inspection camera, which offers a clear view inside the machine without disassembly—this has helped me spot blockages early before they cause failure.
In addition, I recommend investing in a cordless variable speed drill fitted with socket adapters. This allows for efficient removal and tightening of components during routine checks or replacements. I also swear by a microfilter cleaning brush that smooths out grime in tight crevices—regular cleaning with this tool maintains optimal water flow and prevents buildup that can lead to costly repairs. Keeping your toolkit well-stocked with these specific items ensures you can respond swiftly to issues and perform preventive maintenance effectively.
The Future of Dishwasher Maintenance
Looking ahead, I predict an increasing shift toward smart diagnostics integrated directly into dishwashers, enabling owners to receive real-time alerts on potential issues via their smartphones. These technological advances could reduce the reliance on manual inspections and improve long-term performance. However, even with automation, mastering fundamental tools—like the ones I mentioned—will remain vital for proactive care and troubleshooting.
How do I keep my dishwasher in peak condition over time?
Implementing a regular maintenance routine that includes checking seals, cleaning filters, and inspecting hoses is crucial. Scheduling semi-annual checkups with the right tools, such as a flexible inspection camera and torque wrench, helps catch early signs of wear and tear. Additionally, staying informed about common failure points, like worn spray arms or clogged filters, enables targeted interventions. Don’t forget to review your warranty coverage periodically and keep detailed records of your maintenance efforts—this strengthens your position should you need to claim repairs or replacements. Remember, consistent care with specialized tools extends your dishwasher’s lifespan and preserves its warranty benefits. For more insights, visit this comprehensive guide.
One advanced tip I urge you to try: calibrate your water inlet valve with a digital multimeter to ensure proper operation, thereby preventing water overflows or insufficient filling. This small but impactful step can save you from major repairs later. Take your maintenance game to the next level today.
What I Wish I Had Known About Installing and Caring for Dishwasher Fittings
One of the most valuable lessons I’ve learned is that investing in high-quality brass fittings and proper installation techniques can save you countless headaches. The importance of choosing durable components became crystal clear after experiencing multiple leaks from cheap plastic fittings, reminding me that shortcuts often cost more in the long run. Ensuring tight, yet gentle connections and understanding the nuances of warranty coverage has empowered me to maintain my dishwasher effectively and avoid costly repairs.
Curated Tools That Turn Maintenance Into a Breeze
Over time, I’ve found that having the right toolkit—such as a calibrated torque wrench, a flexible inspection camera, and a microfilter cleaning brush—transformed my approach to dishwasher care. These tools have helped me identify issues early and perform precise repairs, extending my appliance’s lifespan. I trust these because they make maintenance manageable and help me prevent minor problems from escalating into major expenses.
Your Next Step in Achieving Peace of Mind with Your Dishwasher
Now is the perfect moment to take charge of your dishwasher’s performance. Regular inspections, quality parts, and using the right tools will not only improve efficiency but also give you confidence that your home is protected from water damage and unexpected failures. Embracing proactive care can truly make a difference—so start today, implement the tips discussed, and enjoy the satisfaction of a well-maintained appliance.
What’s the biggest challenge you’ve faced when installing or maintaining your dishwasher?
Print your story below—sharing insights helps build a community of smarter homeowners. And if you’re curious for more detailed guidance, check out this comprehensive resource to deepen your knowledge.
Related Posts
The Hidden Costs of Skipping Professional Installation Services
It was a morning like any other, until I opened…
Why Your Dishwasher Needs a Dedicated 20-Amp Circuit
It hit me one morning—the terrible, gut-wrenching sound of my…

3 Installation Steps Professionals Take to Avoid Slow Leaks
I remember the first time I ignored a small drip…