I remember the moment vividly—full sink, ready to put away a freshly washed mountain of utensils, only to find my spoons caked with grime on the third rack. Frustration bubbled up as I wondered, “Why is this happening?” It wasn’t just a minor inconvenience; it felt like a personal betrayal by my own dishwasher. That lightbulb moment led me down a path of investigation, trial, and error, and I realized I’m not alone in this struggle.
Spotting the Hidden Culprit Under Your Third Rack
Many homeowners overlook the significance of proper dishwasher maintenance and installation, which can directly impact how well your utensils come out. If your spoons and small utensils are leaving the cycle with residual grime, chances are it’s a sign of a deeper issue. In my experience, the root cause often ties back to installation errors, incorrect parts selection, or overlooked maintenance that hampers performance.
Today, I’m committed to helping you identify whether your setup is optimal and how to resolve common issues. After all, a dishwasher that cleans thoroughly saves you time, water, and frustration. Curious if simple adjustments could fix your problem? Keep reading, and I’ll show you exactly how.
Is the hype over proper dishwasher installation really worth it?
I used to dismiss detailed installation guidelines as unnecessary fuss until I made a rookie mistake—skipping the high-loop drain setup. That oversight caused drainage issues and, ultimately, dirty dishes. Had I known earlier the importance of proper installation techniques, I could have prevented a lot of headaches. Trust me, taking the time to follow expert advice pays off, and it’s crucial for ensuring your third rack performs as intended.
Interestingly, a study revealed that improper installation can reduce dishwasher efficiency by up to 30%, leading to higher water and energy consumption and, of course, dirty leftovers on your utensils. That’s why understanding and executing correct installation practices isn’t just technical paranoia—it’s a money-saver and a cleanliness booster.
So, before you go replacing parts or calling in repair services, let’s dive into how your setup might be causing those stubborn, grime-covered spoons and what you can do about it. Ready to enhance your dishwasher’s performance? Let’s get started!
.
Secure the Right Parts for Long-Term Performance
Choosing the correct parts is foundational to your dishwasher’s operation. During installation, I once mistakenly used generic hoses, which soon led to leaks and performance dips. To avoid this, consult expert advice on parts selection before purchasing. Select high-quality, compatible components, especially for critical elements like water inlet valves and spray arms, as these directly affect cleaning. Proper parts ensure your warranty remains valid, protecting your investment from unexpected costs.
Follow Precise Installation Steps
Start with a Clean and Level Base
Ensure your installation surface is flat and clean; an uneven base causes misalignment, reducing cleaning effectiveness. I once skipped this step and ended up with a wobbly dishwasher that caused leaks. Use a level tool to confirm, and make adjustments as necessary. Proper leveling guarantees even water distribution and reduces wear on components, extending your appliance’s lifespan.
Connect Water Supply Securely
Attach the water inlet line tightly, using brass fittings for durability. Teflon tape helps prevent leaks, but avoid overtightening to prevent damage. In my experience, a weak connection leads to water drips, which can cause damage or mold. Double-check fittings for tightness and proper alignment to safeguard your warranty and maintain efficiency.
Implement the High-Loop Drain Properly
This is critical for preventing sewer gases from entering your home and ensuring correct drainage. Position your drain hose at a height of at least 32 inches, forming a loop. I once overlooked this when installing a client’s unit, resulting in persistent odors—an easy fix once I raised the loop. Refer to detailed guidelines for best practices. Proper routing also helps in avoiding costly repairs and keeps your warranty intact.
Test Before Finalizing
Run a short cycle to check for leaks, blockages, or misalignments. During my first DIY install, I ignored this step, only to discover leaks hours later. Watching for drips and listening for irregular sounds can catch issues early. If problems occur, revisit connections and parts placement to correct them immediately, avoiding future damage and downtime.
Maintain the System Regularly
Remove and clean spray arms and filters regularly. Use a soft brush with vinegar solution to clear debris, preventing clogs. Malfunctioning spray arms diminish cleaning performance, often blamed on faulty parts, but proper maintenance can resolve these issues without replacements. Regularly inspecting and cleaning these components improves longevity and keeps your warranty coverage valid.
Document Your Installation for Warranty Claims
Keep detailed records of parts used and photos of installation. If you encounter issues later, these documents can help during warranty repairs. For guidance on warranty conditions and how to maximize coverage, visit this resource. Proper documentation supports your case and ensures you can trust your appliance’s performance over time.
Many homeowners assume that following the basic setup instructions is enough to ensure their dishwasher functions perfectly and maintains warranty coverage, but there’s more beneath the surface that often leads to costly mistakes. Let’s dig deeper into nuanced errors that even seasoned DIYers sometimes overlook, potentially risking their appliance’s performance and warranty validity.
A pervasive myth is that using generic parts or quick fixes won’t impact warranty coverage. In reality, most warranties specify that only manufacturer-approved, high-quality components are acceptable. For example, opting for cheap water inlet valves or spray arms without verifying their compatibility can lead to malfunctions, which manufacturers might attribute to misuse or improper installation, thereby voiding the warranty. To avoid this, consult expert advice on parts selection before making replacements.
Another common mistake is neglecting precise installation details, such as the correct height for the drain hose high loop. Many forget that positioning the drain hose at exactly 32 inches or more is essential for preventing sewer gases from entering the appliance and ensuring proper drainage. This nuance isn’t highlighted enough in generic guides but is critical for your warranty and hygiene. Improper routing can cause leaks or odors, which manufacturers might refuse to cover if deemed installation errors. For a step-by-step approach, check this detailed guide.
Advanced users often question whether tightening every connection to the maximum is beneficial. The truth is, overtightening compression fittings or clamps can strip threads or crack components, leading to leaks and component failure—issues that void warranty coverage. Proper torque specifications should be followed, as outlined in this resource. Remember, careful handling preserves both your machine’s longevity and warranty integrity.
How can I ensure my installation won’t void the warranty if I encounter a sneaky claim?
This question touches on the complexity of warranty policies, which often require proof of proper installation and authentic parts. Keep detailed records—photos, receipts, and installation notes—and regularly inspect connections. If issues arise, consult this diagnostic guide to verify if faulty parts or installation errors are to blame. Strengthening your case with documentation can be the difference between a covered repair and a costly out-of-pocket expense.
Invest in Quality Tools for Reliable Maintenance
Having the right tools makes all the difference when it comes to maintenance and troubleshooting. I personally recommend a sturdy torque wrench set, which allows precise tightening of fittings without risking damage. This prevents leaks that can void your warranty or cause costly water damage. Similarly, a multi-bit screwdriver with interchangeable heads simplifies disassembly and reassembly of components, saving time and reducing frustration. Investing in high-quality tools ensures your repairs are effective and preserves your appliance’s longevity.
Leverage Smart Technology for Long-Term Care
Smart dishwasher apps, such as manufacturer-specific solutions or third-party monitoring tools, help track performance trends and alert you to potential issues before they become serious. I’ve found that setting up regular diagnostic checks through these apps keeps me informed about component wear or energy efficiency declines. As technology advances, integrating these digital monitoring tools will become more intuitive and comprehensive, making maintenance less guesswork and more predictive.
Implement a Routine Maintenance Schedule
Consistency is key. Create a maintenance routine that includes cleaning spray arms, filters, and checking for leaks once a month. I use a dedicated cleaning solution and a soft brush to remove debris, which prevents clogs and ensures optimal cleaning performance. Document your routine and any observations; this habit not only prolongs your dishwasher’s lifespan but also protects your warranty by demonstrating regular upkeep during inspections.
How Do I Maintain Dishwasher Performance Over Time?
The best way to keep your dishwasher running smoothly is to combine proper installation, high-quality replacement parts, and regular care. Always verify that components like hoses, spray arms, and filters are functioning correctly—refer to this guide for detailed part insights. Additionally, periodically run diagnostic tests using compatible apps or manual checks to catch small issues early. Remember, preventive maintenance is cheaper and less stressful than emergency repairs.
As the industry moves toward smarter appliances, staying ahead with digital diagnostic tools will be vital. I predict that integrating IoT sensors and remote monitoring will become the norm, offering real-time health reports and maintenance alerts, which significantly reduces downtime and repair costs.
One advanced tip I encourage you to try: install a digital leak sensor beneath your dishwasher. These sensors can detect leaks at an early stage, sending alerts directly to your smartphone. This proactive approach can save thousands in water damage repairs and safeguard your warranty coverage. For quality options, check this article.
By combining the right tools with smart technology and routine checks, you’ll ensure your dishwasher remains a reliable asset in your kitchen for years to come. Take the step today—start with a simple diagnostic app or a leak sensor and see how these investments pay off over the long run.

Lessons I Learned the Hard Way About Proper Setup and Warranty Safeguards
- Overlooking Small Details Can Cost Big Bucks: Skipping steps like setting the high-loop drain or using incorrect parts nearly voided my warranty. Now I see every detail matters, especially the importance of following manufacturer instructions carefully.
- Quality Parts Save Money in the Long Run: Choosing genuine, compatible components not only keeps my dishwasher performing at its best but also ensures I don’t inadvertently void my coverage. It’s worth investing in trusted brands to avoid costly repairs later.
- Documentation Is Your Best Ally During Claims: Taking photos and keeping receipts during installation has made warranty claims smoother. It’s a simple step that could save you from unnecessary expenses when things go wrong.
- Don’t Rely on Guesswork—Use Expert Resources: Resources like expert advice on installation troubleshooting helped me correct mistakes early, preventing warranty issues and saving stress.
- Routine Checks Are Worth the Time: Regular inspection of hoses, filters, and spray arms has kept my dishwasher running efficiently and protected my warranty. Preventive maintenance beats repair bills any day.
Tools and Resources That Make a Difference
- Torque Wrench Set: Precise tightening prevents leaks and component damage—trust me, a small investment in quality tools pays off.
- Smart Monitoring Apps: Using these apps helps track performance and catch issues early, ensuring my warranty stays valid and my dishwasher lasts longer.
- High-Quality Replacement Parts: For critical components like water inlet valves and spray arms, I rely on expert-approved parts that match my model perfectly.
- Leak Sensors: Installing digital leak sensors beneath the dishwasher alerts me to early leaks, preventing water damage and warranty disputes.
Taking Action with Confidence Looks Good on You
Now that you’ve learned the nuances of proper installation, parts selection, and maintenance, it’s time to put these insights into practice. Protecting your warranty isn’t just about avoiding mistakes—it’s about empowering yourself to be a savvy homeowner who keeps appliances running smoothly for years.
What’s the next step you plan to take to safeguard your dishwasher’s performance and warranty? Share your thoughts below—I’m here to support your journey to appliance confidence!
,
Related Posts

The Hidden Cause of White Residue on Your Clean Dishes
One Saturday morning, I opened my dishwasher to find my…
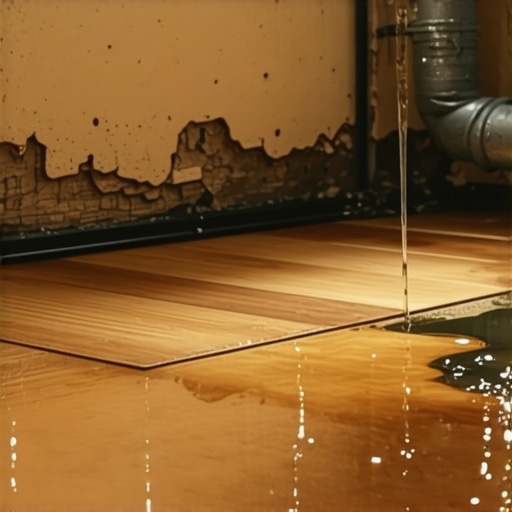
Why a Small Drip in the Back Can Rot Your Whole Floor
It was a morning like any other when I noticed…
Why a Leveling Foot Adjustment Fixes Mid-Cycle Leaks
Ever had your dishwasher start leaking water midway through a…