
It was a typical Saturday morning when I noticed water pooling beneath my dishwasher. At first, I thought it was a minor leak, maybe just a loose hose clamp. But as the days went on, the leak worsened, and I started feeling overwhelmed by the constant worries about water damage and potential plumbing disasters. That lightbulb moment hit me—my plastic inlet hose was no longer reliable, and I needed a better solution. From that day, I vowed to upgrade to a stainless steel braided hose, and honestly, it’s one of the smartest decisions I’ve made for my home’s safety and my peace of mind.
Choosing the Right Hose Can Prevent Major Kitchen Disasters
When it comes to dishwasher maintenance, the small details make all the difference. I used to overlook the importance of quality parts, especially hoses. But early on, I learned a hard lesson: plastic hoses are more prone to cracks, leaks, and even bursts over time, especially when exposed to the constant pressure and movement of water flow. This realization prompted me to look for a more durable, long-lasting alternative. That’s when I discovered the benefits of a stainless steel braided hose, which I now recommend to everyone I know. Believe me, investing in one can save you from stressful emergencies—and costly water damage repairs later on. If you’re like I was, facing frequent hose leaks or planning a dishwasher upgrade, it’s worth checking out why hard water is the number-one enemy of your warranty and how the right hose can protect your investment.
Will a stainless steel hose really last longer than plastic?
Early in my journey, I made the mistake of assuming all hoses are created equal. I thought a plastic hose was sufficient, and that I was saving money. Turns out, that was a costly misconception. Plastic hoses are vulnerable to cracking, especially if exposed to extreme temperatures or frequent movement. I learned this the hard way when a small leak turned into a mini flood, causing water damage and forcing me to replace not just the hose but also parts of my kitchen flooring. Since switching to a stainless steel braided hose, I’ve noticed a significant reduction in leaks and have gained confidence knowing I’ve added a layer of protection. Making mistakes like this taught me the importance of choosing reliable, heavy-duty parts, and it’s a lesson I want to share with you—don’t skimp on your dishwasher’s inlet hose. For even more insights, check out how proper parts selection can extend your warranty.
Select the Right Parts for Your Dishwasher
Start by choosing high-quality components, especially the inlet hose. Opt for a stainless steel braided hose instead of plastic, as it resists cracks and leaks. To ensure compatibility, consult the manufacturer’s specifications and verify that parts meet your model’s requirements. For guidance, see top tips for selecting the right parts. This step is crucial because incompatible or generic parts might void your warranty or cause damage.
Gather Essential Tools and Materials
Before starting, assemble a set of basic tools: adjustable wrench, screwdriver, pliers, and a Teflon tape. Have your new stainless steel inlet hose, replacement clamps, and entry connectors ready. Proper tools prevent damage and make the installation smoother. Check the 10 essential tools for DIY repairs.
Prepare Your Kitchen for Installation
Clear the space around the dishwasher, disconnect the power supply, and turn off the water intake. Ensure your existing plumbing and electrical connections are accessible and compliant with local codes. Use this guide to prepare your kitchen for a seamless setup. Taking these steps prevents accidents and ensures smooth installation.
Secure the Dishwasher Properly
Carefully slide the dishwasher into position, aligning it with the mounting brackets and electrical outlet. Level the appliance using a spirit level to prevent operational issues. Fix it with mounting screws into the cabinetry, ensuring stability. An unlevel dishwasher can cause leaks or poor cleaning. For specific mounting tips, see popular mounting techniques.
Connecting Water and Power with Precision
Attach the stainless steel inlet hose to the water supply valve, using Teflon tape to prevent leaks. Connect the other end to the dishwasher’s inlet port, tightening securely with pliers. For the electrical connection, ensure the circuit matches the manufacturer’s specifications, and double-check wiring. Proper connections are vital to maintain your warranty and avoid damage; review this checklist for details.
Test Before Use
Restore power and turn on the water supply. Run a short cycle to check for leaks and proper operation. Observe all connections closely; if leaks occur, tighten fittings or reapply sealing tape. Regularly inspecting the installation ensures preventable issues are caught early, extending your dishwasher’s lifespan.
Monitor and Maintain Regularly
Schedule periodic inspections of hoses and connections, replacing them if signs of wear appear. Keep filters clean and remove debris from spray arms. Learn more about proper maintenance at this maintenance guide. Consistent care prevents minor issues from escalating into costly repairs or warranty problems.
Why DIY Enthusiasts Often Miss Critical Details
Many homeowners believe that installing a dishwasher is a straightforward task, but overlooking nuanced aspects can jeopardize your appliance’s warranty. For instance, using generic or low-quality parts, like cheap plastic inlet hoses, might seem cost-effective initially but can lead to leaks and void your warranty prematurely. According to expert advice, choosing the right parts isn’t just about compatibility—it’s about ensuring your coverage stays intact if something goes wrong.
The Myth of Universal Parts Compatibility
Contrary to popular belief, not all replacement parts are interchangeable across brands or models. Many assume that a generic hose or gasket will do the trick, but incompatible parts can cause leaks, poor performance, or even failure to honor warranty claims. Correct part selection, as detailed in this guide, is vital to maintaining your appliance’s longevity and coverage. Advanced installations often require precise fittings—the difference between a quiet, efficient machine and a costly repair nightmare.
Why Installing a Subpar Hose Is a Hidden Risk
Poor-quality inlet hoses are a common trap overlooked by many. Plastic hoses may seem sufficient, but they are vulnerable to cracking or bursting under pressure, especially in homes with hard water. Such failures can lead to water damage that not only damages your kitchen but also voids warranty coverage if the manufacturer deems improper parts or installation as the cause. Upgrading to stainless steel braided hoses reduces this risk significantly, as highlighted in this detailed post. Remember, investing a little more in quality parts can save major headaches later.
Advanced Questions: How to Protect Your Warranty During Installations
One advanced consideration often missed involves the specifics of wiring and plumbing connections. For example, improper electrical grounding or inadequate plumbing pressure can lead to warranty denial. Manufacturers expect compliance with code and proper packaging of installation procedures, including inspecting the water inlet and drain lines thoroughly. For detailed troubleshooting, see this resource. Proactive steps, such as correctly tightening fittings and verifying manufacturer specifications, help ensure your coverage remains valid.
By understanding and avoiding these hidden pitfalls, you can safeguard your investment and enjoy a trouble-free dishwasher experience. Have you ever fallen into this trap? Let me know in the comments.
Keep It Running Strong: Tools and Tips for Maintenance
Maintaining your dishwasher’s optimal performance relies heavily on the right tools and a proactive approach. I personally swear by the 10-in-1 Repair Toolkit, which includes adjustable wrenches, flat and Phillips screwdrivers, and needle-nose pliers—these are essentials that I use for virtually every repair or maintenance task. The versatility of this set makes it invaluable, especially when dealing with tight spaces or stubborn fittings. Additionally, a quality magnetic screwdriver helps limit lost screws and ensures secure fittings, reducing the risk of leaks over time. For checking water pressure and flow, I rely on a digital manometer which allows me to verify that incoming water meets manufacturer specifications, preventing issues that could void warranties or cause damage. As the trend shifts toward smart appliances, integrating diagnostic software like Whirlpool’s Smart Diagnostic app has become increasingly popular among DIY enthusiasts, providing real-time troubleshooting insights and reducing unnecessary service calls. Looking ahead, I predict that future maintenance tools will incorporate AI-driven diagnostics, offering predictive alerts for part wear and failure before symptoms even appear.
If you’re serious about keeping your dishwasher in top shape, I recommend trying out the inspection checklist periodically using dedicated inspection mirrors and LED flashlights. Regularly verifying your connections and parts prevents small issues from snowballing into costly repairs or voided warranties. Remember, preventative maintenance with the right tools not only extends your appliance’s lifespan but also saves money in the long run. For detailed guidance on scheduling routine checks, see this comprehensive guide.
How do I maintain dishwasher parts over time?
Maintaining your dishwasher’s parts involves more than just periodic inspections; it requires cleaning and timely replacements. I routinely remove and clean sprayer arms, paying close attention to small holes that can clog with mineral deposits, especially in areas with hard water. Using a mixture of vinegar and baking soda is effective, though I recommend consulting the proper cleaning techniques to avoid damaging delicate sensors. Additionally, gasket maintenance is crucial; applying a silicone-based lubricant helps keep seals flexible and leak-proof. Replacing worn parts like inlet valves or hoses at the first signs of deterioration prevents leaks and maintains efficiency. Always refer to manufacturer recommendations and check warranty guidelines before undertaking repairs. As the market evolves, I foresee smarter sensors capable of alerting homeowners to part degradation via smartphone alerts, making preventative maintenance even easier.
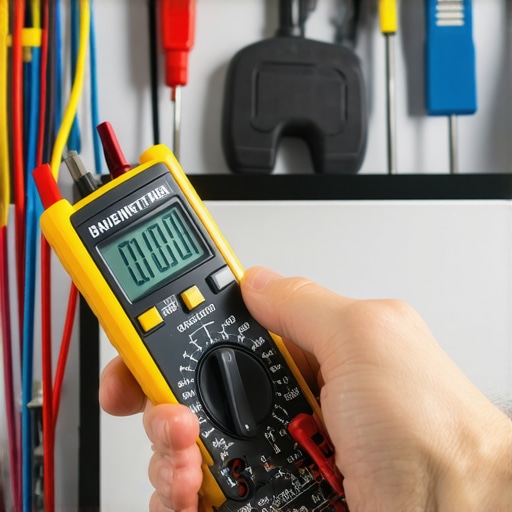
What I Wish I Knew Before Starting My Dishwasher Upgrade
My biggest lightbulb moment was realizing that not all parts are created equal—cheap plastic hoses can seem tempting but often lead to costly leaks and warranty issues. Investing in quality, like stainless steel braided hoses, saved me from future headaches and was a game-changer in my maintenance routine.
Another lesson learned the hard way was that proper wiring and plumbing aren’t optional—they’re essential. Overlooking these details can void warranties and cause operational failures, so I always double-check manufacturer specifications and use trusted resources to guide my installations.
Finally, regular inspections and proactive maintenance have proven to be invaluable. Simple tasks like cleaning spray arms and checking seals prevent minor issues from escalating, ensuring my dishwasher runs smoothly and protects my investment long-term.
Tools and Resources That Keep Me Confident
- 10-in-1 Repair Toolkit: Versatile and compact, this toolkit simplifies DIY repairs, especially in tight spaces. I use it for almost every maintenance task, saving time and ensuring secure fittings.
- Digital Manometer: Verifies water pressure to prevent leaks or damage caused by incorrect flow—an essential for detailed diagnostics.
- Smart Diagnostic Apps: Modern tools like appliance-specific apps help identify issues early and guide repairs, making troubleshooting less intimidating.
- Guides and Checklists: Trusted resources like this detailed checklist help me stay organized and thorough during inspections and installations.
Your Turn to Shine with Smart Maintenance
Taking control of your dishwasher’s performance isn’t just about fixing problems—it’s about protecting your home and peace of mind for years to come. With the right knowledge, tools, and proactive habits, you can ensure your appliance serves you well and stays warranty-compliant. Now, it’s your chance—what’s the one maintenance step you’ve been putting off that could save you money or frustration? Share your experiences in the comments below! That simple action might be the game-changer you need to keep your dishwasher running like new.
Related Posts
The Easiest Way to Replace a Broken Bottom Rack Wheel
One morning, I open my dishwasher and find a side…
The $5 Part That Stops Your Lower Rack From Jumping Tracks
Ever had that heart-sinking moment where, during a wash cycle,…
The $10 Tool Every Homeowner Needs for DIY Dishwasher Repairs
You know that sinking feeling when your dishwasher starts acting…