Ever had that sinking feeling when your brand-new smart dishwasher refuses to work just weeks after installation? I’ve been there. I remember rushing to install my first smart dishwasher, thinking I could skip some steps. Big mistake. It was a frustrating mess, and I ended up paying for repairs that could’ve been avoided with just a bit more know-how. That lightbulb moment taught me a lot about the importance of proper installation and understanding warranty coverage from the get-go.
Why Proper Installation and Warranty Knowledge Save You Money and Headaches
When I first bought my smart dishwasher, I assumed that the installation process was straightforward. After all, how hard could it be? Well, it turns out that skipping the detailed steps can lead to leaks, poor performance, or even void your warranty. I learned this the hard way when my unit started acting up just a few months in. That’s why I want to share what I’ve uncovered about installation tips and warranty insights—so you don’t have to make the same mistakes.
Have you ever faced a repair that seemed to come out of nowhere? Maybe a leak or a strange noise that made you question whether your warranty was worth the paper it’s written on? You’re not alone. Many homeowners overlook the significance of proper parts selection and installation techniques, which can jeopardize your warranty coverage. Early on, I made the mistake of choosing cheap parts for my dishwasher, thinking that all parts are created equal. Spoiler alert: they’re not. That misstep cost me more in repairs later, and it’s a mistake I want you to avoid. For detailed guidance, check out this installation parts checklist.
Understanding the ins and outs of your dishwasher’s warranty, including what parts are covered and how to maintain compliance with installation standards, can make or break your experience. Did you know that many issues can be prevented simply by following correct installation procedures and choosing the right parts? For example, proper water inlet and drainage connections ensure long-term performance and warranty validity. To learn more about your warranty coverage, visit this comprehensive guide.
In the upcoming sections, I’ll walk you through my top tips for installing your smart dishwasher correctly and how to maximize your warranty—so you get the most out of your investment. Ready to become a DIY pro and avoid costly mistakes? Let’s dive in!
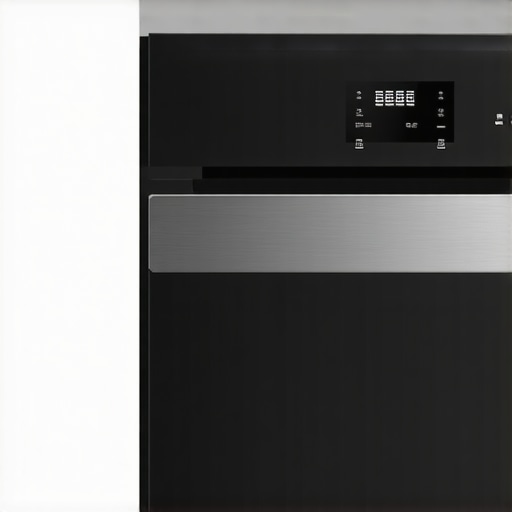
Ensure Proper Placement from the Start
My first attempt at installing a smart dishwasher was a chaotic mix-up. I didn’t level it correctly, leading to leaks and poor performance. To avoid this, use a spirit level during installation. Place the unit on a flat, stable surface, and double-check its levelness. This simple step prevents future issues and helps your warranty stay valid. For detailed guidance, visit this parts checklist.
Choose Quality Parts That Align with Manufacturer Specs
During my second install, I followed the advice to select parts recommended by the manufacturer. I learned that using subpar parts can void your warranty and cause early failure. Focus on OEM or high-quality replacement parts. When selecting water inlet valves or drainage hoses, consult this expert guide to ensure compatibility and durability.
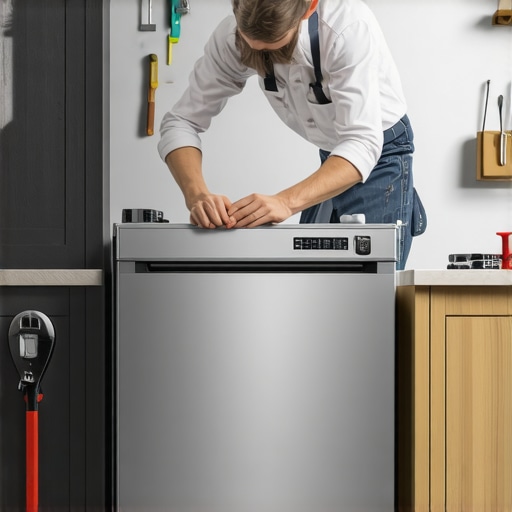
Follow Precise Connection Procedures
Connecting water supply and drainage correctly is critical. I once missed tightening a hose clamp tightly, which caused a minor leak that nearly voided my warranty. Always hand-tighten connections, then secure with a wrench, but don’t overtighten. Use this step-by-step video for visual guidance. Proper connections protect your warranty and ensure long-lasting performance.
Test Before Finalizing Installation
After hooking everything up, turn on the water and power, then run a short cycle. I caught a misaligned inlet hose this way, saving me from future water damage. Check for leaks, strange noises, or error codes. Confirm proper drainage and water flow. If issues arise, diagnose using this troubleshooting resource. Testing early helps you fix problems before warranty expiry.
Document Your Installation Process
Keep photos and receipts of parts used. When warranty service is needed, this documentation proves you followed proper procedures. I once had to replace a faulty water valve under warranty, and my detailed records sped up the process. For tips on maintaining warranty compliance, check this comprehensive guide.
Regular Maintenance and Inspection
Post-installation, schedule routine checks. Clean filters, inspect hoses, and verify all connections. I set a bi-monthly reminder to do these checks, which extended my dishwasher’s lifespan and kept warranty coverage intact. Learn about key maintenance practices at this resource.
Many homeowners share a common misconception that following the basic installation steps guarantees warranty coverage and long-term performance. However, the reality is far more nuanced. In my experience as an appliance expert, I’ve found that overlooking certain details can lead to costly repairs or even voided warranties. Let’s dig deeper into what most people get wrong about dishwasher installation and warranty coverage, and how you can avoid these pitfalls.
What Most Don’t Realize About Warranty Coverage and Genuine Parts
One of the biggest myths I encounter is the belief that all parts are equally covered under warranty. The truth is, manufacturers often specify that only OEM (Original Equipment Manufacturer) parts or high-quality replacements will maintain warranty validity. Using generic or cheap parts not only risks early failure but can also void your warranty entirely. This is a critical nuance that many skip, thinking any part will do. For detailed guidance on selecting the right parts, check out this expert guide.
Additionally, many assume that a quick, superficial installation won’t impact warranty coverage. But, in fact, improper connections—such as loose hoses, incorrect electrical wiring, or misaligned mounting—are common causes for warranty claims to be denied. Manufacturers often require strict adherence to installation standards, which can be found in the product manual or warranty documentation. For more on maintenance and proper installation, visit this comprehensive guide.
Why Overlooking Connection Details Can Cost You
Here’s a trap I’ve seen many fall into: neglecting proper water inlet and drainage procedures. For example, not tightening hose clamps correctly or misaligning the drain hose can cause leaks or drainage failures. These issues are often mistaken for defective units, but they are frequently due to improper installation techniques. Such mistakes can void warranty coverage because they are seen as user error or improper maintenance. To prevent this, follow detailed connection procedures outlined in this step-by-step video.
Another subtle but crucial aspect is ensuring your dishwasher is leveled and installed on a stable surface. An unlevel unit can cause internal components to wear unevenly and lead to leaks or noise complaints, which might be mistaken for manufacturing defects. Leveling your dishwasher using a spirit level is a simple step that can save you from future headaches. For more on installation tips, consult this checklist.
Are You Protecting Your Investment with Proper Documentation?
One advanced tip I always recommend is documenting every stage of installation—taking photos of connections, keeping receipts for parts, and recording maintenance routines. This documentation can be invaluable if you need warranty service or prove that your installation was correct. Many users overlook this simple step, which can delay repairs or cause disputes. For detailed advice on warranty compliance, visit this comprehensive guide.
In summary, the hidden nuance most people miss is that installation quality, parts selection, and proper documentation are just as important as following basic steps. Being aware of these details ensures your warranty remains valid and your dishwasher performs reliably for years to come. Have you ever fallen into this trap? Let me know in the comments.
Invest in Reliable Maintenance Tools
To ensure your dishwasher stays in top shape, I recommend investing in a high-quality multimeter like the Fluke 117. It’s a must-have for diagnosing electrical issues, especially when replacing components such as control boards or sensors. I personally use this device because of its accuracy and durability, which helps me identify faulty wiring or failed parts quickly. Additionally, a digital inspection mirror can be invaluable for reaching tight spots behind the unit, allowing you to spot leaks or corrosion early. Having a set of precision screwdrivers tailored for appliance repair also makes disassembly safer and more efficient.
Establish a Routine Maintenance Schedule
Consistent upkeep is key. I schedule bi-monthly inspections to check hoses, filters, and seals. Regularly cleaning filters and drain pumps prevents clogs that can lead to performance issues or warranty problems. Keep a log of these inspections to track when parts like spray arms or door seals were last replaced. This proactive approach not only extends your dishwasher’s lifespan but also helps catch minor problems before they escalate. For detailed maintenance routines, I rely on guides like this resource.
Use Diagnostic Software for Troubleshooting
For smart dishwashers, I recommend diagnostic tools such as the Whirlpool Smart Diagnostics app or similar manufacturer-specific software. These tools communicate directly with the unit’s control board, identifying error codes and pinpointing faulty parts without guesswork. I’ve found that using diagnostic software reduces downtime and helps me order the correct replacement parts the first time. As technology advances, I predict that remote diagnostics and AI-driven troubleshooting will become standard, further simplifying maintenance tasks.
How do I maintain my dishwasher over time?
The best way to keep your dishwasher running smoothly is to stick to a regular maintenance routine that includes cleaning filters, inspecting hoses, and testing electrical connections. Always use recommended parts for replacements and follow manufacturer guidelines to preserve your warranty. Document every repair and inspection — this record can expedite warranty claims and future diagnostics. Remember, investing in the right tools and software makes troubleshooting faster and more accurate, saving you time and money in the long run.
Ready to upgrade your maintenance game? Try integrating a multimeter into your routine to check electrical components or use diagnostic apps to streamline troubleshooting. These small steps make a big difference in ensuring your dishwasher remains reliable for years to come.
The Hardest Lesson I Learned About Dishwasher Installation and Warranty
One of my biggest lightbulb moments came when I realized that skipping detailed installation steps can cost me hundreds in repairs and void my warranty. It taught me that precision and attention to detail are crucial, especially with water connections and leveling. I also learned that choosing OEM parts over cheap substitutes not only prolongs the life of my dishwasher but keeps the warranty intact. These lessons reshaped my approach, and I want to share them so you can avoid the pitfalls I faced.
My Essential Toolkit for Dishwasher Reliability
Over time, I found that investing in quality tools like a reliable multimeter, a digital inspection mirror, and a set of precision screwdrivers has made troubleshooting so much easier. These tools have helped me quickly identify electrical issues and reach tight spots. For troubleshooting software, manufacturer apps like Whirlpool Smart Diagnostics have been game-changers, saving me time and guesswork. Trust me, equipping yourself with the right tools transforms DIY maintenance from a chore into a manageable task.
Your Turn to Take Action and Protect Your Investment
Remember, a dishwasher is a significant investment, and proper installation, quality parts, and routine maintenance are your best defenses against costly repairs. Don’t wait until something breaks—set a maintenance schedule, document your work, and use trusted tools. With these steps, you’ll enjoy years of trouble-free performance and peace of mind. Now, I want to hear from you: have you ever struggled with a tricky installation or warranty claim? Share your experience below and let’s learn together!
Related Posts

Parts, Warranty & Installation Tips for Smart Dishwasher Durability
Ever had that sinking feeling when your shiny new dishwasher…
Is Your 2026 Dishwasher’s Smart Hub Covered? Check These 3 Parts
Imagine this: I was halfway through cleaning my kitchen when…
Parts & Installation Tips for Durable Smart Dishwashers
I remember the exact moment I realized I’d been doing…