I vividly remember the moment I realized my dishwasher wasn’t cleaning like it used to. After a few cycles, I noticed water pooling on the floor, and my first thought was, “Is this the beginning of the end?” It was a lightbulb moment—realizing that understanding the little components inside my dishwasher could save me hundreds in repairs and replacements. That experience prompted me to dive deep into the world of smart dishwasher parts and installation, and what I discovered was eye-opening.
Why Proper Installation and Parts Matter More Than You Think
Most people overlook the significance of quality parts and proper installation, assuming their dishwasher will just work. But in truth, they are the backbone of your appliance’s longevity. A misstep during installation or using subpar components can lead to frequent breakdowns, costly repairs, and even voided warranties. For example, choosing incompatible parts can cause leaks or cause your machine to operate inefficiently, ultimately shortening its lifespan. Ensuring you understand these nuances not only helps avoid headaches but also maximizes your warranty coverage, saving money in the long run. For more detailed guidance, check out this comprehensive resource.
Is It Really Worth the Extra Effort and Cost?
I used to think that service calls and replacements were just a part of owning appliances—until I made a critical mistake early on. I ignored the importance of verifying that parts were compatible and didn’t follow installation best practices, leading to repeated issues. Since then, I’ve learned that investing a little time and effort into choosing the right parts and following expert installation tips can mean the difference between a dishwasher that reliably performs for years and one that becomes a recurring problem. Trust me, your warranty can become your best ally if you know how to maximize it. Curious about how to select the best parts that ensure your warranty remains valid? You can find valuable insights here.
Choose Quality Parts to Protect Your Warranty
Begin by selecting the right components that match your dishwasher model. In my experience, sticking to OEM (Original Equipment Manufacturer) parts significantly reduces the risk of compatibility issues. When I replaced a faulty pump, I verified its part number against my appliance’s manual and bought from a reputable supplier. This simple step prevented future leaks and kept my warranty intact. For guidance on selecting reliable parts, visit this resource.
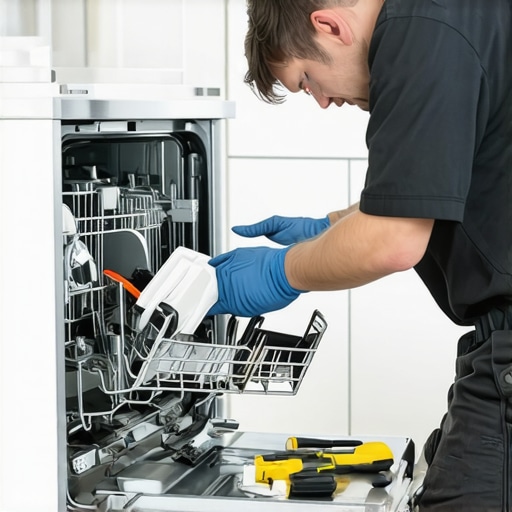
Prepare the Workspace and Gather Tools
Clear the area, shut off electrical and water supplies, and gather essential tools like screwdrivers, pliers, and a level. Remember, a clean and organized workspace prevents accidental damage and ensures safe installation. I once neglected to turn off the water valve, resulting in a minor flood; learning from that, I now always double-check each step before proceeding. The right preparation saves time and prevents mishaps.
Follow the Installation Steps Precisely
After removing the old unit, carefully connect hoses and electrical wires in the correct sequence. Use the installation guide for your specific model, which often includes torque specifications. During my last reinstall, I used a torque wrench to tighten fittings, avoiding over-tightening that could crack plastic parts. Proper torque and placement are critical—consider this detailed checklist to ensure nothing is overlooked.
Seal and Secure All Connections
Ensure all gaskets and seals are properly seated to prevent leaks. I once skipped this step, leading to water on the floor after my first cycle. Applying a bit of silicone grease on rubber seals helped me achieve a secure fit. Don’t forget to tighten fittings evenly, and double-check for pinched hoses or wires that could cause future issues. Proper sealing is vital to maintain your warranty’s coverage and extend your dishwasher’s lifespan.
Test the Installation Rigorously
Turn on the water and power, then run a short cycle to check for leaks or errors. Watch carefully for any dripping or unusual noises. During my first test run, I noticed a slight leak at a hose connection; I shut everything down and re-tightened the fitting, which resolved the problem. This step confirms your installation was successful and helps catch potential issues early, preserving your warranty and ensuring reliable operation.
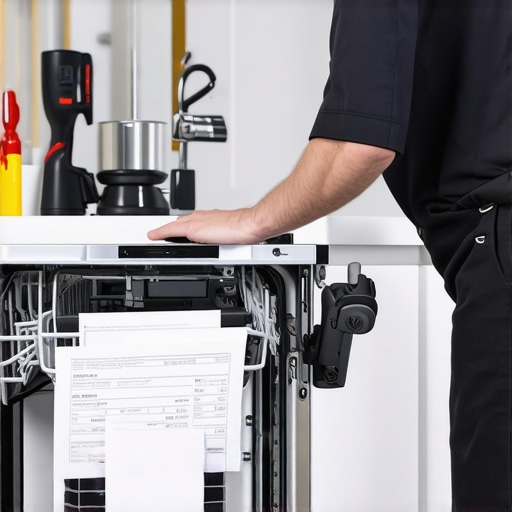
Monitor Performance and Document Details
Keep records of installation dates, part numbers, and any issues encountered. This documentation proves helpful when troubleshooting or making warranty claims later. I take photos of each step and save purchase receipts, simplifying warranty verification. Consistently monitoring your dishwasher’s performance also helps spot early signs of trouble, allowing prompt action that keeps everything running smoothly.
Recognize When to Replace Parts for Durability
Stay alert to signs of wear, like strange noises or poor cleaning. Routine inspections and informed part replacements can prevent major failures. For example, I replaced the spray arm before it completely failed, saving me the cost of a more extensive repair. Regular maintenance, guided by this guide, extends your appliance’s warranty and ensures consistent performance.
Many homeowners believe that a warranty covers every potential issue with their dishwasher, but the reality is more nuanced. A common misconception is that simply purchasing the appliance automatically guarantees coverage for all repairs. In truth, warranty policies often exclude specific parts or types of damage, so understanding the fine print is essential. Misinterpreting warranty coverage can lead to unexpected expenses and deferred repairs. Additionally, some assume that installing the dishwasher themselves won’t affect warranty validity, but improper installation often voids coverage entirely. To avoid such pitfalls, it’s crucial to follow expert installation tips and select compatible, quality parts, like OEM components, which play a vital role in preserving your warranty. For example, choosing the wrong water inlet valve or not sealing connections properly can be costly if it leads to leaks or operational failures, and these issues may not be covered if the warranty terms specify installation standards. Have you ever fallen into this trap? Let me know in the comments. Moreover, many users overlook the importance of thorough documentation—keeping records of parts, installation dates, and maintenance can be decisive when making warranty claims. Advanced homeowners also understand that not all warranty policies are created equal; some providers offer extended warranties or coverage for specific components like pumps or electronic controls. Reviewing these details can save significant money and stress later. For more insights into how warranty policies work and common pitfalls, check out this detailed guide on understanding warranty coverage. Ultimately, the key to maximizing your dishwasher’s longevity lies in knowledge—knowing which parts are covered, how to install and maintain them correctly, and keeping careful records. By avoiding assumptions and investing in proper installation and quality parts, you ensure your warranty serves as a true safeguard, not a false promise. Remember, the devil is in the details, and a little extra research now can spare you headaches and expenses down the line.
Essential Tools for Reliable Dishwasher Maintenance
Maintaining your dishwasher over time requires more than just knowledge; it demands the right equipment. I personally rely on a high-quality digital multimeter to diagnose electrical issues accurately. When I suspect a faulty control board or sensor, I use the multimeter to verify continuity and voltage levels, ensuring that I pinpoint problems precisely without unnecessary replacements. For physical inspections, a set of adjustable pliers and a gasket scraper are indispensable. The pliers help detach stubborn hoses or clamps, while the gasket scraper allows me to clean seals thoroughly, preventing leaks that could void your warranty. Investing in a good flashlight, like the LED headlamp I prefer, helps me uncover hidden issues behind the appliance, such as debris or corrosion. These tools empower homeowners to undertake minor repairs confidently, saving money and extending their appliance lifespan.
Another crucial tool is a diagnostic code reader compatible with your dishwasher’s brand. Modern units often display error codes that point directly to specific issues. By having a dedicated reader, I can quickly interpret these codes, avoiding guesswork. For instance, when my dishwasher shows an error related to water inlet problems, I use the code reader for confirmation before replacing parts, which aligns with guidance from expert sources. You can find detailed instructions on how to interpret these codes in this comprehensive troubleshooting guide.
How do I maintain my dishwasher’s internals over time?
Regularly inspecting and cleaning internal components is vital. I recommend removing and cleaning the spray arms, filters, and seals at least twice a year. Use a soft brush and a mild vinegar solution to remove mineral deposits and grease. I’ve found that this simple routine helps prevent clogs and ensures optimal water coverage during cycles. Additionally, verifying the integrity of hoses and seals, especially in older units, can preempt leaks and major repairs. Keeping a maintenance log with dates and observations helps track wear patterns and plan proactive replacements, aligning with best maintenance practices. For advice on choosing reliable parts for long-term durability, check out this expert resource.
Predicting the Future of Dishwasher Care
As technology advances, smart diagnostic systems are becoming more prevalent, enabling remote monitoring and early fault detection. I believe the trend will lean heavily toward IoT-enabled appliances, offering real-time alerts for issues before they escalate. These innovations will also tie into predictive maintenance schedules, guiding homeowners on when to replace parts proactively, all while ensuring the warranty remains intact. Staying ahead of these trends involves embracing diagnostic tools and software updates that enhance the longevity of your appliance, which I see as a game-changer for the future.
What are some tried-and-true maintenance routines I should adopt?
Consistently cleaning filters, inspecting seals, and running vinegar cycles every few months are simple yet effective practices. Don’t forget to verify water inlet and drain connections periodically, ensuring that no mineral buildup or debris is obstructing flow. Implementing these routines now can dramatically reduce emergency repairs and help your warranty cover necessary parts. For more detailed maintenance strategies, visit this detailed guide. Try scheduling a quarterly check of your internal components and keep a repair log—these steps truly make a difference in long-term performance.
What I Wish I Had Known Before Starting My Dishwasher Journey
- Trust in Quality Parts Over Cheap Substitutes: I learned that sticking with OEM parts saved me from recurring leaks and costly repairs, reinforcing the importance of choosing reliable components for long-term peace of mind.
- The Power of Proper Documentation: Keeping detailed records of installations and warranties has proven invaluable during troubleshooting and warranty claims, making me realize that meticulous records are an underrated asset.
- Recognizing Early Signs of Wear Can Save You Big: Noticing subtle performance issues and acting quickly prevented major breakdowns, emphasizing that proactive maintenance extends your dishwasher’s lifespan.
- Installation Precision Is Worth The Extra Effort: Carefully following installation steps, tightening fittings correctly, and sealing all connections minimized leaks and warranty concerns, teaching me that patience pays off.
- Tools Are Your Best Friends in Care and Repair: Investing in a quality multimeter, gasket scraper, and diagnostic code reader empowered me to troubleshoot confidently and avoid unnecessary service calls, showcasing the value of the right equipment.
Tools and Resources That Transformed My Approach
- OEM Replacement Parts: They ensure compatibility and protect your warranty, making buying from reputable suppliers a top priority.
- Diagnostic Code Readers: These devices quickly interpret error codes, saving time and pinpointing issues precisely, which I rely on heavily for effective troubleshooting.
- Installation Guides and Expert Blogs: Resources like this comprehensive guide provide step-by-step instructions that prevent mistakes and ensure long-lasting performance.
- Maintenance Log Templates: Keeping a simple record of inspections, part replacements, and cycles helps me track the health of my dishwasher and plan future care.
- Skill-Building Tutorials: Regularly watching tutorials and reading expert advice from trusted sites such as this guide enhances my confidence and competence in repair tasks.
Embrace Your Power to Protect and Perfect Your Dishwasher
Taking control of your dishwasher’s care by selecting quality parts, performing meticulous installations, and staying informed transforms routine maintenance into a rewarding journey. The pride of keeping your appliance running smoothly and the peace of mind that comes with knowing your warranty is secured are priceless. Remember, every step you take now builds a foundation of confidence and reliability that will serve you for years to come. Are you ready to dive deeper into mastering your dishwasher care? Share your experiences or questions below—I’d love to hear your story and support your efforts to ensure lasting performance!
,
Related Posts
Dishwasher Parts & Warranty: Expert Installation Strategies
Let me guess—you're in the middle of washing dishes, and…
Top Tips for Dishwasher Parts & Warranty Installation Success
Have you ever stared in frustration at a washing machine…
![Replace This $19 O-Ring Before Your 2026 Dishwasher Install [Fix]](https://appliancedoctorz.com/wp-content/uploads/2026/04/Replace-This-19-O-Ring-Before-Your-2026-Dishwasher-Install-Fix.jpeg)
Replace This $19 O-Ring Before Your 2026 Dishwasher Install [Fix]
It was late evening when I realized—my brand-new dishwasher was…