
I remember sitting on my kitchen floor at midnight, staring at the blinking digital timer on my brand-new dishwasher. It said 58 minutes left, but I had already been in bed for two hours before the low hum woke me up. I felt like I had been duped by the salesman who promised me ‘high-efficiency’ and ‘state-of-the-art’ technology. Instead, I felt like I was back in the 1920s waiting for a hand-cranked tub to finish. If you have ever stood in your kitchen wondering if your machine had simply forgotten how to turn itself off, you are certainly not alone. Today, I am going to help you figure out why your kitchen’s most expensive appliance is moving at a snail’s pace and whether it is a sign of efficiency or a cry for help from a failing sensor.
Modern Machines Aren’t Broken They Are Just Being Thrifty
The biggest shock for most people moving from an old-school machine to a newer model is the marathon-length cycles. We are used to that aggressive, loud scrubbing that finishes in forty-five minutes. However, the reality is that your smart dishwasher is taking four hours to finish because it is designed to soak your dishes rather than blast them with high-pressure water. According to the U.S. Department of Energy, current standards require such extreme water and energy reduction that manufacturers have no choice but to extend the time to maintain cleaning standards. I made a massive mistake when I first noticed this. I assumed the constant running meant my motor was failing, and I almost started tearing into the unit to swap out common dishwasher parts without checking the manual. I nearly voided my entire coverage because I didn’t realize that a long cycle is actually the machine trying to save me money on my utility bill.
Is this four-hour marathon actually worth the wait?
You might be skeptical that a longer run time actually saves money, but it comes down to the temperature of the water and the sensors inside. Your machine uses a turbidity sensor to check how much gunk is floating in the water. If you used a poor detergent or didn’t scrape your plates, that sensor tells the control board to keep the cycle going. This is why understanding dishwasher parts is so crucial for any homeowner. If that sensor is covered in hard water scale, it might be lying to your machine. Before you call a repairman, check if you are accidentally triggering these long times by overfilling the racks or using the wrong cycle. Have you noticed your machine taking longer and longer over the last few months, or has it always been this slow? It is important to know the difference before you start worrying about your dishwasher parts warranty and what it covers.
Stop the Clock by Cleaning the Hidden Eyes
I once spent three hours in a frantic Google spiral trying to figure out why my machine was stuck in a loop, only to realize a tiny piece of a pickle jar label had adhered itself to the turbidity sensor. It was a messy lesson in how these machines think. The sensor is the brain’s eyes; if it can’t see through the water, it assumes the dishes are still dirty. You need to get down there and find the hidden filter under the spray arm. If that filter is clogged, the water remains “cloudy” to the sensor, and the timer will keep adding minutes until it feels the job is done.
Clear the Gunk from Your Sensors Regularly
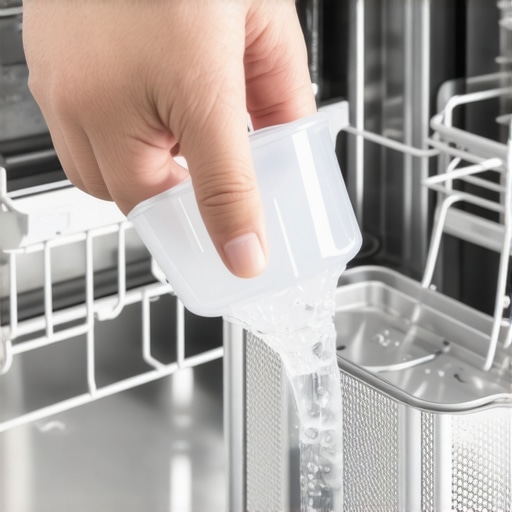
Think of your sensor like a pair of glasses. If they are smeared with grease, you’re going to struggle to see clearly. If your machine is constantly running over its estimated time, it is likely because it’s caught in a feedback loop. One of the most popular dishwasher parts and how they improve performance involves the turbidity sensor’s ability to accurately read water clarity. Wipe it down with a soft cloth and some white vinegar. This simple act can shave forty minutes off your cycle because the machine finally realizes the water is clean. If you find the sensor is actually failing, check how to diagnose dishwasher parts during warranty periods before you commit to buying a replacement.
Heat is the Real Speed Limit
Modern machines don’t have massive, power-hungry heaters like the old ones did. They use smaller elements that take a long time to warm up the water to the necessary 140 degrees Fahrenheit. If your “hot” water tap takes two minutes to actually get hot at the sink, your dishwasher is spending the first hour of its cycle just acting as a kettle. I learned this the hard way when I realized my kitchen sink and dishwasher shared a long, uninsulated pipe. By the time the water reached the unit, it was lukewarm, forcing the internal heater to work overtime while the timer stayed frozen.
Run the Sink Before You Hit Start
To bypass this, always run your kitchen faucet until the water is steaming before you press start. This ensures the first fill is actually hot, allowing the cycle to progress immediately to the wash phase. While you’re at it, test your water inlet valve for failure if you notice the machine is taking too long just to fill up with water. A restricted valve is like trying to fill a swimming pool with a straw; it will eventually get there, but it ruins your afternoon and stresses the motor. Remember that your warranty claim depends entirely on your water temperature in some cases, as internal components are rated for specific heat ranges and can fail prematurely if the water is consistently too cold or too hot.
Avoid the Auto Cycle Trap
The “Auto” or “Smart” cycle is often the longest because it relies entirely on those sensors we talked about. If you are in a rush, use a “Normal” or “Express” cycle, which follows a hardcoded timeline regardless of how dirty the water looks. However, be warned that the quick wash cycle is leaving grit on your plates if you haven’t properly scraped them beforehand. It’s a trade-off: speed vs. perfection. If your machine is still acting up despite these adjustments, you might need to look into when to replace dishwasher parts for optimal performance to ensure the heating element or the drain pump isn’t dragging its feet and artificially inflating your utility bills.
I’ve seen too many homeowners brag about saving fifty bucks on a DIY install, only to lose a thousand dollars in potential coverage because they overlooked a single sentence in their manual. Most people think that as long as the machine fits in the hole and doesn’t leak immediately, the job is done. However, there is a massive difference between a lemon and a faulty installation. If you didn’t follow the specific plumbing codes for your zip code, your manufacturer might use that as an excuse to deny your claim for a failing motor six months from now.
The 10-Year Motor Label is Mostly Marketing
It is easy to get lured in by those shiny stickers on the front of the tub promising a decade of protection. But let’s be real for a second: the truth about those 10-year motor stickers on the door is that they almost exclusively cover the metal part itself, not the labor, the trip fee, or the diagnostic cost. In many cases, paying for a technician to swap that ‘free’ part costs 80% of the price of a brand-new dishwasher. I have spoken to countless readers who were shocked to learn that what happens to your coverage if you use third-party parts is an immediate voiding of the entire policy. If you swap a simple gasket with a generic one from a big-box store, the manufacturer often considers the unit ‘tampered with’ and walks away from their obligations.
Why is my brand-new unit already showing an E-code?
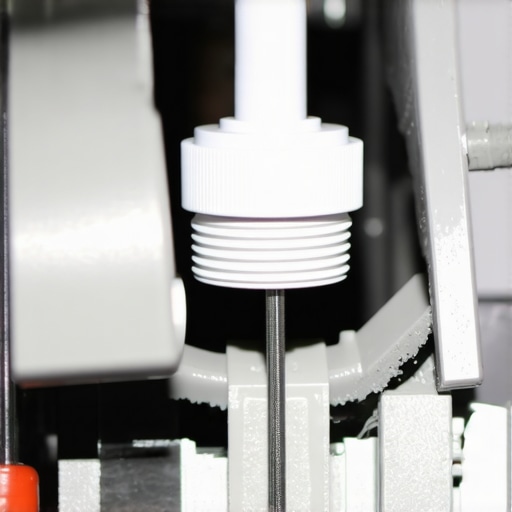
If you just installed a machine and it’s throwing an error code within hours, you likely fell into the most common ‘oops’ in the industry. Many homeowners fail to remove the hidden drain plug that kills your motor during setup. If you recently replaced your garbage disposal as part of your kitchen upgrade, there is a plastic knockout plug inside the disposal’s inlet. If you don’t knock it out with a screwdriver before attaching the dishwasher drain hose, the water has nowhere to go. The machine will fill up, attempt to drain, and when it hits that wall of plastic, the pressure can fry the drain pump or cause the control board to panic. This isn’t a faulty part; it’s a setup error that could have been avoided by double-checking the common dishwasher parts and their role in proper installation.
Why Your Universal Install Kit is a Ticking Time Bomb
I’m going to challenge the common belief that a hose is just a hose. While universal kits are sold everywhere, the problem with universal hoses for high-end European models like Miele or Bosch is that their internal pressure valves are tuned to very specific flow rates. Using a generic, narrow-diameter hose can cause the machine to overwork the inlet valve, leading to a slow, noisy failure. According to the International Association of Plumbing and Mechanical Officials (IAPMO), improper drain line routing and incompatible connectors are responsible for nearly 40% of early-onset appliance failures in residential settings. Always cross-reference your manual for top tips for seamless dishwasher installation in 2025 to ensure you aren’t using a $10 part that ruins a $1,200 investment. Have you ever fallen into this trap? Let me know in the comments. I’d love to hear your horror stories or your victories in getting these machines to behave.
Keep Your Kitchen Dry with This Monthly Routine
Maintenance isn’t just a buzzword; it’s the difference between a machine that lasts fifteen years and one that ends up in a landfill by year four. I’ve found that the single biggest killer of modern units isn’t a faulty motor, but rather a simple buildup of calcium on the heating element. When this happens, the element has to run longer and hotter to reach the same water temperature, eventually cracking under the stress. If you’ve reached that point, knowing how to replace a faulty heating element by yourself can save you a $300 service call. However, a monthly soak with citric acid or a specialized descaler usually prevents this entirely. I also make it a habit to check my sump for debris. You’d be surprised how many ‘broken’ pumps are actually just choked by a stray cherry pit or a piece of plastic wrap. Dealing with essential parts for troubleshooting dishwasher installation issues early on ensures that these minor clogs don’t lead to backflow disasters that ruin your cabinetry.
The Only Two Tools You Actually Need
You don’t need a professional-grade workshop to keep your dishwasher running perfectly. If I could only keep two things in my kitchen junk drawer for appliance care, it would be a 5/8-inch flare nut wrench and a basic digital multimeter. A flare nut wrench is the proper tool for tightening your water supply compression fit because it grips all sides of the soft brass nut, preventing the rounding that happens with standard crescent wrenches. As for the multimeter, it allows you to stop guessing. If your machine isn’t heating, you can test the element’s continuity in thirty seconds. This data-driven approach is vital for maximizing your dishwashers warranty through proper parts selection, as you can provide the manufacturer with proof of failure rather than just ‘it’s not working.’ I always recommend keeping the replacement parts every dishwasher owner should keep on hand, like a spare door gasket and a set of rack wheels, to avoid the two-week wait for shipping when a minor piece snaps.

How do I maintain my dishwasher for a full decade?
Consistency is more important than intensity. Every six months, I pull the unit out just a few inches to check the floor underneath. According to the National Fire Protection Association (NFPA) 70, also known as the National Electrical Code, kitchen appliances with high current draws should be monitored for signs of thermal stress at the connection point. I look for any discolored wire nuts or signs of moisture near the junction box. This prevents fires and ensures you aren’t part of the 40% of homeowners who experience electrical-related appliance failures. Furthermore, I am a firm believer in using OEM components for critical seals. While a generic O-ring might look the same, the real difference between aftermarket and factory gaskets is the chemical resistance to the high-alkaline detergents we use today. Looking ahead, I predict that ‘acoustic diagnostics’ will be the next big shift; we are already seeing tech that allows you to learn how to use your smartphone to diagnose a failing motor by analyzing the frequency of the hum. This AI-driven future will make it impossible for manufacturers to hide behind vague error codes. My best advice for you today? Go into your kitchen, run the hot water at the sink, and listen to your machine’s rhythm—learning its ‘healthy’ sound is your best defense against future repairs. Try using your phone to record a thirty-second clip of your machine while it’s in the wash cycle now; it will be your baseline for comparison if it starts acting up next year.
What the Sales Floor Won’t Mention About Long-Term Care
After years of tinkering and helping neighbors with their appliance woes, I’ve realized that the most expensive repair is almost always the one caused by a $5 oversight. First, never underestimate the ‘high loop’ in your drain line; without it, you are simply inviting your sink’s dirty water back onto your clean dishes. Second, do not be afraid to skip the ‘Smart’ cycle. If you know your load is not that dirty, manually selecting a shorter cycle saves the turbidity sensor from over-calculating and adding unnecessary time. Finally, remember that understanding dishwasher warranty policies for peace of mind is just as important as knowing how to load the racks. It is your safety net when the complex electronics inevitably glitch or when a sensor decides to go rogue.
The Gear I Actually Keep Under the Sink
You do not need a massive professional toolbox to keep things running smoothly. I always keep a small container of food-grade citric acid for descaling; it is significantly cheaper than name-brand cleaners and works wonders on calcium-coated heating elements. I also swear by a 5/8-inch flare nut wrench to prevent slow drips at the supply line, as it avoids the rounding of nuts common with standard wrenches. For those deeper issues, I frequently refer back to expert advice on dishwasher installation troubleshooting to avoid making common rookie mistakes that could lead to water damage. Lastly, always keep a digital copy of your specific model’s parts diagram on your phone—it is the ultimate cheat sheet when you need to identify a mystery component in the middle of a DIY project.
Taking Control of Your Kitchen’s Rhythm
At the end of the day, your dishwasher is a tool designed to serve you, not the other way around. By taking ten minutes once a month to check the filter and wipe down the seals with a soft cloth, you are not just cleaning dishes; you are protecting your home’s value and your own sanity. Investing time into learning about common dishwasher parts and their role in proper installation ensures that your machine runs as efficiently as the day you bought it. You have the knowledge now—go ahead and hit that start button with complete confidence. Have you ever discovered a ‘secret’ maintenance trick or a hidden filter that saved your machine from the scrapyard? Let me know in the comments below!
Related Posts
The $20 Kit That Makes Any Dishwasher Energy Efficient
The first time my dishwasher flooded my kitchen, I felt…
The Water Hardness Setting Most People Never Configure
It was a typical Wednesday when I finally looked under…

The Real Reason Your Energy Star Machine Takes Three Hours to Run
One evening, I stood in my kitchen, staring at my…