
I still remember the smell. It was a Tuesday evening when I finally investigated the damp, musty odor creeping from under my kitchen sink. I opened the cabinet door, reached for a trash bag, and my hand sank into a cold, slimy puddle. It turned out my brand-new dishwasher was backwashing dirty sink water straight into my clean tub, and the excess was slowly rotting my custom shaker cabinets. Why? Because during my rushed weekend installation, I had simply shoved the flexible plastic drain hose through a jagged, low-level hole I hacked into the shared cabinet wall. I made a rookie mistake that bypassed the physical laws of gravity.
The Cost of Getting Your Drainage Wrong
When you are tackling a diy dishwasher installation step-by-step guide, it is easy to focus on the shiny front panel or getting the unit level. But the real magic—and the real danger of water damage—happens behind the scenes in the dark corners of your cabinetry. If you route that drain hose improperly, you risk stagnant water pooling in your machine, premature pump failure, and ultimately, ruining your expensive kitchen floor. Today, I am going to show you exactly how to measure, drill, and route your drain line through that shared cabinet wall so you never have to deal with a flooded kitchen or a voided appliance warranty.
Is a simple plastic hose really worth all this fuss?
Absolutely. Many homeowners assume that because a dishwasher is a self-contained appliance, it handles its own waste removal flawlessly regardless of how the plumbing looks behind the cabinet doors. This is a dangerous misconception. In fact, according to home inspection statistics compiled by InterNACHI, improper dishwasher drain routing—specifically the lack of a high loop or proper elevation—is one of the top ten most common plumbing defects found during real estate transactions. When I first started out, I did not realize that securing a high loop or using a proper cabinet pass-through was vital. I paid the price in warped wood and water cleanup fees, a mistake that could have been avoided with ten minutes of planning and the right common dishwasher parts and their role in proper installation.
Why Gravity is Your Best Friend and Worst Enemy
Your dishwasher pump is designed to push dirty water out, but it is not strong enough to fight gravity indefinitely. Without a high loop or a physical air gap mounted above the flood level of your sink, dirty dishwater from your sink or garbage disposal will siphon back down into your clean dishwasher. Have you ever opened your machine after a wash cycle only to find a pool of murky, smelly water sitting at the bottom? If so, you are likely dealing with this exact routing issue. Have you ever encountered a stubborn pool of standing water in your own kitchen cabinets due to a layout mishap? Let me know in the comments below, because we have all been there, and it is a pain we can easily prevent together.
Step-by-Step Guide to Routing Your Drain Line Like a Professional
Now that you know the physics behind the flow, let us get our hands dirty and map out the exact path your drain line must take. When I first attempted this, I treated the drain hose like an afterthought, shoving it through a ragged hole. The result was a pinched line, a flooded cabinet, and a frantic call to customer service where I learned that improper drainage loops instantly void your warranty. To avoid my messy mistake, follow these three practical execution steps.
Locate the Sweet Spot on Your Shared Cabinet Wall
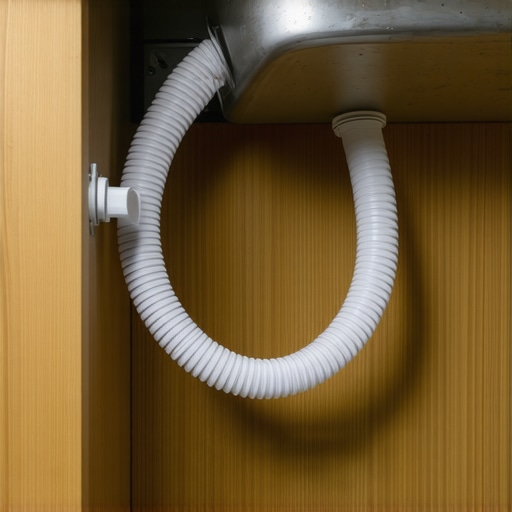
Your cabinet wall acts as the gateway between your dirty dishes and the household plumbing. You need to drill a pass-through hole that is clean, smooth, and positioned correctly. Grab a pencil and measure at least 20 inches up from the kitchen floor on the shared cabinet wall. This height ensures the hose naturally slopes downward toward the sink connection. If you drill too low, you risk creating a trap where stagnant water will sit, leading to bad smells. I use a 2-inch hole saw attached to a standard power drill. This size leaves plenty of wiggle room so you do not pinch the line or scrape the outer casing during a diy dishwasher installation step-by-step guide process.
Secure Your High Loop High Against the Cabinet Ceiling
Think of the high loop as a physical security guard. It is a simple curve in your drain line that rises above the water level of your sink. To create it, pull your drain hose through the newly drilled hole and loop it up to the very top of the sink cabinet. Use a plumbing strap or a heavy-duty plastic zip-tie to secure the hose directly to the underside of your countertop or the topmost edge of the cabinet frame. If you skip this, dirty sink water will gravity-feed back into your clean appliance. Securing this peak is the ultimate high loop vs air gap drainage defense against backflow, and it costs virtually nothing to do right.
Make the Final Connection to Your Garbage Disposal or Sink Tailpiece
With your high loop secured, the remaining length of the hose must slope downward to your drain connection. If you are connecting to a garbage disposal, you must knock out the plastic disposal plug first. I once forgot this step and ended up with a dishwasher that refused to drain on its first run, which made me scramble for the essential troubleshooting parts to fix my own oversight. Use a screwdriver and a hammer to tap the plug out, then fish the loose plastic piece out of the disposal chamber. Slide a metal hose clamp over the end of the drain hose, push the hose firmly onto the disposal nipple, and tighten the clamp until it snuggly compresses the rubber. Do not overtighten, or you might crack the plastic connector.
The Counterintuitive Truth About New Appliance Parts
Most DIYers believe that a brand-new appliance comes out of the box ready to install with everything needed for a lifetime of trouble-free service. In my experience, relying solely on the stock factory components is a recipe for premature failure. While manufacturers package basic utility lines with their machines, these default pieces are frequently built to the absolute lowest budget threshold. Instead of settling for standard-issue plastic, seasoned pros actively choose to upgrade their components immediately during setup. Understanding the difference between factory-standard components and heavy-duty alternatives is the true key to installing a dishwasher for long-term performance.
Why do professional installers refuse to use plastic supply elbows?
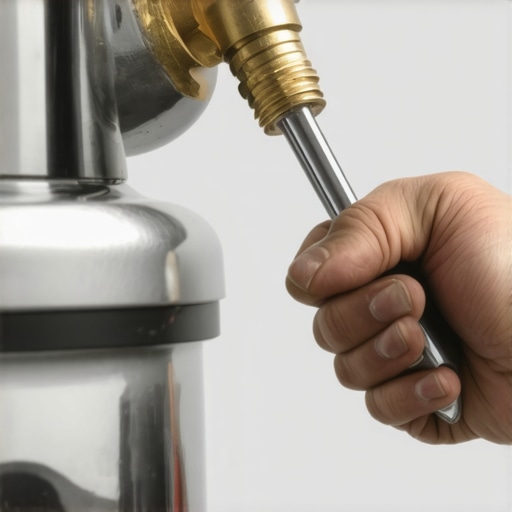
It comes down to a fundamental vulnerability in threaded plastic connections. A common mistake during self-installation is screwing a plastic 90-degree elbow joint directly into the metal water inlet valve of your brand-new machine. Because metal is harder than plastic, it is incredibly easy to cross-thread the connection without realizing it. Under the constant pressure of your home’s water system, a microscopic cross-thread will eventually fail. When that connection shears off at 2:00 AM, you face catastrophic kitchen flooding. This is exactly why professional installers refuse to use plastic supply elbows, demanding solid brass or copper fittings instead. The plumbing industry’s leading safety studies, including data from the Plumbing-Heating-Cooling Contractors Association (PHCC), emphasize that threaded plastic-to-metal connections under continuous domestic water pressure account for a disproportionate number of residential water damage insurance claims.
The Costly Trap of the Reused Water Supply Line
Another deceptive trap is trying to save twenty dollars by hooking your shiny new high-end appliance to your existing copper or braided water line. It looks clean, so why replace it? In reality, water supply lines develop memory crimps and internal mineral scaling over years of use. When you bend and flex that old line to fit the footprint of your new machine, you disturb those internal deposits and weaken the metal braiding. This debris travels straight into your new unit’s inlet valve, clogging the microscopic internal mesh screens. If you want to protect your investment, you must treat your water delivery system as a single cohesive unit. Always pair your setup with selecting the right parts for dishwasher installation to avoid starving your system of water pressure.
How a Minor Installation Shortcut Can Completely Void Your Warranty
Many homeowners believe that a manufacturer’s warranty is an absolute safety net that covers any mechanical failure during the first year. This is a massive misconception. If a service technician arrives at your home and documents that your drain line lacks a high loop, or that you used standard drywall screws to secure the chassis, the manufacturer will deny your claim on the spot. They will categorize the issue as “improper installation” rather than a component defect, leaving you with a hefty diagnostic bill. To keep your coverage intact, you must be meticulous about documentation and follow the manual to the letter. Have you ever fallen into this installation or warranty trap? Let me know in the comments below, because sharing our collective close-calls is how we all learn to build better, safer kitchens. Protect your wallet from day one by learning how to maximize your warranty coverage today.
My Personal Toolkit for a Lifetime of Leak-Free Performance
Over the years, I have moved away from basic adjustable wrenches and cheap utility knives. If you want to ensure your water lines never drip and your drainage stays clear, you need the right gear. First, throw away those standard pliers that slip and mar your fittings. I exclusively use Knipex Pliers Wrenches because their smooth, parallel jaws grip brass connectors without destroying the soft metal. When sealing the water supply line, choosing the right tool is paramount. For years, I struggled with slow drips until I discovered the proper tool to use when tightening your water supply line, which prevents over-torqueing while ensuring a watertight seal. I also keep a compact inspection mirror and a high-lumen headlamp in my kit so I can visually inspect the rear pump housing for slow drips during the first test cycle.
How do I maintain my dishwasher plumbing over time?
To keep your system running optimally, you must treat your dishwasher as a dynamic mechanical system that requires periodic check-ups. I recommend inspecting your under-sink connections every single month. Debris, grease, and food particulate can settle in your drain path, which eventually forces your pump to work twice as hard. This added strain is the primary reason pumps fail prematurely. According to technical bulletins from the Association of Home Appliance Manufacturers (AHAM), regular consumer maintenance—specifically clearing the fine mesh filter and verifying the drain line’s high loop integrity—reduces service calls by up to forty percent. Keeping these components clear is essential for understanding dishwasher parts as a key to effective maintenance and ensuring your appliance reaches its full decade-long lifespan.
Smart Sensors and the Future of Kitchen Protection
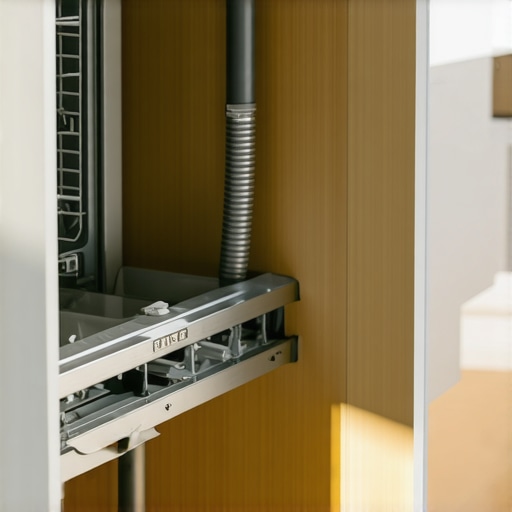
As we look toward the future of home appliances, the integration of smart technology is changing how we handle preventative maintenance. In my own kitchen, I no longer rely solely on manual inspections. I have installed digital water-intrusion sensors directly beneath my dishwasher’s tub and inside the shared cabinet cavity. The industry is rapidly moving toward integrated smart shut-off valves that automatically cut water supply the microsecond a pressure drop is detected. Investing in a simple twenty-dollar smart sensor that detects leaks before they ruin your subfloor is the ultimate modern insurance policy. If you want to protect your home and keep your warranty intact, I highly recommend upgrading your setup with these simple, modern safeguards. Try installing a smart leak detector under your sink cabinet this weekend to experience true peace of mind.
3 Myths About Dishwasher Drainage and Warranties That Held Me Back
When I first started handling my own kitchen plumbing, I bought into several widely shared myths that almost cost me thousands of dollars. First, I assumed that a dishwasher’s internal pump was powerful enough to clear any line regardless of the elevation. In reality, relying on raw pump power without setting up a proper slope is a quick way to burn out the motor. Second, I believed that if a part was brand new, it was guaranteed to work flawlessly. However, as I quickly learned, using the default plastic connections bundled in the box often leads to slow, hidden leaks. Finally, many DIYers believe that a manufacturer’s warranty is an unconditional safety net. The truth is that a single minor installation shortcut—like omitting a high loop—can completely void your coverage. Taking the time to understand understanding dishwasher warranty policies for peace of mind is the best way to safeguard your investment from day one.
My Essential Toolkit for a Lifetime of Dry Cabinets
To ensure your installation remains completely dry and functional for the next decade, you need to look past basic household tools. Here are the specific resources and items I rely on for every single project:
- Knipex Pliers Wrenches: These are indispensable because their flat, smooth jaws tighten brass compression fittings perfectly without scratching or warping the soft metal.
- Solid Brass 90-Degree Elbows: Never use the stock plastic elbow packaged with your unit. Upgrading immediately to solid brass ensures a lifetime of leak-free service under continuous household water pressure.
- Digital Leak Sensors: I place a twenty-dollar smart sensor that detects leaks directly under the cabinet pass-through to give me instant smartphone alerts at the first sign of moisture.
- High-Lumen Rechargeable Headlamp: You cannot fix or inspect what you cannot see, and a hands-free light source is critical when working inside dark cabinetry.
Take Control of Your Kitchen Plumbing Today
Taking on a diy dishwasher installation step-by-step guide might feel intimidating when you consider the risks of water damage, but you now possess the exact blueprint used by professional plumbers. By taking your time, selecting premium fittings, and securing your high loop, you are protecting both your subfloor and your appliance warranty. Do not let the fear of a leak keep you from upgrading your home. Take it one step at a time, check your connections twice, and enjoy the peace of mind that comes with a job done right. Have you ever struggled with a stubborn dishwasher drain hose or experienced an unexpected leak under your kitchen sink? Let me know in the comments below!
Related Posts
The Junction Box Wiring Step Most Homeowners Get Wrong
Ever had that sinking feeling when you turn on your…
Why Your Dishwasher Door Won’t Latch After a Floor Renovation
It was a morning like any other, until I went…
The $12 Copper Coupler That Stops Kitchen Floor Rot
I remember the moment I first noticed that unmistakable smell…