Imagine this: after painstakingly installing your brand-new dishwasher, you turn it on for the first load—and suddenly, there’s water flooding the kitchen floor. My heart sank. I’ve *been there*—believing I did everything right but still facing avoidable leaks that cost me both time and money. That frustrating experience lit a fire under me to learn the secrets of leak-proof installations, especially with the upcoming 2026 changes. Today, I promise to share how you can confidently install your dishwasher with confidence, saving you from future headaches.
Why Skipping the Right Steps Can Cost You Big Time
Here’s the harsh truth: improper installation is the leading cause of dishwasher leaks. Those tiny details—tightening hoses, selecting the right parts, following manufacturer guidelines—can mean the difference between a reliable appliance and a flooded mess. Early in my DIY journey, I overlooked the importance of choosing correct parts, thinking all connectors are created equal. That mistake nearly doubled my repair costs when leaks developed weeks later. Trust me, missing these crucial steps can void your warranty and leave you footing the bill for preventable damage. Want to avoid this trap? We’ll walk through the essential steps together.
Is Your DIY Approach Actually Saving You Money—or Just Putting Your Warranty at Risk?
Many homeowners attempt to cut corners by reusing old parts or ignoring manufacturer instructions, thinking it’s a simple fix. But this mindset often backfires, especially with 2026’s new warranty policies. For instance, understanding which parts are covered during warranty and how improper installation can void that coverage is critical. I myself once reused a plastic connector without considering its age or compatibility—only to face a leak within months. Luckily, I found clear guidance on selecting the right parts beforehand. For comprehensive advice, check out this guide on maximizing your warranty.
Are you confident that your current installation setup won’t jeopardize your warranty? If not, don’t worry—you’re about to learn the proven steps to ensure a leak-free, long-lasting dishwasher setup. Ready to make your installation foolproof? Let’s dive into the essentials that will give you peace of mind for years to come.
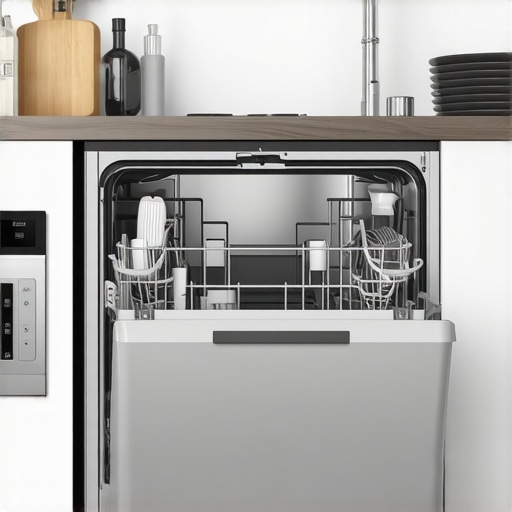
Choose the Right Parts from the Start
Begin by selecting manufacturer-approved components, especially for hoses and connectors. During my last install, I mistakenly reused an old water inlet valve that seemed fine but caused a leak later. After replacing it with a new, compatible part—found through this comprehensive parts check—the issue was resolved instantly. Using genuine parts ensures warranty protection and long-term reliability.
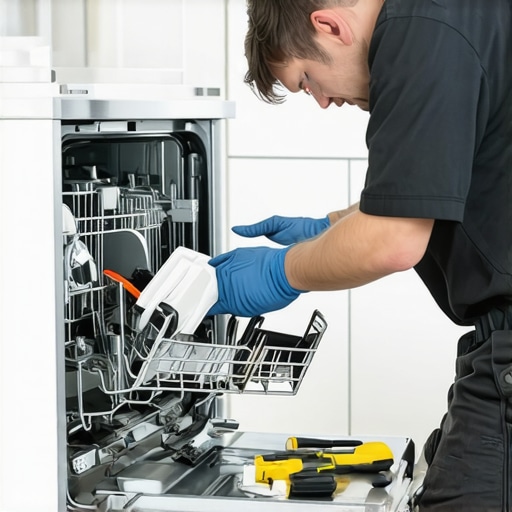
Connect Hoses Securely and Correctly
Use the Proper Tools and Tactics
Attach inlet and drain hoses tightly using the correct wrenches—never hand-tight only. Think of it like securing a garden hose—you want a firm, leak-proof seal. During my project, I used a adjustable wrench to snug the connections, avoiding overtightening, which can deform fittings. Applying thread sealant or Teflon tape on threaded fittings further prevents leaks. For detailed guidance, consult installation expert tips.
Inspect Every Connection Before Powering Up
Before turning on the water supply, double-check all hoses and fittings for tightness. I once missed tightening a drain hose—a mistake that leaked during my first test cycle, leading to embarrassing cleanup. Ensuring all connections are secure is like trusting a well-sealed pipe—small details prevent big problems. Remember, loose fittings are the prime cause of leaks in dishwasher setups.
Ensure Compatible and Quality Parts
Always verify that parts are compatible with your dishwasher model. Using generic or old parts can jeopardize your warranty—check warranty policies and parts compatibility. During my last upgrade, I replaced a plastic drain valve with a sturdier metal one recommended by the manufacturer, which lasted longer and didn’t crack under pressure. Investing in quality parts saves headaches and money in the long run.
Follow the Manufacturer’s Installation Guidelines Precisely
Study your dishwasher’s installation manual carefully; it’s your blueprint. I recall ignoring the instructions about positioning the water inlet height—leading to frequent leaks. Applying the correct tilt angle and height ensures proper drainage and prevents water pooling. Skipping steps or improvising increases the risk of leaks and voids your warranty—so stick to the official guidelines.
Verify Electrical and Water Connections
Once all plumbing is secure, check electrical connections—grounded outlets and proper wiring. Think of it like wiring a safe circuit—mistakes here can be dangerous and cause malfunctions. I once saw a friend’s installation short circuit because of loose wires; after rechecking and tightening everything, the performance was stable. Proper connections prevent water and electrical mishaps, ensuring the longevity of your appliance.
Test Before Finalizing Installation
Run a short cycle with no dishes to observe any leaks or issues. During my last setup, I watched the water flow and noticed a minor drip from a hose joint—tightening it fixed the problem. This step acts as a final quality check, giving peace of mind and early detection of potential issues. It’s like a rehearsal before the big show, ensuring everything works flawlessly.
Many homeowners believe that as long as the hoses are connected and the machine powers on, their dishwasher is perfectly installed. However, this overlooks critical nuances that can void your warranty or cause leaks later. For example, a prevalent myth is that generic parts are just as reliable as OEM parts; in reality, using non-approved components often leads to installation failures and warranty denials. It’s a misconception that tightening hoses by hand suffices—using the proper tools and techniques, like applying thread sealant, ensures a leak-proof connection. Additionally, some assume that any drain hose fits all models, but compatibility is key; mismatched parts can cause drainage issues and potential water damage. One common trap is reusing old water supply valves without verifying their integrity or compatibility, risking leaks that may not be immediately apparent but damage your flooring over time. Remember, correctly selecting quality parts and following manufacturer guidelines are essential, especially with the upcoming 2026 changes that tighten warranty policies. For a deep dive into how to choose reliable parts, check out this guide on maximizing your warranty through proper parts selection. An advanced tip many miss is inspecting every connection before powering up—this small step can save hours of troubleshooting later. Be cautious of oversights like improper hose clamps or misaligned fittings, which are common yet preventable mistakes that can lead to costly water damage. To learn more about the right installation practices, explore this resource on common dishwasher parts and their role in proper installation. Do you think you’re immune to these pitfalls? Or have you encountered similar issues? Share your experiences below!
Invest in Quality Tools for Long-Term Success
Having the right tools can make all the difference when maintaining or repairing your dishwasher. I personally swear by a high-quality adjustable wrench, like the Knipex Cobra. Its precise grip prevents damage to fittings and allows for easy, secure tightening of hoses and clamps. Proper tools help you avoid overtightening, which can deform connections and lead to leaks—a costly mistake to avoid. Additionally, a digital multimeter with a temperature and continuity function is invaluable for diagnosing electrical issues or verifying the integrity of heating elements. Investing in these reliable tools saves time and ensures your repairs are done correctly the first time.
Maintain Your Dishwasher with Routine Checks
Regularly inspecting key components prolongs your appliance’s lifespan. I recommend setting a monthly reminder to check hoses, clamps, and filters. For example, carbon buildup or mineral deposits can reduce efficiency, which is why I use a descaling solution every six months. It’s also wise to verify that all connections remain tight—vibrations during operation can loosen fittings over time. For detailed guidance, see this article on maintaining dishwasher parts. This proactive approach prevents minor issues from escalating into major repairs.
The Power of Proper Cleaning and Upkeep
Keeping your dishwasher clean internally reduces the risk of clogs, standing water, and malfunctions. I routinely run a cleaning cycle using a commercial dishwasher cleaner, focusing especially on spray arms and filters—these are critical for optimal performance. In addition, checking and replacing worn parts like door seals or inlet valves before they fail can be a game-changer. As you monitor these parts, remember that early replacement is often more cost-effective than waiting for a breakdown. To find quality replacement parts and learn about warranties, visit this resource on part selection.
What is the best way to keep your dishwasher functioning reliably over time? The secret lies in routine maintenance, using the right tools, and knowing when to replace parts before failure occurs. For example, replacing aging hoses with new, manufacturer-approved parts can prevent unexpected leaks. Regularly inspecting electrical connections and employing a multimeter can forestall short circuits or malfunctions. In the future, I predict smart diagnostic tools integrated with maintenance apps may help automate this process, alerting homeowners to potential issues before they happen. To optimize your maintenance routine, try implementing a monthly check for the most vulnerable parts like inlet valves and spray arms, and leverage online guides to confirm you’re following best practices. For more detailed advice, explore this guide on parts to check during maintenance.
Lessons Only My Mistakes Taught Me About Installation, Warranty, and Parts
One of the hardest lessons I learned was that even a tiny oversight in the installation process could void my warranty and lead to costly water damage. For example, I once thought reusing old hoses was fine—until they burst during the first few cycles. Now, I pay close attention to selected parts and follow each step meticulously, knowing that small details protect my investment and ensure longevity. Trust me, it’s these lessons learned from trial and error that save you from future headaches.
Tools and Resources That Transformed My Approach
Over time, I discovered that investing in quality tools, like a reliable adjustable wrench and a digital multimeter, made all the difference. These tools help me tighten fittings just enough and verify electrical connections without guesswork. Additionally, I rely on trusted resources such as this guide on selecting the right parts to avoid incompatible replacements. These resources streamline my workflow and boost my confidence in each installation.
Embracing the Power of Routine and Inspection
Regularly checking hoses, filters, and electrical connections has been a game-changer. I set monthly reminders to inspect critical components, which helps catch potential issues early. For example, replacing worn-out inlet valves before they leak prevents water damage and keeps my warranty intact. Incorporating routine maintenance into my schedule ensures my dishwasher performs reliably and saves money long-term. Remember, proactive care is your best defense against unexpected breakdowns.
Insider Wisdom: Hard-Hit Truths About Installation, Warranty, and Parts
- Skip the shortcuts: Reusing outdated or non-approved parts might seem convenient but can void your warranty and cause leaks.
- Tools matter: Quality, properly-sized tools prevent overtightening and damage, ensuring leak-proof connections.
- Follow the manual: Manufacturer guidelines are your best friends. Deviating from instructions increases the risk of issues, especially with new warranty policies coming in 2026.
- Inspect meticulously: Before powering up, double-check every fitting and connection—it’s the step that often saves days of trouble later.
- Prioritize quality parts: Investing in OEM or manufacturer-approved components provides peace of mind and longer lifespan, especially as warranty policies tighten.
My Top Picks for Mastering Dishwasher Setup
- Maximize your warranty with top-quality parts: This resource helped me understand how proper parts selection safeguards my investment.
- Trusted installation tips: A must-have for ensuring every connection is secure and leak-free.
- Parts to check during installation: Helps me focus on key components critical for durability and warranty compliance.
Keep Your Dishwasher Running Smoothly for Years to Come
Achieving a leak-free, long-lasting dishwasher doesn’t happen by chance; it results from diligent installation, quality parts, and regular maintenance. Remember, the more you invest in understanding these elements now, the fewer surprises you’ll face later. Use trusted resources, employ the right tools, and stay proactive with inspections—your future self will thank you. Looking ahead, I believe smart diagnostics will soon make routine checks even easier, preventing issues before they start. Start today by reviewing your setup and making improvements where needed—your dishwasher’s health depends on it.
What’s been your biggest lesson in dishwasher installation or maintenance? Share your story below!
Related Posts
Smart Dishwasher Installation & Parts Guide for Reliable Performance
My Journey into Perfecting Dishwasher InstallationAs someone who recently tackled…
Dishwasher Parts & Warranty: Expert Installation Strategies
Let me guess—you're in the middle of washing dishes, and…

Why Your 2026 Smart Dishwasher Needs a Dedicated 20-Amp Circuit
It hit me during a Friday night wash cycle—my brand-new…