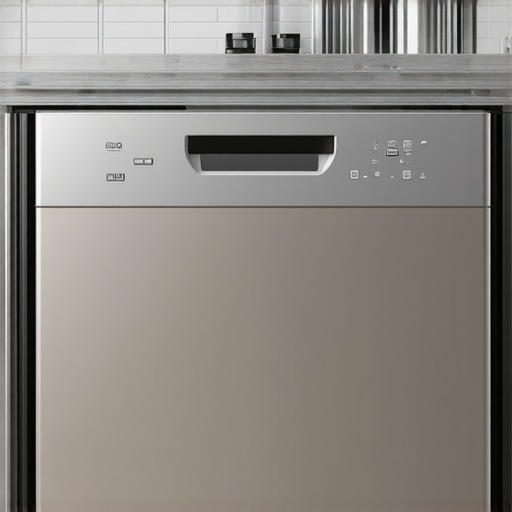
I remember the moment vividly. After finally installing my brand new 2026 dishwasher, I ran my first load only to be greeted by a stubborn leak—soaking the kitchen floor and turning my excitement into frustration in seconds. It was a lightbulb moment that revealed a crucial truth: even the tiniest overlooked part can turn a simple upgrade into a costly nightmare. If you’ve faced similar headaches or worry about making costly mistakes, you’re not alone. Today, I’ll guide you through the 7 critical parts you need to focus on when installing your upcoming dishwasher, ensuring you avoid common pitfalls and protect your investment.
Why Choosing the Right Parts is the Key to a Leak-Free, Long-Lasting Dishwasher
Proper installation isn’t just about plugging and playing. It’s about understanding which parts contribute to a smooth, leak-proof operation that lasts for years. Missing or installing the wrong components can void your warranty, cause operational issues, or even damage your home. Trust me, I learned this the hard way early in my DIY journey. Swapping parts without proper knowledge led me to unnecessary repairs, which could have been avoided by following key installation tips.
For a comprehensive understanding of how to maximize your dishwasher’s performance and warranty coverage, I recommend reviewing this detailed guide on [maximizing your warranty through proper parts selection](https://appliancedoctorz.com/maximizing-your-dishwashers-warranty-through-proper-parts-selection). It’s packed with insider tips that saved me from many installation mishaps.
Is Overpaying for Parts Worth It or Just a Kitchen Folly?
I used to think that spending extra on premium parts was unnecessary. Boy, was I wrong. My early mistake was opting for cheap connectors, which barely lasted a year. It turned out that investing in reliable, high-quality fittings prevented leaks and extended the life of my dishwasher. This lesson underscores the importance of choosing the right components from the start. For a deep dive into the best parts and what to avoid, don’t miss the article on [top tips for selecting the right parts for dishwasher installation](https://appliancedoctorz.com/top-tips-for-selecting-the-right-parts-for-dishwasher-installation). It helped me identify quality parts that stand the test of time.
If you’re wondering how to spot the critical parts or want to ensure you’re not making simple yet costly mistakes, I recommend checking out the [essential parts for troubleshooting installation issues](https://appliancedoctorz.com/essential-parts-for-troubleshooting-dishwasher-installation-issues) guide. It’s a trusted resource that clarified my doubts and prevented me from redoing my work.
Now that we’ve laid the groundwork on why picking the right parts matters, next, we’ll explore the specific components that demand your attention during installation. Equipped with this knowledge, you can confidently install your dishwasher without the stress of leaks, warranty denials, or premature failures. Ready to get started? Let’s dive into the heart of the matter—making sure your dishwasher installation is flawless from the first turn of the valve.
Secure the Water Supply Properly
Start by turning off the water supply and disconnecting the old line, then connect the new supply hose to a sturdy, threaded brass valve—never reuse rubber or plastic connectors that might crack over time. Remember, the key is ensuring a tight seal to prevent leaks. I once reused an old plastic connector without checking its condition, only to find a leak a few weeks later, which cost me time and money. Using high-quality brass fittings can save you from these headaches. Visit this guide for tips on leak prevention.
Position the Drain Correctly
Your drain hose must have a high loop, secured above the sink or countertop, to prevent backflow or siphoning. I once ignored this step, and dirty water siphoned back into my dishwasher, causing an unpleasant smell and possible damage. Clipping the drain hose properly not only protects your appliance but also maintains the warranty’s validity. This article explains how proper draining contributes to long-term performance.
Test the Electrical Connections Carefully
Before powering on, ensure the dishwasher’s electrical plug is firmly seated and that wires are correctly connected according to the manufacturer’s instructions. A loose connection or incorrect wiring can cause shorts or damage the control board, possibly voiding your warranty. I once hurried through wiring, and it led to an immediate trip of the circuit breaker, highlighting the importance of methodical connections. Consult this resource to confirm your wiring setup aligns with safety standards.
Check All Fittings and Clamps
Ensure all connectors—water supply, drain, and inlet hoses—are secured tightly with clamps. A loose clamp can cause slow leaks that worsen over time. I learned this after a minor drip turned into a significant flood, which could have been avoided with a simple check. Tighten clamps securely but avoid over-tightening to prevent damage to hoses or fittings. For more detailed advice, see this guide.
Double-Check the Door Seal
The door gasket is the last line of defense against leaks. Inspect for cracks, warping, or debris that could compromise the seal. During my second installation, I forgot to clean off debris from the gasket, which caused a leak during the first cycle. Regular maintenance, like wiping the seal, helps prevent water escape and ensures your warranty remains intact. Learn more at this resource.
Run a Test Cycle
After all steps are complete, run an empty cycle to observe for leaks, unusual noises, or electrical issues. I once skipped this important step and only noticed a leak after heavy use, leading to damage and service calls. Monitoring during the initial run confirms that all connections are tight and correctly installed, giving you peace of mind and safeguarding your warranty. Visit this page for additional testing tips.Many homeowners operate under the misconception that installing a dishwasher is a straightforward task that doesn’t require much technical knowledge. However, this oversimplification overlooks critical nuances that can make or break your warranty claims. For instance, a prevalent myth is that using generic or cheap replacement parts won’t affect your warranty, but in reality, most manufacturers specify that only OEM or high-quality compatible parts are warranty-eligible. Skipping this detail can result in rejected claims, especially if leaks or failures occur, which are often linked to subpar components. To ensure your warranty remains valid, always refer to comprehensive guides like checking critical parts during installation.
A common oversight people make involves neglecting to properly secure hose connections and ensuring high loops in drain lines, which are vital for preventing backflow. When overlooked, these errors often lead to leaks that are initially unnoticed, but can cause significant water damage later. Remember, the devil is in the details—something even seasoned DIYers sometimes forget. For advanced insights into preventing leaks, this article offers in-depth tips.
A surprisingly overlooked area is the importance of electrical wiring quality. Many think that simply plugging into a grounded outlet suffices, but the wiring must adhere strictly to manufacturer standards to avoid shorts, control board damage, or voiding warranties. A loose connection might seem minor, but it can cause circuit trips or damage that’s not covered under warranty. For expert advice on wiring and electrical safety, visit this resource.
**Are you aware of the subtle mistakes that can disqualify your warranty?** For example, reusing old supply lines, plastic fittings, or ignoring high-quality fittings can seem inconsequential, but these are common reasons warranty claims are denied. Plastic connectors may crack or degrade over time, leading to leaks or failures that a manufacturer won’t cover if improper parts were used. This is why selecting reliable parts, like brass fittings, is crucial for long-term performance. Discover more at this guide.
The subtle nuances extend further into maintenance routines. A quick glance at the door gasket or neglecting to run a test cycle after installation might seem trivial, but these steps ensure early detection of potential issues. Neglecting to perform a thorough initial test can lead to water damage or warranty rejection later on. Don’t forget, detailed pre- and post-installation checks are your best defense against costly repairs.
Leveraging deep industry knowledge, I’ve seen how overlooked details, like ensuring proper clamp tightness or correctly sealing hoses, often make the difference between a successful, warranty-covered installation and a costly fix due to negligence. For more on verifying your installation’s robustness, see this troubleshooting resource.
**Have you ever fallen into this trap?** Let me know in the comments. Remember, understanding these hidden nuances not only protects your warranty but ensures long-lasting, leak-free operation of your dishwasher. Being detail-oriented upfront saves you time, money, and frustration down the line.Maintaining your dishwasher’s performance over the years requires more than just good installation. I rely on a few specialized tools and methods to keep operations smooth and prevent costly breakdowns. One essential item I always keep on hand is a high-quality digital multimeter. This device allows me to quickly test electrical connections and verify the control board’s functionality without risking further damage. For delicate components, I use a precision plastic spudger—this helps in removing panels or disconnecting wiring harnesses without scratching surfaces or creating static issues. When inspecting hoses or fittings, I prefer a flexible inspection mirror coupled with a bright LED light to visualize hidden areas—especially behind or underneath the unit—without needing to move it entirely. These tools save time and reduce the need for guesswork, making maintenance more effective and less stressful.
In addition to hardware, I recommend employing diagnostic software when available. Modern dishwashers with smart features often have diagnostic modes accessible via apps or onboard menus, which can identify leaks, sensor failures, or communication errors early. Regularly running these checks, combined with visual inspections of parts like door seals, drain pumps, and filters, ensures long-term reliability. For example, I advocate for a quarterly inspection routine where I test the electrical continuity of critical components and check for signs of wear or corrosion.
Looking ahead, the trend points toward more integrated diagnostics and remote monitoring in dishwashers. Future models might alert homeowners to potential issues before failure occurs, much like advanced HVAC systems do now. Embracing these technologies early can provide significant peace of mind.
**How do I maintain my dishwasher over time?** I set a schedule for preventive checks—cleaning filters monthly, inspecting hoses every season, and updating firmware when possible. I also document repairs and parts replacements to track wear patterns and plan replacements proactively. These habits not only safeguard your warranty but extend your appliance’s lifespan.
If you want to take your maintenance to the next level, try using a digital multimeter for electrical testing during your next check-up. It’s a small investment that offers quick, measurable insights into your dishwasher’s health and can prevent many common issues from escalating. For detailed guidance on troubleshooting, I recommend reviewing [this resource](https://appliancedoctorz.com/how-to-diagnose-dishwasher-parts-during-warranty-periods) to ensure you’re covering all bases effectively.
The Hardest Lessons I Learned About dishwasher,warranty,parts,installation
One of my most significant realizations was that even the smallest overlooked detail during installation could jeopardize my warranty coverage. I once neglected to secure a hose clamp properly, which led to a leak that cost me hundreds. It taught me that patience and attention to every tiny part are crucial for peace of mind and long-term savings.
Another lesson was about the quality of parts I used. I used cheap fittings, thinking I was saving money, only to replace them twice within a year. Invest in the right, reliable components from the start, and your dishwasher will thank you with fewer issues.
The biggest eye-opener was understanding how proper testing after installation can reveal hidden problems before they escalate. Running a thorough leak check and electrical test isn’t just extra work; it’s a safeguard against future headache.
My Essential Toolkit for Dishwasher Installation Success
- Digital Multimeter: For quick electrical troubleshooting, ensuring wiring is solid and safe.
- Inspection Mirror and LED Light: For viewing behind or under the dishwasher for leaks or fitting issues.
- High-Quality Clamps and Fittings: Always choose brass over plastic to prevent failures.
- Proper Tools and Sealant: Necessary for ensuring tight, leak-proof connections.
These tools have become my go-to arsenal, helping me catch potential problems early. For more detailed advice on the products and their applications, check out this trusted resource.
Take Action and Protect What Matters Most
Installing your dishwasher correctly isn’t just about avoiding messes—it’s about safeguarding your investment and peace of mind. Remember, every small detail, from hose clamps to proper wiring, makes a difference. With the right knowledge and tools, you can ensure your dishwasher performs flawlessly, and your warranty stays intact. Don’t wait for leaks or failures to remind you—be proactive now, and enjoy years of trouble-free operation.
What’s the most surprising thing you’ve learned about dishwasher installation or warranty protection? Share your stories below—I’d love to hear your experiences!
Related Posts

Avoid the Tech Fee: 4 Installation Parts for 2026 Dishwasher DIYers
I'll never forget the moment I realized my simple dishwasher…
4 Small Parts to Double-Check During Your 2026 Dishwasher Install
I remember the moment I realized I overlooked a tiny…

5 Fixes for the Most Common 2026 Dishwasher Install Errors
Ever had that heart-sinking moment when your brand-new dishwasher refuses…