Ever had your brand-new dishwasher wobble and rattle like a washing machine on steroids? I remember the first time I installed mine. I thought I followed all the instructions perfectly, only to find it shaking and making strange noises within days. That lightbulb moment hit me hard: I had overlooked a seemingly tiny detail—the mounting bolt. Turns out, that one mistake can turn a smooth installation into a noisy, unstable mess.
Why a Simple Bolt Can Cause Your Dishwasher to Shake
I’ve learned from personal experience—and a lot of trial and error—that that small, often overlooked mounting bolt is actually the secret to a calm-running dishwasher. When the bolt is not tightened properly or is installed incorrectly, it prevents the dishwasher from sitting evenly. The result? Vibration, noise, and even long-term damage. I used to think that once I secured the mounting bracket, my work was done. But I was missing half the story. Proper installation isn’t just about hooking things up; it’s about ensuring every part is exactly where it needs to be for long-term performance. Early on, I made the mistake of skipping the detailed torque specifications, which only made the problem worse. If you’re curious about which parts are critical during installation, I recommend checking out the comprehensive list of [common dishwasher parts](https://appliancedoctorz.com/common-dishwasher-parts-and-their-role-in-proper-installation), which highlights how each component contributes to stability and function.
Is This Small Bolt Really That Important—Or Just a Seller’s Trick?
Here’s a truth I learned the hard way: ignoring proper bolt tightening isn’t just a minor oversight; it can void your warranty or cause premature wear. Early in my installation, I thought a quick tighten was enough. But I missed the importance of ensuring the torque was within manufacturer specs. This oversight led to increased vibrations and an annoying rattling that had me questioning everything. According to experts, paying close attention to tightening procedures is vital for ensuring your dishwasher operates smoothly and maintains its warranty coverage. For more detailed tips on parts that impact performance, visit [parts to check during installation](https://appliancedoctorz.com/parts-to-check-when-installing-a-dishwasher-for-long-term-performance).
Let’s Fix The Shake and Save Your Warranty
Now that you know what can go wrong, in the next sections, I’ll guide you through the exact steps to identify if your mounting bolt is the culprit, how to tighten it properly, and what other related parts you should inspect to keep your dishwasher running silently for years to come. Ready to troubleshoot and get peace of mind? Let’s delve into the details and make sure your appliance works smoothly from now on—no more unwanted shakes or rattles!
,
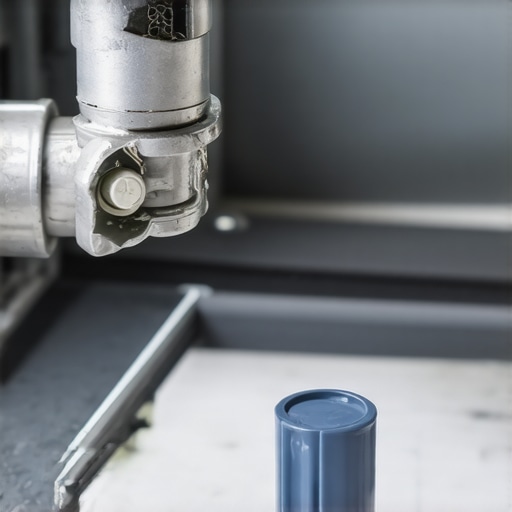
Identify the Mounting Bolt and Assess Its Tightness
Start by locating the mounting bolt that secures your dishwasher to the countertop or cabinetry. Use a flashlight if needed. Gently attempt to turn the bolt with your hand; if it moves easily or feels loose, it’s a clear sign it needs tightening. I once skipped this step and proceeded with the installation, only to discover my dishwasher shaking violently during a test run. Ensuring the bolt is snug is like tightening the lug nut on a wheel—if it’s loose, everything else is at risk.
Prepare the Tools and Safety Equipment
Gather a compatible socket wrench or screwdriver that matches the bolt’s head. Wear safety gloves to protect against sharp edges or pinch points. Having the correct tools prevents over-tightening or stripping the bolt, which can compromise the mounting. I learned this the hard way when using an ill-fitting screwdriver that stripped the bolt head, leading to additional frustration. Confirm the torque specifications from your dishwasher’s manual or manufacturer website, such as top tips for selecting the right parts to avoid damage.
Apply Proper Technique to Tighten the Bolt
Turn the wrench clockwise to tighten the bolt, applying steady, even force. Imagine tightening a bicycle seat bolt—you want firm resistance but not crushing pressure. Use a torque wrench if available, set to the manufacturer’s recommended torque (usually listed in the installation manual). This ensures consistent tightening without risking stripping or breaking components. Once tightened, test its stability by gently rocking the dishwasher side to side. It should feel solid with no movement, akin to setting a tent post firmly into the ground.
Examine Related Mounting Components
Inspect the mounting bracket, screws, and surrounding framework for cracks, rust, or damage. Pay special attention to the clips or anchors holding the bracket in place. Replace any compromised parts immediately to prevent future instability. Remember, a loose bolt isn’t the only culprit—sometimes the mounting hardware itself has weakened over time. To ensure longevity, consider upgrading to stainless steel brackets if your setup involves metal components prone to corrosion. For detailed insights on parts that influence installation longevity, check essential parts for troubleshooting.
Secure the Drain and Water Supply Connections
After the mounting bolt is tight, confirm that water inlet and drain hoses are properly connected and secured. Loose hoses can induce vibrations or leaks that falsely mimic mounting issues. Tighten hose clamps firmly but avoid overtightening, which can cause damage. Think of it like sealing a water bottle—you want a snug fit that prevents leaks but isn’t so tight that it deforms the connection. For guidance on hose installation that supports warranty coverage, see parts to check during installation.
Test the Stability and Functionality
Run a short cycle to observe the dishwasher’s behavior. Listen for unusual rattling or vibrations. If the unit still wobbles, re-tighten the bolt incrementally, ensuring you don’t overdo it. Remember, proper tightening is a balance—too loose causes rattles, too tight may crack parts. I once over-tightened and cracked a plastic bracket, which cost me time and money. Always refer back to the manufacturer’s torque specs to strike the right balance.
Document the Work for Warranty Purposes
Take photos of the secured bolt and mounting area, along with notes on torque settings used. Keeping records like these can be invaluable if you need to claim warranty or troubleshoot further. Many warranties, such as dishwasher warranty coverage, require proof of proper installation. A clear photo log can save the day when verifying that you followed installation guidelines correctly.
 Many homeowners believe that choosing the right parts or following basic installation steps guarantees a long-lasting, warranty-covered dishwasher. However, I’ve discovered through years of troubleshooting and hands-on experience that there are nuanced pitfalls most users overlook, which can inadvertently void warranties or cause premature failure.
Can Your Installation Be Voiding the Warranty Without You Knowing?
Contrary to popular belief, a flawless-looking setup isn’t enough; the specific quality of parts and precise adherence to manufacturer torque specifications are critical. Using generic or low-quality components may seem like a cost-saving move initially, but according to experts at Appliance Doctorz, selecting OEM-approved parts and understanding their role can dramatically extend your dishwasher’s lifespan and warranty eligibility. For instance, improper hose materials or loose mounting brackets can lead to leaks or excessive vibration, which often aren’t visible during a casual inspection. It’s essential to recognize that warranties often require documented proof of proper part selection and installation procedures, especially in complex systems involving electronic sensors and safety features. Including detailed records—such as photos of torque settings or receipts for OEM parts—can be the difference between a covered repair and out-of-pocket expenses. Simply put, what most people get wrong is assuming that standard installation practices are sufficient without focusing on the specifics endorsed by the manufacturer. To sidestep these common traps, I recommend reviewing guides that emphasize the importance of high-quality parts and meticulous adherence to specifications—check out the comprehensive list of [common dishwasher parts](https://appliancedoctorz.com/common-dishwasher-parts-and-their-role-in-proper-installation) to understand each component’s critical role. Additionally, understanding the relationship between proper part selection and warranty coverage enhances troubleshooting and maintenance efforts, as outlined on this [guide to dishwasher parts and warranty](https://appliancedoctorz.com/guide-to-dishwasher-parts-warranty-what-you-need-to-know). Remember, DIY repairs or installations are only as good as your knowledge of these nuances. Avoid the trap of thinking turning a few bolts and connecting hoses is sufficient—acknowledging the importance of specific parts and procedures is what guarantees your warranty remains valid. So, be diligent—your dishwasher’s longevity depends on it. Have you ever fallen into this trap? Let me know in the comments.
Maintaining Your Dishwasher for Peak Performance
Achieving long-lasting, trouble-free dishwasher operation relies heavily on employing the right tools and routines. I personally swear by a high-quality digital torque wrench when tightening mounting bolts—it ensures I stay within manufacturer specifications, preventing damage and voiding warranties. Regularly inspecting key parts like hoses, filters, and seals is vital; I use a set of precision screwdrivers and a flashlight to spot early signs of wear or leaks before they escalate. Incorporating these simple tools into your routine allows you to catch issues early, saving time and money.
In addition to physical tools, software-based diagnostics are transforming maintenance. For instance, many modern dishwashers come equipped with error logs accessible via manufacturer apps or built-in displays. Learning how to interpret these logs helps identify emerging problems like sensor failures or drainage issues, enabling proactive repairs that extend your appliance’s lifespan. I recommend familiarizing yourself with the specific diagnostic procedures outlined in your dishwasher’s manual or consulting expert resources like this guide.
How do I keep my dishwasher functioning smoothly over the years?
Consistency is key. Establish a routine inspection schedule—monthly checks of hoses, seals, and mounting hardware, paired with cleaning filters and spray arms. Use a set of non-abrasive brushes and soft cloths to maintain components without damaging delicate parts. Ensuring proper water hardness levels and installing a quality water softener can prevent mineral buildup that impairs function. Additionally, sticking to manufacturer-recommended detergents and rinse aids reduces residue accumulation that can clog nozzles and sensors. Over time, replacing worn-out parts with OEM-approved components, which you can verify through this resource, maintains performance and safeguards your warranty.
One advanced maintenance tip I encourage all DIY enthusiasts is periodically performing a diagnostic cycle tailored to your model. Many modern dishwashers support this via hidden menus or smartphone apps. This routine uncovers hidden error codes, updates firmware, and calibrates sensors—actions that are often overlooked but crucial for optimal functioning in the long run. Remember, staying proactive with these practices not only extends your dishwasher’s life but also preserves warranty coverage, especially if you document each step with photos and notes.
Looking ahead, the trend points towards smarter, self-monitoring dishwashers that suggest maintenance tasks and automatically report issues. Embracing these technologies now can simplify long-term upkeep. For example, tools like digital torque wrenches and diagnostic apps are becoming standard equipment for professionals and serious homeowners alike. I recommend trying out a digital torque wrench for your next installation or service—it guarantees precise tightening, protecting both your investment and warranty rights. Ready to upgrade your maintenance regimen? Dive into our detailed guides and keep your dishwasher working flawlessly for years to come.
Lessons I Didn’t See Coming About Parts and Proper Setup
- Over-tightening that mounting bolt once seemed like a quick fix, but it cracked a plastic bracket, leading to future instability. The key is precision, not just torque, and trusting manufacturer specs over trial and error.
- Choosing generic replacement parts saved money initially, but after a leak, I realized OEM components and understanding their role are vital for warranty protection and long-term health of your dishwasher.
- Skimping on critical inspections, like water hoses and seals, is a risk that can cost much more than taking the time to document proper parts and procedures—think of it as safeguarding your warranty claims with proof.
Tools and Resources That Changed My Perspective
- The digital torque wrench became my best friend; it guarantees precise tightening and preserves your warranty. I trust it over regular screwdrivers for critical bolts.
- The comprehensive list of common dishwasher parts on Appliance Doctorz helps me understand what each component does and how proper installation boosts performance and warranty longevity.
- Reading guides on selecting OEM-approved parts and adhering to manufacturer specs ensures my repairs and setups are compliant, saving me headaches and money in the long run.
Time to Make Your Move and Keep Your Dishwasher Happy
If there’s one thing I’ve learned, it’s that attention to detail—especially regarding parts, installation, and documentation—is the backbone of a reliable, warranty-protected dishwasher. With the right tools, knowledge, and dedication, you can prevent common pitfalls and extend the life of your appliance. Don’t settle for quick fixes—be proactive and informed. Your future self will thank you for it!
Related Posts

The Drain Pump Grumble: Fix It Before the Floor Floods
It was a typical Saturday morning when I finally heard…
The $4 Plastic Drain Plug That Kills Your Dishwasher Pump Before It Starts
I remember the shock of flipping the switch on my…
The Simple Reason Your Dishwasher Is Not Drying the Top Rack
Imagine this: You've just finished loading your dishwasher, proud of…
Comments are closed.