Ever had that sinking feeling when your dishwasher leaks just a month after installation? I sure have. It was a frustrating experience that made me realize how crucial proper parts selection and installation are for long-term reliability. At first, I thought a quick fix would do, but it turned into a costly lesson. That lightbulb moment pushed me to dig deeper into the world of dishwasher parts and proper installation techniques, and now I want to share what I’ve learned to help you avoid the same pitfalls.
Why Proper Dishwasher Parts Matter More Than You Think
When I first installed my dishwasher, I underestimated the importance of choosing high-quality parts. I believed all parts were created equal—big mistake. A faulty water inlet valve or a poorly fitted gasket can cause leaks, reduce efficiency, and even void your warranty. According to appliance experts, using the right parts is essential not only for immediate performance but also for ensuring your warranty remains valid and your appliance lasts for years. If you’re unsure which parts are critical, I recommend checking out common dishwasher parts and their roles.
Is Skimping on Parts Worth the Risk?
Honestly, I used cheap parts initially, thinking I’d save a few bucks. That was a mistake. The cheap gasket I bought caused a leak within weeks. I learned that investing in quality parts pays off in the long run, especially when it comes to warranty coverage. For a comprehensive list of parts that are essential during installation, see parts to check during installation. Skipping this step can lead to costly repairs and downtime, which nobody wants.
So, if you’ve faced issues like leaks, poor washing performance, or warranty disputes, you’re not alone. The good news is, with the right knowledge and the right parts, you can install your dishwasher confidently and keep it running smoothly for years. Next, I’ll walk you through the key steps to ensure your installation is foolproof and your parts are up to the task. Ready to become your own appliance hero? Let’s dive in.
Choose Quality Parts and Tools for a Solid Start
When I replaced a faulty gasket that caused my dishwasher leak, I learned the importance of selecting high-quality parts. Think of your dishwasher as a delicate machine; using cheap parts is like putting cheap oil in a car—short-term fix, long-term disaster. Always check the role of each part before purchasing. This ensures compatibility and durability, preventing leaks and malfunctions down the line.
Prepare Your Workspace and Gather Essential Tools
Before starting, clear your workspace and gather all necessary tools: adjustable wrenches, screwdrivers, and a bucket for spills. During my first installation, I forgot to have these ready, causing delays and a messy cleanup. Having everything on hand allows for a smooth process and reduces the risk of damaging parts. For a detailed list, see parts to check during installation.
Disconnect Power and Water Supply
Safety first. Turn off the power supply at the breaker and shut off the water supply valve. I once skipped this step, and water sprayed everywhere when disconnecting the old dishwasher. Think of it as turning off the gas before working on a stove—crucial for safety. Confirm the power is off by testing with a voltage tester, and ensure water is fully shut off.
Remove Old Dishwasher Carefully
Disconnect the drain hose and water inlet pipe gently. Support the dishwasher with a helper or a sturdy tool to prevent dropping it. When I removed my first dishwasher, I forgot to detach the water inlet first, causing a leak. Take your time, and follow instructions from disassembly steps for safety and efficiency.
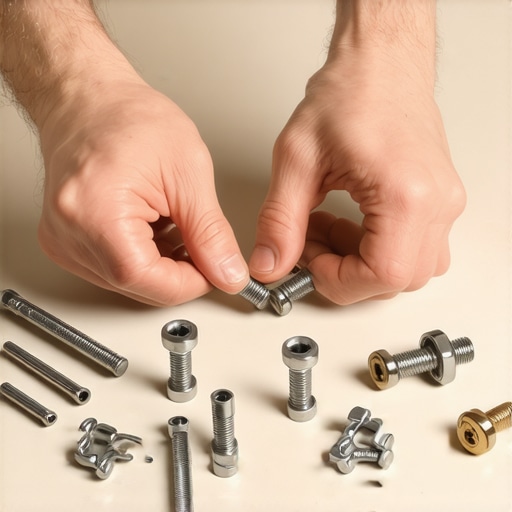
Inspect and Replace Critical Parts
Before installing the new unit, inspect all parts for damage or wear, especially the water inlet valve, gasket, and mounting brackets. I replaced the gasket regardless of condition, which prevented future leaks. Use these tips to ensure long-term performance. Confirm that all parts are clean and free of debris.
Connect New Dishwasher Correctly
Attach the water inlet and drain hoses securely, avoiding kinks or twists. Make sure the gasket seats properly to prevent leaks. During my second installation, I used a new gasket from a reputable supplier, which created a tight seal. Tighten all connections but avoid over-tightening, which can damage threads. Check installation tips for best practices.
Secure and Test the Setup
Mount the dishwasher firmly to prevent movement. Reconnect power and water, then run a short cycle to check for leaks and proper operation. I watched closely during my test cycle, noticing a minor leak from the inlet valve, which I tightened further. This step confirms your installation is solid and your parts are functioning correctly, safeguarding your warranty and ensuring longevity. For troubleshooting, see diagnostic tips.
Many DIY enthusiasts and homeowners believe that selecting any compatible part and following basic installation steps will safeguard their dishwasher’s performance and warranty. However, the truth is far more nuanced. Overlooking critical details can lead to costly repairs, voided warranties, or even permanent damage to your appliance. Let’s dig deeper into what most people get wrong and how you can avoid these pitfalls.
Why Choosing the Cheapest Parts Often Backfires
Everyone says to go for the lowest-priced parts to save money, but in my experience, this is a false economy. Cheap parts—especially gaskets, valves, or hoses—may seem like a good deal initially, but they often lack durability and proper sealing capabilities. This can result in leaks or malfunctions shortly after installation, which not only frustrates you but also risks voiding your warranty. Experts recommend always selecting high-quality, manufacturer-approved parts, even if they cost a bit more. For detailed guidance, check out this resource.
Misunderstanding the Impact of Proper Installation on Warranty
Many assume that as long as the parts are compatible, the installation process is straightforward. But in truth, improper installation—such as misaligned gaskets, loose fittings, or incorrect hose connections—can cause leaks, poor washing, or even electrical issues. These problems often lead to warranty denial because the manufacturer’s terms specify that correct installation is a prerequisite. Take the time to follow professional installation tips and use proper tools to ensure your setup is flawless.
Common Myth: The More You Tighten, The Better
A widespread mistake is over-tightening hoses and fittings, thinking it prevents leaks. In reality, excessive tightening can damage threads, deform gaskets, or crack plastic components. Proper torque—firm but not forcing—is key. If you’re unsure, consult the manufacturer’s torque specifications or these installation guidelines. This nuance often makes the difference between a leak-free setup and a costly re-do.
How to Protect Your Warranty with Correct Parts and Techniques
To maximize your warranty coverage, it’s essential to choose parts that are explicitly covered under your appliance’s warranty policy. Many homeowners overlook this, assuming any compatible part will do. However, using non-approved parts can void your warranty entirely. It’s wise to review warranty policies and ensure the parts you buy are listed as covered. Additionally, documenting your installation process and keeping receipts can prove your adherence to proper procedures if warranty issues arise.
Have you ever fallen into this trap? Let me know in the comments. Remember, investing time in understanding these nuances not only extends the life of your dishwasher but also protects your investment through a valid warranty. Proper parts selection and installation are not just technicalities—they’re the foundation of reliable, long-lasting performance.
Invest in Precision Tools for Long-Term Reliability
When it comes to maintaining your dishwasher, having the right tools is crucial. I personally recommend a high-quality digital multimeter, such as the Fluke 117, because it allows me to accurately diagnose electrical issues without guesswork. A digital manometer also helps ensure water pressure remains within optimal ranges, preventing leaks caused by pressure fluctuations. Using these tools regularly during inspections can catch potential problems early, saving you from costly repairs and protecting your warranty. For detailed guidance on troubleshooting electrical components, visit this resource.
Why I Swear by a Quality Drain Camera
Clogged or improperly installed drain hoses can cause persistent drainage issues. I always keep a compact, waterproof drain camera like the RIDGID SeekTech in my toolkit. It helps me visually inspect the internal pipes for obstructions or damage without invasive disassembly. This saves time and prevents accidental damage to parts, which could void your warranty. As drain issues are common, having a reliable camera can make troubleshooting more precise and less frustrating. Check out this guide for more on preventing drainage problems.
Strategic Maintenance for Peak Performance
Beyond tools, establishing a routine maintenance schedule prolongs your dishwasher’s lifespan. I recommend cleaning the filter and spray arms monthly, inspecting hoses for wear, and replacing worn gaskets proactively. Using a serviceable slip-joint plier and a soft brush, I gently clean components to avoid damage. Regular inspections identify leaks or corrosion early, which is vital for maintaining warranty coverage and ensuring efficient operation. For long-term performance tips, see this article.
Future Trends in Dishwasher Maintenance and Parts
The future of dishwasher maintenance is leaning toward smart diagnostics and IoT integration. Expect more appliances to feature built-in sensors that alert you to issues before they escalate. Staying ahead involves familiarizing yourself with these technologies and investing in compatible diagnostic tools. As innovations continue, I predict that remote monitoring and AI-driven troubleshooting will become standard, making maintenance more accessible and efficient for homeowners. Preparing now with advanced troubleshooting skills will keep your appliance reliable long into the future. Try implementing regular diagnostic checks with a multimeter and drain camera to get ahead of problems before they affect your warranty or performance.
The Hardest Lesson I Learned About parts, installation, dishwasher, warranty
One of my biggest lightbulb moments came when I realized that the quality of dishwasher parts and the precision of installation are directly linked to the longevity of your appliance. Skimping on parts or rushing the install can lead to leaks, poor performance, and even warranty denial. My mistake was thinking cheap parts would do, but I learned that investing in genuine, high-quality components saved me from costly repairs later. It’s a lesson I wish I’d known from the start—your dishwasher is only as reliable as the parts you choose and how well you install them.
What Experts Won’t Tell You About parts, installation, dishwasher, warranty
Many homeowners overlook the importance of proper tools and following manufacturer instructions, assuming that any compatible part will suffice. I discovered that over-tightening connections or misaligning gaskets can cause leaks or damage that voids warranty. The real secret is understanding that correct torque, clean components, and using approved parts are essential for a dependable setup. Trust me, taking the time to learn these details pays off in the long run and keeps your warranty intact.
How I Changed My Approach and Saved Money in the End
Initially, I bought cheap gaskets and skipped some steps to save time, only to face leaks and frustration. After consulting trusted resources and investing in quality parts, my installation became smoother, and my dishwasher runs quietly and reliably. Now, I always check the role of each part and follow detailed guides to ensure my setup is perfect. This shift in approach has extended the life of my dishwasher and kept my warranty valid.
Curated Recommendations for a Foolproof Installation
Here are some tools and resources I swear by: 1. Digital multimeter for electrical diagnosis—trust me, it’s a game-changer.
2. Waterproof drain camera to inspect pipes without invasive disassembly—saves time and prevents damage.
3. High-quality gasket and valve sets from reputable suppliers—these ensure a tight seal and prevent leaks.
And for expert guidance, consult this resource to get the best tips on long-term performance and warranty protection.
Your Turn to Try
Armed with these insights, you’re now ready to tackle your dishwasher installation with confidence. Remember, choosing the right parts and installing them carefully is the foundation of a reliable, long-lasting appliance. Don’t rush the process—your future self will thank you for it. Keep learning, stay patient, and enjoy the peace of mind that comes with a well-installed dishwasher.
Have you ever struggled with a leak or installation mistake? Share your experience below and let’s learn from each other’s lessons!
One Reply to “Expert Guide to Dishwasher Installation & Parts for Lasting Trust in 2025”
Leave a Reply
Related Posts

Reliable Dishwasher Parts & Warranty: Expert Installation Tips Today
Discovering the Secret to a Smooth Dishwasher ExperienceLet me take…
Installation & Warranty Tips for Trusted Smart Dishwashers in 2025
Ever faced that sinking feeling when your brand-new smart dishwasher…
DIY Installation: 4 Parts You Usually Forget to Tighten
Ever tighter screw, and suddenly the dishwasher leaks all over…
Reading through this comprehensive guide really resonated with me, especially since I recently faced a leak issue that turned out to be linked to using a cheaper gasket. It’s clear now that investing in high-quality, manufacturer-approved parts can save a lot of trouble and money down the line. I’ve also learned the hard way that proper installation techniques are just as crucial as the parts themselves. One thing I’ve found helpful is marking and aligning hoses carefully to prevent over-tightening, which as noted, can damage threads and cause leaks. Has anyone experimented with using specific tools, like a torque wrench or gasket sealants, to ensure the best fit during installation? I’d love to hear about techniques or tools that others have found effective in securing long-lasting, leak-proof connections. Proper maintenance and inspection are also topics I want to dive into more—any suggestions on how often I should check critical parts to prevent issues? Thanks for creating such a detailed resource—it’s an excellent reminder that patience and quality really do matter when it comes to appliance longevity.