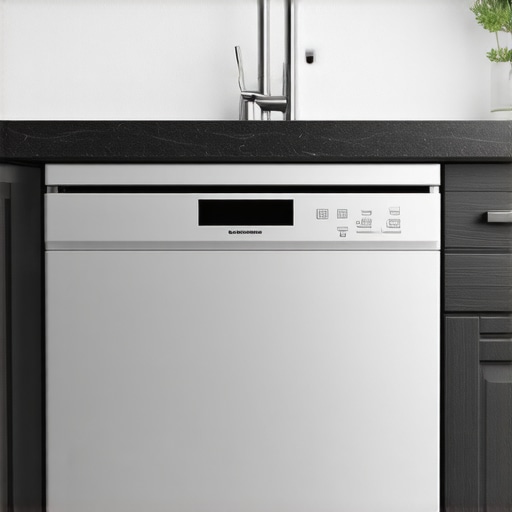
I remember the first time I installed a new dishwasher in my kitchen. Everything looked great—until I stood back and noticed the unsightly gap between the bottom of the appliance and the cabinet toe-kick. Annoyed, I realized that even a tiny misalignment could ruin the overall aesthetic of my sleek kitchen design. That lightbulb moment made me appreciate how crucial proper toe-kick alignment is—not just for looks but also for ensuring the dishwasher functions optimally. Have you ever faced a similar issue where your dishwasher just doesn’t sit quite right, throwing off the entire look of your cabinetry? If so, you’re not alone. Many homeowners overlook this small detail, but it can make a big difference in both appearance and performance.
Why Proper Toe-Kick Alignment Changes Everything
Aligning your dishwasher toe-kick might seem like a minor task, but it’s actually a game-changer for a custom, professional-looking finish. When the toe-kick isn’t properly aligned, it can lead to gaps, uneven surfaces, and even compromised sealing, which might cause water leaks or pest intrusion. Moreover, a well-aligned toe-kick ensures your dishwasher looks integrated into your cabinetry, elevating your entire kitchen’s aesthetic. I’ve found that a perfectly aligned toe-kick can boost your confidence in DIY projects and save you from the costly mistake of a second installation or repair. Interestingly, studies show that improperly installed appliances can sometimes void warranties—so taking the time to get it right is definitely worth the effort. If you want your kitchen’s built-in look to truly shine, mastering this skill is essential.
Skeptical About the Process? Think Again
Now, I admit, I used to be wary about tackling such technical details. Early on, I made the mistake of rushing the installation without double-checking the toe-kick height—leading to awkward gaps. That mistake cost me extra time and frustration. However, I discovered that with the right tools and a bit of patience, aligning a dishwasher toe-kick becomes a straightforward task. Want to avoid my early blunders? Keep reading. I’ll walk you through the practical steps to achieve a seamless, professional look. And if you’re curious about maximizing your warranty coverage or troubleshooting common issues during installation, check out some expert advice on these topics. Proper alignment isn’t just about aesthetics; it also plays a role in the dishwasher’s longevity and efficiency, directly influencing warranty claims and maintenance routines. So, let’s dive into why this little detail can make or break your kitchen upgrade.
Measure Twice, Cut Once: Setting Your Foundation
During my first attempt, I used a tape measure to assess the height difference between the dishwasher’s base and the cabinet floor, ensuring it aligned perfectly. Start by removing the dishwasher and placing a level against its base to check horizontal alignment. Use a measuring tape to confirm the distance from the floor to the top of the toe-kick panel, noting any discrepancies. This initial measurement prevents surprises later and ensures your appliance sits flush. Think of it as laying a solid foundation before building a house—precision here saves headaches down the line.
Adjusting the Toe-Kick for a Custom Fit
Loosen and reposition
Next, loosen the toe-kick mounting screws slightly—don’t remove them completely. With a helper, gently push or pull the toe-kick to align it with the surrounding cabinetry. Tighten the screws just enough to hold it in place, then double-check the level. I once had to readjust twice before it looked right, but patience paid off with a seamless finish. This step is similar to tuning a guitar string—you need to find the perfect tension for harmony.
Use shims for fine-tuning
If the toe-kick sits unevenly, slip thin shims or washers behind the panel to even it out. Carefully insert them at the mounting points and tighten screws gradually. This technique works like a builder stacking blocks to create a perfectly flat surface. Remember, even small gaps can trap water or cause the panel to rattle during operation.
Securing the Toe-Kick to Safeguard Your Investment
Once aligned, ensure all screws are tightened firmly to prevent shifting during use. I often used a torque wrench to apply even pressure, avoiding over-tightening that could crack the panel. Proper fastening is akin to tightening a bike bolt—tight enough to hold firm but not so much as to damage the threads. Secure connections also help maintain warranty coverage; improper installation might void your warranty, so check the guidelines on maximizing warranty coverage.
The Hidden Role of Sealants and Strips
In some cases, sealing gaps with a-quality weather-resistant sealant or foam strips can prevent leaks and pest entry, ensuring your installation remains airtight. I once applied a thin bead of silicone along the edges for extra security, which kept my dishwasher quiet and leak-free. Remember, using the right products prevents future damage and preserves your appliance’s lifespan, similar to choosing the best gasket for a water-tight seal—see essential parts to know.
Test and Confirm the Alignment
Finally, run a short cycle to observe any wobbling, leaks, or unusual vibrations. Use a level to recheck the toe-kick alignment after running the cycle; fine adjustments might be necessary. Properly aligned toe-kicks not only look professional but also function quietly and efficiently, extending your appliance’s life. Think of this as proof of a job well done—no leaks, no rattles, just seamless operation. For further troubleshooting tips, refer to expert advice.
Many homeowners operate under misconceptions when it comes to dishwasher parts and the nuances of installation that affect warranty coverage. A common myth is that replacing any part with a generic or low-quality component won’t impact warranty claims. In reality, manufacturers are increasingly strict about using specific parts during installation or repairs, and opting for non-approved components can void your warranty altogether. This misconception can lead to costly disputes when issues arise, especially if a non-certified part causes further damage or malfunctions. To avoid this, always refer to the diagnostic guides during your warranty period and ensure your parts are compliant with manufacturer standards.
Common Installation Oversights That Cost You
A significant oversight is neglecting the importance of securing proper water and power connections. Many DIY installers skip verifying that hoses and electrical fittings are torqued to the correct specifications, which can jeopardize your warranty and lead to leaks or electrical failures. For example, overtightening water supply fittings might damage the gasket or crack the fitting, resulting in leaks. Conversely, under-tightening can cause leaks that are wrongly attributed to defect rather than installation error. Always use a torque wrench as recommended in professional installation checklists and avoid the trap of ‘tight by feel,’ which rarely achieves the right seal.
Warranty Pitfalls: Not All Parts Are Equal
Another misconception is the belief that all parts, even those bought aftermarket, will be covered under warranty if a failure occurs. However, many warranties specify that only OEM (Original Equipment Manufacturer) parts are eligible for coverage. Installing incompatible or substandard parts can lead to outright denial of a warranty claim, especially if the part failure results in damage to other components. For advanced users, understanding what parts are covered can be nuanced; for example, some models cover only certain brands or specifications. To navigate this complexity, consult detailed resources like the complete list of parts covered by warranty and always document your purchase, installation process, and part compatibility.
Advanced Tips: How to Protect Your Warranty and Your Investment
One of the most overlooked aspects is documenting your installation and maintenance routines thoroughly. Keeping records of part serial numbers, installation photos, and receipts can be invaluable when fighting warranty disputes or seeking manufacturer support. Additionally, regularly inspecting parts like door seals, filters, and inlet valves—as outlined in maintenance guides—can prevent small issues from becoming costly repairs that void your warranty. Remember, warranties are designed to protect your investment, but only if you adhere to the prescribed parts, installation practices, and maintenance schedules.
Have you ever fallen into this trap? Let me know in the comments if you’ve faced issues with parts or warranty claims, so we can learn from each other’s experiences.
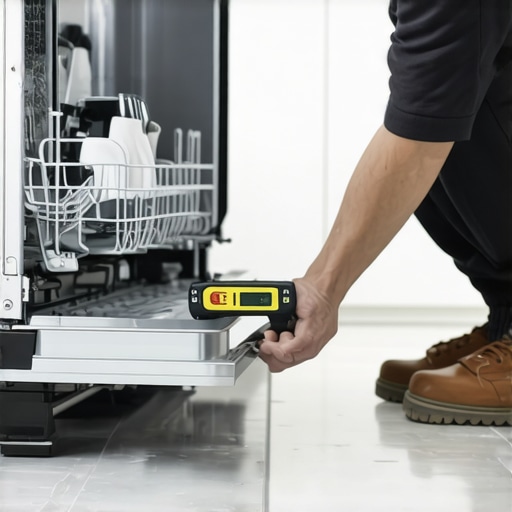
Maintaining your dishwasher’s peak condition requires the right tools and a strategic approach. Over the years, I’ve found that investing in specific equipment not only simplifies repairs but also extends the appliance’s lifespan. One of my go-to devices is a high-quality digital multimeter, which I use regularly to diagnose electrical issues like faulty thermostats or control boards. This precise tool allows me to test voltage, resistance, and continuity—crucial checks that help determine whether a part needs replacement or repair. Learn more about multimeter use here and why it’s indispensable for DIY diagnostics.
Another invaluable device is a reliable spray nozzle cleaning kit. Over time, mineral deposits and debris clog spray arms, reducing wash efficiency. I routinely remove and clear my dishwasher’s spray arms using a dedicated cleaning tube, preventing clogs that could lead to poor cleaning results or mechanical wear. Moreover, investing in a waterproof inspection mirror has saved me countless hours scouting behind panels for leaks or loose fittings, which are often invisible without such tools. These are just a few examples of essential equipment that facilitate both troubleshooting and preventive maintenance.
Predicting Future Trends in Dishwasher Maintenance
Looking ahead, I believe smart diagnostic systems integrated with IoT (Internet of Things) technology will revolutionize appliance maintenance. Imagine receiving real-time alerts on your phone about impending component failures or schedule automated diagnostics that guide you through repairs remotely. As connected devices become more sophisticated, the need for specialized tools may evolve into comprehensive maintenance platforms, making DIY upkeep more accessible and efficient. Staying informed about these emerging trends will help you plan upgrades and investments effectively.
How do I keep my dishwasher working reliably over time?
Consistency is key. Regularly inspecting and cleaning key parts—like filters, spray arms, and seals—prevents minor issues from escalating. I recommend setting a quarterly maintenance routine that includes checking for leaks, testing the control panel, and replacing worn parts before they cause significant problems. Using the right tools, such as a torque wrench for securing fittings or a precision screwdriver set for delicate screws, ensures you avoid damage during maintenance. Also, always verify that you’re using the correct replacement parts, ideally OEM, to maintain warranty coverage and guarantee long-term reliability. Remember, proper maintenance isn’t just about fixing problems; it’s about preventing them from happening in the first place. For guidance on selecting compatible parts, see our expert tips.
To truly optimize your routine, I encourage you to implement a regular diagnostics check using your multimeter—testing the thermal fuse and control board continuity as outlined in this guide. By doing so, you can catch issues early, save money, and extend your appliance’s life. Ready to take your maintenance skills to the next level? Pick up a quality multimeter today and perform your first diagnostic check—your dishwasher will thank you.
The Hardest Lesson I Learned About parts, installation, dishwasher, warranty
One of the most eye-opening lessons I encountered was realizing how a small misstep in toe-kick alignment could compromise an entire kitchen upgrade. Precision wasn’t just about aesthetics but about safeguarding my warranty and extending the lifespan of my dishwasher. That lightbulb moment taught me to never overlook these tiny details again.
3 Myths About parts, installation, dishwasher, warranty That Held Me Back
Believing that generic parts would never affect warranty claims was a costly mistake. Also, thinking that tightening fittings ‘by feel’ was enough often led to leaks and voided warranties. Lastly, assuming professional installation is always necessary for warranty protection, when, in fact, informed DIY with proper tools can be equally reliable.
What Experts Won’t Tell You About parts, installation, dishwasher, warranty
Many professionals keep it under wraps that proper documentation during installation—like photos and receipts—can be your best defense when dealing with warranty disputes. Moreover, using OEM parts isn’t just a suggestion; it’s often a requirement for full warranty coverage.
My Essential Toolkit for parts, installation, dishwasher, warranty
Investing in a quality multimeter has transformed how I diagnose electrical issues, preventing unnecessary repairs and protecting warranty rights. A set of precision screwdrivers and a torque wrench are equally essential, ensuring fittings are secure without damage. These tools have been game-changers in my maintenance routine.
Where to Go from Here
If you’re serious about getting the most out of your dishwasher and warranty, start by understanding the key parts that matter most. Read guides on effective maintenance and consider investing in the right tools. Regular inspections and proper part selection can save you hundreds and keep your appliance running smoothly for years to come.
Your Turn to Try
Are you confident in your ability to correctly align and secure your dishwasher’s toe-kick? Or is there a part or process you’re hesitant about? Sharing your experiences can help others avoid common pitfalls and ensure their appliances stay warranty-compliant. What’s your next step in mastering dishwasher maintenance? Let me know below.
Related Posts
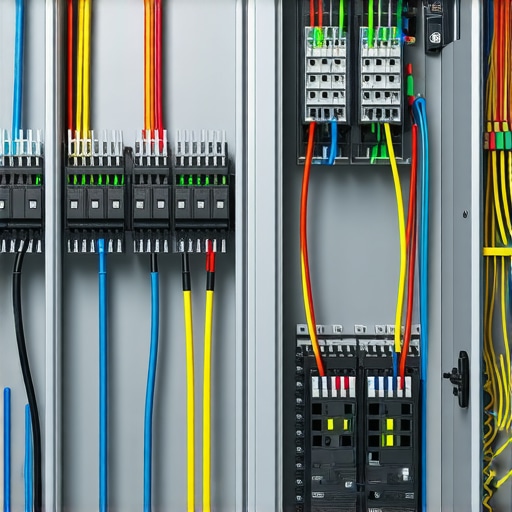
The Correct Way to Route Electrical Lines Through Cabinets
I remember the first time I tried installing a dishwasher…
Why Your Dishwasher Needs a High-Loop More Than a Fancy Filter
I'll never forget the day my dishwasher started leaking for…
How to Level a Dishwasher on an Uneven Tile Floor
Ever had that sinking feeling when you open your dishwasher…