
Have you ever found yourself squirming in frustration because a tiny screw from your sump assembly has magically slipped out of sight—probably behind the dishwasher or under the cabinetry—and you’re left wondering how to get it back? I remember the exact moment when I was knee-deep in a messy repair, and that elusive screw decided to vanish. It was one of those lightbulb moments—realizing that something so small could cause such a big headache.
Why a Dropped Screw Can Turn Into a Major Headache
Dropping a screw isn’t just a minor annoyance; it can delay your repair, lead to additional parts costs, or even cause damage if left unchecked. The worst part? Sometimes, you don’t even realize it’s missing until you run the machine and notice a strange noise or leak. That’s why knowing how to recover a lost screw is a skill worth mastering—not just for DIY enthusiasts but for anyone who wants to save time and avoid costly repairs.
Is Your Fix Worth the Hassle? Think Twice
Early on, I made the mistake of rushing through the process without proper planning, and that only made the problem worse. I tried to DIY without consulting detailed guides or knowing what tools to use, which added to my frustration. According to expert advice, proper preparation and patience are key to successful repair projects—just like when you consult reliable sources like the appliance repair experts recommend thorough troubleshooting before diving into a fix.
So, have you faced this specific problem? If so, don’t worry—help is on the way. In the following sections, I’ll walk you through straightforward steps to recover that sneaky screw and get your appliance back in top shape. Whether it’s in the sump or another tight spot, I’ve got your back.
naturally, I’ll guide you through the most effective techniques so you won’t have to keep searching under the sink or cursing your luck. Ready to tackle this head-on? Let’s get started!
Identify the Exact Location of the Missing Screw
First, determine where the screw came from. Think of it like tracing lost car keys—you need to know the general area before diving in. Recall when I lost a screw behind my dishwasher control panel; I remembered removing that panel earlier. Use a flashlight to peer into tight spots and look for any visible tab or hole where the screw might have fallen. If you have access to the user manual, it can help pinpoint the exact component and corresponding screws. Remember, this initial step saves time by narrowing your search.
Gather the Necessary Tools and Replacement Parts
Prepare a small container for screws, a Phillips-head screwdriver, and the replacement screw if needed. Think of your toolbox as a mini operating room—each tool has a specific role. When I did this, I kept a magnetized screwdriver handy; it helps lift tiny screws from hard-to-reach places. If the screw is stripped or missing, consult the essential parts for troubleshooting to identify the correct match. Choosing the right screw ensures your repair’s longevity and prevents leaks or loose fittings.
Remove Obstructions and Clear the Workspace
Ensure the dishwasher is unplugged for safety. Use painter’s tape or masking tape to hold back any delicate wires near the work area—think of it as taping a fragile item for transport. Remove panels or covers that may be blocking access, following step-by-step guides like DIY installation guides. During my repair, I had to remove a lower panel, much like peeling an onion—carefully, layer by layer. This step prevents accidental damage and gives you a clear view of where the screw should go.
Retrieve the Lost Screw Effectively
Use a magnetic pickup tool to fish out the screw from tight spots. If you don’t have one, craft a DIY grabber with a bendable wire or use duct tape rolled into a loop. I once used a balloon with a small weight as a makeshift grabber—resourcefulness pays off. Gently maneuver the tool into crevices, and gently lift the screw out. Be patient; rushing can push the screw further into inaccessible areas, complicating recovery. If retrieval is unsuccessful, consider removing adjacent panels or components to create a clearer path.
Replace or Reinstall the Screw Correctly
Align the screw with its designated hole, then tighten it by hand to avoid cross-threading. Think of screwing in like threading a needle—start slowly to ensure proper engagement. Once aligned, turn the screwdriver clockwise until snug but not over-tightened, which could strip the threads or crack the plastic. During my last fix, I used a small piece of tape over the screw head to prevent slipping—small tricks help maintain control. Double-check that the component is secure before reassembling the panels.
Test the Appliance and Confirm Success
Plug the dishwasher back in and run a short cycle. Listen for unusual noises or leaks, acting like an auditor listening for irregularities. If all sounds normal, your repair is successful. Remember, sometimes a missing screw can cause the machine to vibrate or leak—fixing it restores stability. If issues persist, revisit previous steps or consult specialized resources like diagnosing dishwasher parts to ensure no other problems exist. Properly securing all screws enhances the longevity of your appliance and gives you peace of mind.Many homeowners believe that simply registering their dishwasher or using genuine parts guarantees seamless warranty coverage, but the truth runs deeper. A common misconception is that warranties are entirely comprehensive, covering all repair costs. However, experts emphasize that understanding the nuances—like proper installation procedures and compatible parts—is crucial to maximizing benefits—or risking costly out-of-pocket expenses.
For instance, numerous users overlook the importance of precise parts selection, which can invalidate warranty claims, especially if incompatible components lead to further damage. According to industry professionals, incorrectly installed parts or neglecting manufacturer guidelines often void warranties, despite popular belief to the contrary.
What advanced homeowners often get wrong about warranty claims
One nuanced trap involves ‘gray-area’ damages—issues not explicitly covered but resulting from improper maintenance or installation errors. For example, failing to heed specific installation instructions, such as proper water inlet connection or leveling, can cause failures that warranty policies label as user error. This is why consulting detailed resources like expert advice on dishwasher installation is essential to avoid pitfalls.
Furthermore, many assume that using generic or third-party parts won’t affect warranty coverage, but manufacturers often specify that only approved parts are compliant, especially during the warranty period. Choosing incompatible parts can lead to denied claims under the premise that improper repairs contributed to the failure.
Some users are also unaware that certain warranties require documented maintenance and professional installation to remain valid. Skipping professional setup or maintenance logs could be seen as negligence, affecting the ability to claim repairs, as highlighted by expert tips on warranty maximization.
It’s also a common trap to delay repairs or ignore early warning signs, thinking the warranty ‘covers everything.’ In reality, neglecting small issues like leaks or unusual noises may lead to voided warranties if they result from unaddressed problems.
By understanding these hidden nuances—correct part selection, installation adherence, documented maintenance, and timely repairs—you can truly leverage your warranty benefits. Ignoring these details often results in unexpected expenses and frustration, contradicting the popular myth that warranties are a guarantee of free repair service regardless of actions taken.
Have you ever fallen into this trap? Let me know in the comments. Being informed enables you to avoid costly mistakes and ensures your dishwasher continues to perform properly over its lifespan.
Keep It Running: Tools I Trust for Effective Maintenance
Maintaining your dishwasher over time requires more than just generic screwdrivers and wrenches. I swear by a few specific tools that have consistently saved me hours during repairs and kept my appliances performing optimally. First, a high-quality magnetic pickup tool is essential. I use the <Magnetic Pickup Tool> because it helps retrieve tiny screws or washers that often fall into tight spaces, preventing the need to disassemble more than necessary. It’s a game-changer for reassembling components like the spray arms or filter assemblies without frustration.
Next, I rely heavily on a digital torque screwdriver. Unlike standard screwdrivers, it allows precise tightening of plastic components like the tub’s mounting brackets, reducing the risk of cracking or stripping. Proper torque application prolongs the lifespan of parts and helps maintain the integrity of seals, which contributes directly to avoiding leaks and ensuring effective cleaning.
Additionally, I recommend a set of plastic pry tools. These are gentle on delicate panels and trim, especially for non-metallic covers on modern dishwashers. They help you open panels or access hidden screws without damaging the exterior, making your maintenance safer and more efficient. Adapting these tools into your routine can make future small repairs a lot less stressful.
For troubleshooting and diagnostics, I prefer a dedicated multimeter that can measure continuity and resistance accurately. It’s invaluable when checking the integrity of water inlet valves or heating elements, which are common failure points. Combining this with software-based diagnostics—when supported by the manufacturer—can isolate problems faster. As technology advances, I predict we’ll see increasingly integrated diagnostic tools that connect directly to smartphone apps, giving homeowners immediate feedback and actionable insights, similar to what professional technicians use.
How do I keep my dishwasher performing well over time?
One key is regular cleaning and inspection using the right tools. For instance, periodically removing and cleaning the spray arms prevents calcium deposits—especially in hard water areas—ensuring optimal water coverage. I recommend using a dedicated spray arm cleaning brush paired with a vinegar soak session. Also, inspecting the water inlet filter with a magnifying glass or a visual inspection mirror can help prevent clogs that lead to poor wash performance.
In addition, timely replacement of worn parts—like door seals or spray manifolds—based on a schedule rather than waiting for leaks or error codes can extend your dishwasher’s lifespan significantly. To do this effectively, I consult detailed guides on when to replace dishwasher parts. Remember, a proactive approach rather than reactive fixes benefits you long-term.
The trend in appliance maintenance points toward smart diagnostics and remote monitoring, which future updates may bring into the consumer realm. Imagine receiving an alert on your phone when a component’s efficiency dips—it would enable you to order parts and schedule repairs before major failures occur. For now, incorporating reliable physical tools and routine inspections remains the best practice to keep your dishwasher humming smoothly.
Try integrating a digital torque screwdriver into your next maintenance session and see how much easier it makes ensuring perfect tightening. It’s small investments like these that can save you money and hassle long-term. For advanced diagnostics, consider exploring professional-grade tools or consulting an expert—sometimes, the right tool makes all the difference in achieving long-term, reliable performance.
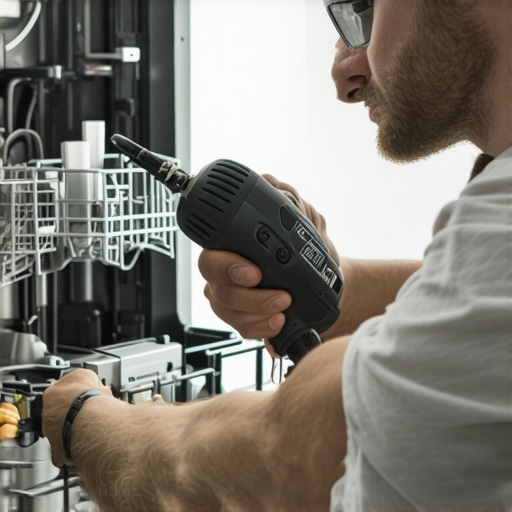
Sample image prompt: close-up of a homeowner using a digital torque screwdriver on dishwasher components, showing precision in tightening screws, in a modern kitchen setting.
,
3 Surprising Lessons You Learn When Fixing Your Dishwasher
- Realizing that taking a moment to plan saves hours of frustration—rushing often causes overlooked screws or damaged parts, leading to bigger problems down the line.
- Understanding the importance of using the correct tools—like a reliable magnetic pickup tool or a precision torque screwdriver—which makes all the difference between a quick fix and a prolonged struggle.
- Recognizing that patience is a virtue, especially when retrieving lost screws from tight spaces—sometimes, the wind-down of frustration is more valuable than the fix itself.
- Discovering that small preventive maintenance—like cleaning spray arms or inspecting seals—can dramatically extend the lifespan of your dishwasher, saving money and headaches over time.
- Learning that deep knowledge about warranty nuances and proper part selection can prevent costly disputes—it’s not just about the repair, but understanding how to protect yourself legally and financially.
My Toolkit for Dishwasher Success
- Magnetic pickup tool—I’ve found it indispensable for retrieving tiny screws from inaccessible spots.
- Digital torque screwdriver—ensures precise tightening prevents cracking and leaks, boosting longevity.
- Plastic pry tools—delicately open panels and remove covers without damage.
- Multimeter—diagnoses electrical issues early, saving time and money.
Your Next Steps: Embrace the Process and Keep Moving Forward
Remember, each repair is a step toward mastery. Every challenge you face deepens your understanding of your appliance, making future maintenance smoother and more straightforward. By integrating the right tools, patience, and knowledge, you’re not only fixing a machine—you’re empowering yourself to handle household issues confidently. So, go ahead—tackle that screw with newfound confidence, and turn a frustrating moment into a valuable lesson. Your dishwasher—and your wallet—will thank you. What small repair have you hesitated to try but found rewarding once you did? Share your story below and join the community of DIY enthusiasts making progress one step at a time.
Related Posts
How to Replace a Snapped Door Spring in Ten Minutes
Ever had that gut-wrenching moment when you open your dishwasher…
The 10-Cent Fix for a Noisy Drain Pump
Ever stood in your kitchen, hearing that relentless grinding or…

The Gasket Mistake That Leads to Mold Under Your Floorboards
I remember the exact moment I realized my mistake. It…