It was a quiet Saturday morning when I spotted that telltale reddish-brown stain creeping across my dishwasher’s stainless steel racks. My heart sank. I had just installed the new rack last year, following all the proper steps and double-checking the warranty policies. Yet, here we were—fighting rust that seemed to appear out of nowhere. If you’ve ever faced this frustration, you’re not alone. Rust spots can make even the newest dishwasher look neglected, and they can feel like an insurmountable challenge.
But here’s the good news: tackling those stubborn rust stains isn’t as daunting as it seems. Over the years, I’ve learned a few tricks and hacks that made all the difference. Today, I want to share proven methods to help restore your racks, extend their lifespan, and keep your dishwasher looking pristine.
Why Rust Takes Over Stainless Steel Racks—and Why You Should Act Fast
Rust happens surprisingly quickly when certain conditions align. Hard water, exposed metal components, and even detergent residues can accelerate oxidation—especially if protective coatings wear down over time. According to industry experts, rust can not only mar the appearance but also compromise the integrity of your equipment, leading to more costly repairs or replacements down the line. Ignoring these spots can also foster bacteria growth, which no one wants in their kitchen.
Early on, I made a mistake countless homeowners do—using abrasive cleaners that scratches the surface, creating more entry points for rust. That chase for a quick fix ended up costing me more in the long run. Learning from that, I realized that preventative measures and proper cleaning techniques are the keys to maintaining your racks.
Would you be surprised to know that many rust issues could have been avoided with simple checks and maintenance? For instance, inspecting your dishwasher’s installation and parts periodically can prevent rust build-up and even extend your warranty coverage. For guidance on installing or replacing parts correctly, visit [this expert advice guide](https://appliancedoctorz.com/expert-advice-on-dishwasher-installation-troubleshooting).
Before we jump into the step-by-step process of removing rust and protecting your racks, I want to address some of the common fears you might have. Rust removal sounds messy, time-consuming, or maybe even unsafe. Trust me, I felt the same—until I discovered that with the right tools and techniques, it’s straightforward and safe. Plus, avoiding DIY fixes can sometimes lead to more significant damage, which is why knowing how to handle rust effectively is essential.
So, if you’re tired of those unsightly spots ruining your kitchen’s aesthetic or wondering if there’s a way to prevent this issue from recurring, stick around. We’re about to dig into simple but effective strategies to reclaim your stainless steel racks and keep your dishwasher looking brand new.
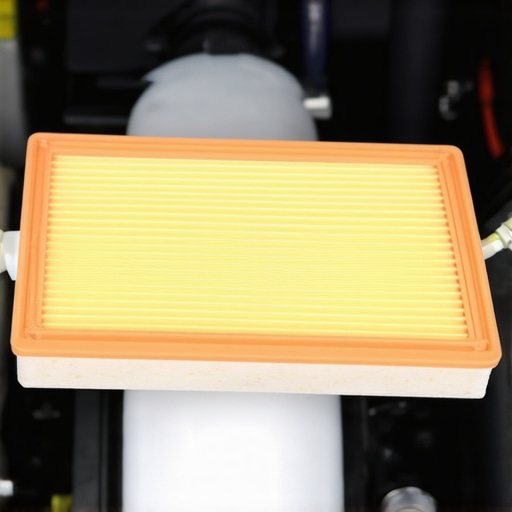
Start with a thorough cleaning to prep your racks
Remove the dishwasher racks and scrub them with a mixture of baking soda and water using a stiff-bristled brush. This helps eliminate loose debris and prepares the surface for rust removal. I once tried just wiping with a cloth, but I found that a deliberate scrub significantly improved rust removal; it’s like sanding a rough wood before staining—it makes all the difference.
Apply a rust converter for chemical transformation
Use a commercial rust converter or some white vinegar on a cloth to treat the rust spots. For stubborn areas, I dipped a sponge in vinegar and held it against the rust for 15 minutes. The rust spots darkened and softened, making them easier to scrub off later. This step chemically changes rust into a stable compound, preventing further corrosion.
Scrub away the loose rust with an abrasive tool
After applying the rust converter, use a fine steel wool pad or a nylon brush to gently scrub the converted rust. Be careful not to scratch the stainless steel surface excessively—think of it like buffing out minor scratches on your car’s paint. I found that light, circular motions worked best, and I avoided aggressive scrubbing to prevent damage.
Rinse thoroughly and dry completely
Once the rust has been removed, rinse the racks with warm water to wash away residue. Dry them thoroughly with a clean towel or air-dry to prevent new rust from forming. Moisture is the enemy here; I always double-check that no damp spots remain, especially in crevices, since trapped moisture can reignite rust.
Protect the racks with a stainless steel-safe coating
To prevent future rust, apply a protective coating designed for stainless steel surfaces, such as a silicone-based spray or mineral oil. Spray or wipe it on evenly, focusing on vulnerable areas. I personally used a food-grade mineral oil, which added a thin barrier against moisture. Keep in mind that some coatings may void your warranty if not specified; for detailed warranty coverage info, visit this guide.
Reinstall the racks carefully
Place the racks back into the dishwasher, ensuring they are aligned properly without forcing or bending any parts. Misaligned racks can cause unnecessary wear or damage, which might not be covered under warranty—check out this resource for installation tips. A proper installation also ensures smooth operation and longevity.
Schedule regular maintenance to keep rust at bay
Set a monthly reminder to inspect your racks for early rust signs and clean them regularly. Using a stainless steel polish can help maintain a protective layer and shine. This proactive approach prevents rust from gaining a foothold, saving you the hassle of chemical treatments later. Remember, the key is consistency—think of it like oiling a bicycle chain to keep it running smoothly for years.
 Many homeowners assume that installing a dishwasher is a straightforward task, but in reality, there are nuanced mistakes that can undermine your appliance’s longevity and warranty coverage. One widespread myth is that generic parts are always suitable replacements. In truth, using off-brand or incompatible components can void your warranty and lead to costly repairs. For example, substituting a non-standard inlet valve or spray arm without verifying compatibility can cause leaks or poor cleaning performance. To avoid this, always check the manufacturer’s recommendations and consult a detailed parts guide like this resource before purchasing replacements.
Another misconception is that tightening fittings as much as possible ensures a leak-proof installation. Over-tightening compression fittings can strip threads or crack plastic components, leading to water damage. Professional installers emphasize the importance of applying the correct torque, using tools like a tension gauge if necessary, to prevent damage. For proper techniques, review this guide. Additionally, many forget to consider the electrical circuit’s capacity, thinking a standard outlet suffices. But installing the wrong circuit or subpar wiring can cause breaker trips and void warranties. Always verify that your setup matches the recommended specifications, which you can find in this detailed policy.
Now, here’s an advanced question that trips up even experienced homeowners: How do subtle errors in hose routing affect warranty claims? Improperly positioned drain hoses, for example, can lead to improper drainage or backflow, which may not be covered if it results in damage. Ensuring correct hose loops, adherence to height guidelines, and avoiding kinks is crucial. For expert tips on this, consider reviewing this comprehensive post. Remember, proper installation isn’t just about fitting parts—it’s about understanding how each nuance impacts performance and warranty eligibility.
In conclusion, debunking these myths and paying attention to small details can save you money and frustration down the line. Take the time to verify parts, avoid over-tightening fittings, and ensure electrical safety. For more insights on how to maximize your warranty and keep your dishwasher running smoothly, visit this guide. Have you ever fallen into this trap? Let me know in the comments.
Invest in Quality Maintenance Tools for Reliable Performance
Having the right tools at your disposal ensures that maintenance tasks are efficient and effective. I personally rely on a few specific items like a digital multimeter for electrical checks—it’s precise and saves me time diagnosing issues. A set of precision screwdrivers makes replacing parts like spray arms or door seals a breeze, reducing the risk of stripping screws or damaging delicate components. For cleaning, a flexible grout brush helps reach those tricky nooks and crannies, especially around seals and filters, ensuring thorough removal of grime that could accelerate wear and rust. Don’t underestimate the value of a high-quality leak detection dye; it quickly pinpoints small leaks before they become costly disasters.
Streamline Your Routine with Specialized Software and Systems
To maintain peak performance, I recommend using a dedicated dishwasher app that tracks cycle histories, error codes, and maintenance alerts—such tools can send you reminders when filters or spray arms need attention. Modern appliances often come with smart diagnostics, but supplementing with your own system creates an extra layer of oversight. Additionally, maintaining an organized log of part replacements and service dates helps identify patterns and plan proactive maintenance, extending your dishwasher’s lifespan.
How do I keep my dishwasher functioning long-term without constant surprises?
Adopting a regular maintenance schedule is key. Schedule monthly inspections to check for early signs of rust or leaks, and use a flexible inspection mirror to peek behind inaccessible panels. Regularly running a cleaning cycle with descaling products removes mineral buildup, especially crucial if you have hard water, to prevent overheating and efficiency loss. Consider installing a digital leak sensor under your dishwasher—these devices can alert you to issues before water damage occurs, often saving hundreds in repairs. As trends advance, integrated smart sensors will become standard in appliances, providing real-time diagnostics and predictive maintenance, so staying ahead with current tools now can future-proof your setup. To learn more about advanced replacement strategies, check out this guide for servicing tips and timing.
Choosing Long-Lasting Parts and Proper Installation Practices
The durability of your dishwasher largely depends on selecting the right parts and ensuring correct installation. I always opt for OEM parts or reputable aftermarket equivalents that come with reliable warranties. Using high-quality clamps, hoses, and gaskets reduces the risk of leaks and rust; in particular, braided stainless-steel supply hoses have proven to last longer and resist corrosion better than plastic alternatives. For installation, meticulously check all connections and tighten fittings to manufacturer specifications—over-tightening can cause damage, while under-tightening leads to leaks. Refer to this resource for a comprehensive list of installation checks that safeguard your investment.
Warranty Deep Dive: Protecting Your Investment
Understanding what your warranty covers is essential to avoid out-of-pocket expenses later. Many warranties exclude damage caused by improper installation or maintenance. Thus, keeping detailed records of repairs, parts replacements, and maintenance routines can prove invaluable when making a claim. Consider periodically reviewing your warranty policy to remain informed about coverage limits and service requirements. Upgrading to more durable parts, like brass inlet valves, can also extend warranty coverage and overall lifespan, aligning with future industry trends toward more resilient components.
One advanced strategy I recommend trying today is installing a digital leak sensor underneath your dishwasher. These sensors can alert you immediately to leaks, preventing costly water damage and maintaining warranty validity. Such proactive measures exemplify how integrating simple technology can drastically improve your long-term maintenance routine. For detailed guidance on parts upgrades and proper installation, consult this essential resource.
Throughout my journey maintaining dishwashers, I discovered that the greatest learning often comes from unexpected challenges. One tough lesson was realizing that skipping thorough inspections during installation could haunt me later—the subtle misalignments or overlooked parts sometimes led to rust or warranty issues down the line. Empowered by experience, I make it a habit now to double-check every connection and part, knowing that proactive steps save both money and stress. Additionally, I’ve learned that investing in reliable, high-quality replacement parts, like OEM components, truly prolongs lifespan and maintains warranty coverage, preventing avoidable setbacks. Embracing a mindset of continuous learning and meticulous care transforms dishwasher upkeep from a chore into an opportunity to safeguard my investment, ensuring pristine performance for years to come.
Related Posts
Why Your Filter Is the Most Important Part You’re Ignoring
I remember the moment it hit me—my dishwasher, a sleek…
The Water Hardness Test Strip That Saves Your Heating Element
It was a morning like any other, until I opened…

Why Soft Water Might Be Ruining Your Best Wine Glasses
I remember the first time I pulled out a beautifully…