
Ever had that sinking feeling when you open your dishwasher or garbage disposal, only to find water pooling around your feet? That moment when you realize—too late—that your drain pump has given out, and now your kitchen is on the verge of a flood? Trust me, I’ve been there, and it’s no joke. It happened during a busy week, right before hosting friends, and I learned a costly lesson about the importance of keeping an eye on those tiny, often-overlooked parts.
Don’t Let a Hidden Failure Turn Into a Flood
That lightbulb moment—when water starts backing up or drains sluggishly—can be a warning sign. But if you’re like I was early on, you might dismiss the signs or assume it’s a minor clog. I’ve come to realize that many drain pump failures are preventable if you know what to look for. Today, I promise to share my personal tips on how to detect the subtle signs of a failing drain pump before your kitchen turns into a mini lake.
Is Checking the Drain Pump Actually Worth the Effort?
At first, I wondered if it was worth all the fuss. After all, it’s just a small component tucked away. But I made a critical mistake early on—I ignored routine maintenance, thinking that if the dishwasher was working fine, everything was perfect. That oversight nearly cost me thousands in water damage and repairs. As I dug deeper, I found that regular inspections could save you huge headaches. For instance, examining parts like hoses and filters is simple and can be done yourself—just check out this guide on installation parts which also highlights key inspection points.
Understanding how your drain pump operates and recognizing early symptoms of wear can make all the difference. Think of it as routine health checks for your dishwasher or disposal. If left unchecked, small issues can escalate into major, costly failures. So, let’s dive into how you can proactively keep your kitchen dry and worry-free, starting with the signs that your drain pump might be on its last legs.
Assessing Your Drain Pump’s Condition
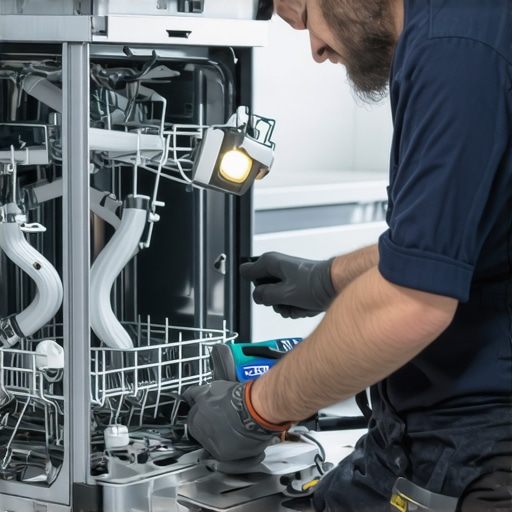
Start by turning off your dishwasher and unplugging it to ensure safety. Remove the kickplate or access panel at the bottom front of your unit, which gives you direct access to the drain pump area. Use a flashlight to inspect for any visible debris or buildup around the pump and hoses. During my own hands-on check, I found a tangled mass of food particles clogging the impeller, causing sluggish drainage. Clearing this debris was straightforward and immediately improved performance.
Testing the Pump with a Multimeter
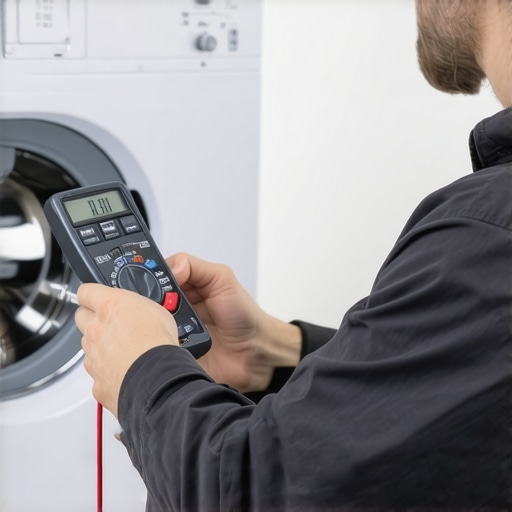
To determine if your drain pump is functional, disconnect it from the wiring harness. Set a multimeter to the resistance (ohms) setting. Place the probes on the pump’s terminals; a typical good pump usually reads between 20-100 ohms. If the reading shows ‘open circuit’ or infinite resistance, the pump is likely burnt out. When my multimeter showed an infinite reading, I replaced the pump, preventing potential flooding. For detailed testing procedures, visit this guide.
Proactive Maintenance Strategies
Regularly inspecting your hoses prevents many failure issues. Replace plastic hoses with stainless-steel braided ones; they resist kinks and burst hazards better, as explained in this article. Check the clamps holding hoses securely; loose fittings can cause leaks or airlocks. During a recent overhaul, I tightened the clamps with a torque wrench to manufacturer specs, reducing the risk of leaks during operation.
Examining the Pump’s Impeller and Housing
Remove the pump impeller carefully to inspect for cracks or damage. Use a flat-head screwdriver to gently pry it loose if necessary. Debris or corrosion here can impede water flow, risking pump burnout. I once found a cracked impeller that fluctuated in performance, which I replaced following the replacement timeline. Installing a new impeller restored proper drainage and extended the life of my dishwasher.
Learn from Practical Experience
During my last DIY check, I used a little bit of dish soap mixed with water to test the pump’s durability. Running the pump briefly while observing for unusual noises or leaks helped identify a failing bearing before it caused water damage. Remember, routine checks can spot issues early, saving you money and headaches down the line. To understand more about the parts involved, see this resource.
Many homeowners operate under misconceptions when it comes to dishwasher warranties, installation practices, and selecting replacement parts. These misunderstandings can inadvertently void warranties or cause costly repairs down the line. Let’s dig deeper into some of these common pitfalls and reveal the nuances that experienced technicians swear by.
Myth Busting: Warranty Coverage Is Always Clear-Cut
One prevalent belief is that if a part is branded as “warranty-approved,” it will be covered no matter what. In reality, warranty agreements often contain fine print that excludes damages caused by improper installation, misuse, or incompatible parts. For instance, using non-recommended hoses or fittings can void your warranty entirely. A study from this expert guide emphasizes that reading and understanding your warranty terms is crucial to avoid surprises during claims.
Mastering Installation: Overlooked Details That Matter
Many assume that installing a dishwasher is straightforward—just connect the water and power, then run it. But professional installers pay close attention to nuances like the high loop of the drain hose or secure grounding. Failing to implement these can lead to leaks, poor drainage, or even void your warranty. For example, proper parts selection and installation tips highlight that a high loop prevents siphoning and backflow, which are critical for long-term performance. Remember, improper installation is one of the most common reasons for early dishwasher failure.
Is Your Replacement Part Up to Standard?
Another misconception is that any generic part will suffice for repairs. While cost-saving is tempting, choosing the wrong parts can cause premature failure or even damage other components. High-quality parts are designed to fit precisely and endure the rigors of daily use. For instance, stainless-steel hoses are far superior to cheap plastic ones—they resist kinks and burst risks, as explained in this article. Always verify part compatibility and quality before purchasing to safeguard your appliance’s longevity.
In my own experience, replacing a worn impeller with a genuine part extended my dishwasher’s lifespan significantly. Cutting corners with cheap replacements might save money initially but often leads to repeated repairs and warranty issues. Trusted sources and proper research are your allies here.
Lastly, many overlook the importance of documentation. Keeping receipts, warranty cards, and detailed photos of your installation can be invaluable when making claims. A quick tip from this resource is to photograph your setup immediately after installation. It can prevent denial of warranty claims due to improper proof.
Have you ever fallen into this trap? Let me know in the comments. Understanding these nuances helps you make smarter decisions, extend your dishwasher’s life, and protect your investment.
Maintaining your dishwasher over the long term requires more than just occasional inspections; it involves investing in the right tools and adopting systematic routines. From specialized multimeters to high-quality replacement parts, having the right equipment ensures you can diagnose and resolve issues before they escalate into costly repairs.
Choosing the Right Tools for Reliable Maintenance
One of my personal favorites is a digital multimeter with a high-precision setting. I use a Fluke multimeter because of its durability and accuracy. It allows me to quickly test components like the drain pump or heating element without guesswork, saving me time and ensuring precise diagnostics. Investing in a good multimeter isn’t optional if you’re serious about troubleshooting, especially given that modern dishwashers contain complex electronics.
For inspecting installation parts, I rely on specialized tools like a torque wrench for tightening clamps and fittings to manufacturer specifications. Properly secured parts prevent leaks and avoid voiding warranties. For example, using a torque wrench when tightening hose clamps, as recommended in this guide, guarantees an optimal seal without damaging fittings.
Why Quality Replacement Parts Matter
Replacing worn or damaged components with genuine, high-quality parts is crucial. I always choose parts from reputable sources like OEM suppliers to ensure perfect fit and durability. Using inferior parts can lead to frequent failures, which not only costs more over time but also risks voiding your warranty. Visit this resource for a comprehensive guide on selecting parts that will stand the test of time.
Long-Term Benefits of Regular, Tool-Driven Checks
Routine inspections with the right tools can extend your dishwasher’s life significantly. I recommend setting a monthly schedule to check hoses, seals, and the drain pump, especially before heavy usage periods like holidays. Over time, this proactive approach can catch minor issues before they turn into emergencies. Plus, it gives you peace of mind knowing that your appliance is operating optimally.
How do I maintain my dishwasher’s performance over time?
Consistent maintenance includes using a multimeter for electrical checks, tightening fittings with a torque wrench, and replacing parts with certified replacements. Additionally, keeping a maintenance log helps track what’s been inspected or replaced, making future troubleshooting even easier. Modern tools like digital leak detectors or app-based diagnostics are emerging trends, and I predict they will become standard for DIY enthusiasts. For now, mastering these fundamental tools can save you hundreds in repair costs and prolong your dishwasher’s lifespan. Try performing a multimeter test on your drain pump this month, following the steps outlined in this detailed guide—you’ll be surprised how much peace of mind it provides.
Little Mistakes That Cost Big: Lessons Only Insiders Know
One of my earliest lessons was realizing how a tiny oversight—like not tightening a hose clamp properly—could turn into a flood. It taught me that paying attention to small details during installation or maintenance can save you from expensive repairs later. Another insight was understanding that not all replacement parts are created equal; opting for genuine, high-quality components extends your dishwasher’s lifespan much more than cheap alternatives.
The third unexpected lesson was discovering how often warranty claims get denied because of overlooked documentation or improper installation practices—something I used to take for granted. Keeping detailed records and following expert-recommended procedures can make or break your ability to leverage warranty coverage. Finally, I learned that routine checks and using the right tools—like a digital multimeter—are the key to catching issues early, before they escalate into costly damage.
My Top Picks for Keeping Your Dishwasher in Top Shape
For serious troubleshooting, I rely on a high-precision multimeter. It helps me verify electrical components quickly and accurately, saving lots of guesswork. When inspecting installation parts, I trust a torque wrench to tighten fittings to exact specifications—preventing leaks and preserving warranty integrity. For replacing worn components, I always choose stainless-steel hoses and genuine parts—these aren’t optional luxuries but necessities for durability. Lastly, detailed maintenance logs I keep help me track what’s been checked or replaced, ensuring nothing is overlooked over time.
Your Turn to Make a Difference with Maintenance
Embracing these insights and tools transforms your approach from reactive to proactive. Regular maintenance, informed parts selection, and meticulous documentation will empower you to extend your dishwasher’s life and protect your investment. Remember, small, consistent efforts today prevent big, costly problems tomorrow. So, why not start your next routine check with a multimeter test on your drain pump? You’ll be surprised at how much confidence it adds—plus, it’s easier than you think.
What’s the first step you plan to take towards smarter dishwasher care? Let me know below!
Related Posts
How to Test a Heating Element Without Tearing the Machine Apart
I remember the moment clearly—my dishwasher suddenly stopped heating, and…
How to Test Your Dishwasher Door Springs for Fatigue
It was a typical Saturday morning, and I eagerly loaded…
Fix Your Slumping Bottom Rack with These Heavy-Duty Rollers
There was a moment in my kitchen—an ordinary Saturday—that turned…