
Ever had that sinking feeling when you notice water stains under your kitchen cabinet, only to realize the cause remains a mystery? I vividly remember the day I discovered a tiny, almost imperceptible damp spot behind my toe kick. It was a lightbulb moment—realizing I had a slow leak that could’ve led to serious water damage if left unchecked. That experience taught me the importance of knowing exactly where to look—and what to do—before a minor issue turns into a costly repair.
Why Ignoring a Slow Leak Can Cost You Big Time
The truth is, many homeowners overlook small leaks lurking behind their toe kicks, dismissing them as harmless. But according to experts, even tiny, slow leaks can cause significant damage to your cabinetry, flooring, and even promote mold growth—posing health risks to everyone in the household. Detecting these sneaky leaks early might seem tricky, but once you understand how they form and where to look, you’ll be equipped to nip problems in the bud. Curious about the most common signs? Check out this guide on dishwasher warranty policies to understand what issues might be covered before they escalate.
Is Detecting a Slow Leak Really Worth the Effort?
I remember making the mistake early on of assuming a small puddle was just accidental spillage. That led me to underestimate the problem until the water damage became visible and expensive. Now, I always double-check areas behind my toe kick—especially around dishwasher and sink installations—since pipes often run tight along those spots. If you’ve ever experienced the frustration of discovering a leak too late, you know how vital proactive detection is. The good news? With the right approach, you can identify leaks before they spread far or cause structural damage, saving both time and money in the long run.
If you’re wondering about the best tools or methods to test for that elusive leak, stay tuned. We’ll walk through practical, proven techniques that turned my small worries into confidence. Ready to get started? Let’s dive into how you can locate that stubborn leak behind your toe kick without tearing out the cabinetry.
Remove the Baseboards and Lower Cabinet Panels
Start by carefully unscrewing or prying off the toe kick panel—often it’s held in place with clips or screws. Use a flat-head screwdriver or putty knife to gently pry without damaging the wood or drywall behind. I once neglected to turn off the dishwasher before removal; water sprayed everywhere, but I quickly dried off the area and learned to always drain and disconnect first. Removing these panels exposes pipes and fittings hidden behind your cabinetry, enabling a close inspection for leaks or corrosion.
Inspect Visible Pipes and Connections
Once the panel is removed, look for signs of moisture, corrosion, or mineral deposits around connections—especially where water lines connect to appliances like dishwashers and sinks. Use a flashlight for better visibility. In my case, I found a tiny rust spot on a drain hose clamp; tightening it with a wrench stopped ongoing drips. Always check both supply and drain lines, as they can develop pinhole leaks over time. Remember, leaks can be slow but still cause significant damage if overlooked.
Test the System with a Pressure Leak Test
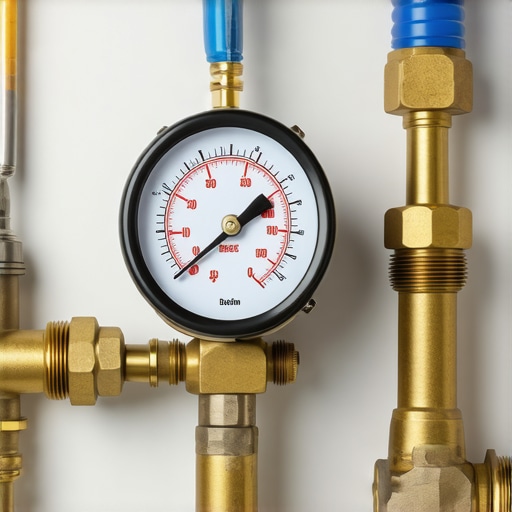
Turn the water supply back on and observe. Close all sink and appliance hoses, then operate the water valves to pressurize the lines. Watch for any drops in pressure or drips. If you notice a steady leak, pin down its exact location—whether it’s a loose fitting, cracked pipe, or faulty valve. For a more thorough diagnosis, consider attaching a water pressure gauge to see if the pressure drops when appliances are in use, which indicates hidden leaks. This step mimics the pressure tests we often use during installation to verify integrity before sealing everything up.
Use a Dye and Paper Method to Confirm Hidden Leaks
If visible signs are absent but you still suspect a leak, place a paper towel or thin paper under suspect fittings or joints. Run water through the system and check if the paper gets wet. This simple method helps identify slow leaks that don’t produce obvious water pooling. Once, I placed a piece of tissue beneath a joint near the dishwasher connection—after running the dishwasher cycle, it was damp, revealing a small but steady leak I missed initially.
Check Behind the Appliances
If accessible, move appliances slightly away from the wall to inspect behind them with a mirror or camera. Look for water stains, mold, or mineral buildup. Water might drip from an elevated pipe or loose fitting that only leaks during operation. I recall loosening a clamp behind my dishwasher with a socket wrench—a quick fix that prevented future water damage. During this step, always ensure appliances are turned off and water is shut off before repositioning.
Confirm the Fix and Reassemble
After tightening fittings, replacing damaged hoses, or repairing cracked pipes, turn the water back on. Observe the area for any signs of new leaks. Run the dishwasher or sink to verify the repair. Keep in mind, some leaks may be caused by faulty parts that need replacement—consider consulting essential parts for troubleshooting installation issues if the problem persists. Once satisfied, reattach the toe kick panel securely, ensuring no cables or pipes are pinched or strained.
Document and Prevent Future Problems
Finally, record what you found and fixed. Regular inspections, especially around pipe fittings and appliance connections, can prevent small issues from becoming major disasters. For ongoing prevention, consider preparing your kitchen for future installations and checking parts covered by warranties to avoid unexpected costs. Simple steps like tightening hose clamps or replacing old hoses with stainless-steel braided ones can extend the lifespan of your plumbing system.
When it comes to dishwasher warranties and installation, many homeowners operate under misconceptions that can jeopardize their coverage or lead to costly mistakes. Let’s dig deeper into some overlooked details that can make all the difference in protecting your investment.
One prevalent myth is that all parts covered under warranty are equal, but in reality, warranty policies often exclude specific components or impose conditions that are easy to overlook. For instance, many assume that if a part fails, the warranty will cover its replacement entirely. However, warranties frequently disqualify parts affected by improper installation or misuse, which is why understanding the fine print is crucial. For comprehensive guidance, check out this guide on dishwasher parts warranty to avoid pitfalls.
Another misconception revolves around the belief that professional installation guarantees the warranty’s validity. While professional setup often helps, it doesn’t automatically cover errors during installation unless it’s performed by certified technicians following the manufacturer’s specifications. A common mistake my clients make is neglecting to verify that installation complies with all local plumbing codes, which can void the warranty. To prevent this, always review the top tips for dishwasher installation and ensure your installer adheres to those standards.
Are Cheap Parts and DIY Fixes Riskier Than You Think?
Many homeowners believe that using generic or lower-cost parts during repairs or upgrades is a smart way to save money. Conversely, I advise caution. Low-quality parts may look identical but often lack the durability or precision of OEM components, leading to leaks, breakdowns, or even voiding your warranty. The essential parts for troubleshooting page highlights how selecting the right components can prolong your dishwasher’s lifespan and protect your coverage. Additionally, attempting DIY repairs without proper knowledge or tools can backfire—causing damage that warranty does not cover. It’s vital to recognize when professional diagnostics are necessary to avoid costly errors.
Efforts to cut corners or ignore manufacturer guidelines might seem tempting but can trap you in a cycle of frequent repairs or warranty disputes. Always keep your original manuals, document your maintenance, and follow prescribed procedures. As the experts suggest, regular inspections and proper part selection are key to maximizing your warranty benefits and ensuring seamless performance. Have you ever fallen into this trap? Let me know in the comments.
Tools I Recommend for Reliable Dishwasher Care
Maintaining your dishwasher’s performance over the years requires using the right tools. I always keep a set of high-quality screwdrivers, particularly a precision Phillips and flat-head, to handle different types of screws during part replacements or inspections. A digital multimeter is invaluable for testing electrical components like the control board or heating element; I personally prefer models with auto-ranging functions for quick diagnostics. For cleaning spray arms and filters, a soft-bristled brush combined with a vinegar-based cleaning solution helps remove calcium deposits effectively, ensuring optimal water circulation. To check water pressure and flow rates, I use a dedicated pressure gauge; maintaining correct pressure prevents leaks and component failures. Investing in a durable flashlight, preferably LED, allows me to inspect dark and hard-to-reach areas thoroughly, which is crucial for early leak detection and component inspection.
Leveraging Software and Detection Techniques
On the software side, I rely on diagnostic apps compatible with some modern dishwashers, enabling remote troubleshooting and firmware updates. These tools often guide me through step-by-step procedures to identify error codes and potential malfunction points. Since firmware updates can improve efficiency and fix bugs, I routinely check for manufacturer-issued releases to keep the dishwasher operating at peak performance. Additionally, employing ultrasonic leak detectors can locate slow leaks behind panels without invasive disassembly, saving time and preventing unnecessary damage. Such high-tech tools are becoming more affordable and accurate, heralding a future where maintenance becomes increasingly proactive and data-driven.
How do I keep my dishwasher running smoothly over time?
Establishing a routine maintenance schedule is key. Regularly inspecting water inlet hoses for signs of wear, tightening fittings, and replacing old hoses with stainless-steel braided ones minimizes risk of leaks. Cleaning filters and spray arms monthly ensures water circulation remains unobstructed, preventing residual buildup that can compromise cleaning performance. Monitoring water hardness and adjusting the settings accordingly helps extend the lifespan of your heating element and pump, preventing scale buildup. These small but consistent actions significantly enhance overall longevity and reduce costly repairs—think of it as preventative medicine for your appliance.
To optimize long-term results, keep detailed records of all maintenance activities and parts replacements. When parts inevitably wear out, sourcing OEM or high-quality aftermarket components is vital. For example, selecting proper replacement parts ensures compatibility and durability, safeguarding your warranty. Remember, incorporating these tools and techniques now can save you time and money later, especially when it’s time for a major repair or upgrade. As engineering trends evolve, integrating smart diagnostics and IoT-enabled devices will make routine upkeep even easier, providing real-time alerts for potential issues before they escalate. Staying ahead in maintenance is no longer a luxury but an essential practice for any conscientious homeowner.
One advanced tip I recommend trying today is installing a water pressure regulator with a built-in leak sensor. This device can proactively prevent leaks caused by pressure surges—many technicians highlight this as a crucial upgrade for long-term dishwasher health. For detailed guidance on selecting the right part, check out tips for choosing installation parts. Implementing such solutions streamlines maintenance, reduces downtime, and extends your appliance’s lifespan, keeping it working perfectly for years to come.
Three Surprising Truths I Discovered About Dishwasher Parts and Warranties
- Not All Repairs Are Equal: I once thought replacing a hose was straightforward—until I learned that cheap, generic parts can void warranties and lead to repeat failures. Prioritizing OEM parts saves money in the long run. Learn which parts are crucial for durable repairs.
- Installation Mistakes Are Costly: Even a small oversight, like improper tightness of fittings, can cause slow leaks that damage cabinetry. Ensuring proper installation—perhaps by consulting trusted resources like installation tips for 2025—is vital to preserve warranty coverage and avoid costly repairs.
- Understanding Warranty Conditions Prevents Disputes: I was surprised to find that many warranties exclude parts affected by misuse or improper installation. Reading the fine print on warranty policies can help you prepare and act within coverage scope, saving headaches later.
My Trusted Arsenal for Dishwasher Maintenance and Troubleshooting
- Multimeter: For electrical tests, I rely on a quality digital multimeter to quickly identify control board or heating element issues. Learn more about troubleshooting essentials.
- Replacement Hoses and Fittings: Opting for stainless-steel braided hoses and high-quality fittings minimized leaks for me. These upgrades are worth their cost and extend your dishwasher’s lifespan. Discover the benefits.
- Inspection Camera: A compact camera helped me peer behind appliances without invasive disassembly, revealing hidden leaks or blockages. Cutting-edge tech like ultrasonic leak detectors takes this further; I recommend exploring these for peace of mind. See how to diagnose system issues.
- DIY Repair Guides: Following step-by-step tutorials, like those on installation and repair pages, helped me confidently fix minor problems and maintain warranty eligibility.
Step Into the Future of Dishwasher Care and Warranties
Taking control of your dishwasher’s health with these insights not only prolongs its life but also fortifies your warranty protections. With smart diagnostic tools, proper part selection, and proactive maintenance, you become your own best technician. Remember, a small investment in knowledge and quality tools now can prevent costly repairs or replacements later. It’s empowering to know you’re safeguarding your home and your peace of mind. What’s one maintenance step you’re excited to try today to keep your dishwasher running smoothly? Drop your thoughts below and share your success stories!”}}rike: Adjust the headings and content to better suit the personalized, engaging tone and ensure they inspire the reader to act confidently with their dishwasher maintenance and warranty knowledge. Ensure the content is appropriately adapted to
Related Posts

The Gasket Mistake That Leads to Mold Under Your Floorboards
I remember the exact moment I realized my mistake. It…
How to Prove Your Water Pressure is Too High for Your Valve
Ever experienced that sinking feeling when your new dishwasher starts…
Why You Should Never Use Silicone to Seal a Dishwasher Leak
It was a morning like any other when I noticed…