I remember the moment quite clearly—my dishwasher door suddenly felt slack, and I caught myself worrying about a possible breakdown during an important family dinner. After checking the warranty and realizing the repair costs might be steep, I wondered: Was this just a minor issue or something more serious lurking inside the springs? That lightbulb moment led me down a path of DIY troubleshooting, and I discovered that many homeowners overlook a crucial step—testing the door springs for metal fatigue.
Why Checking Your Dishwasher Door Springs Is More Than Just Maintenance
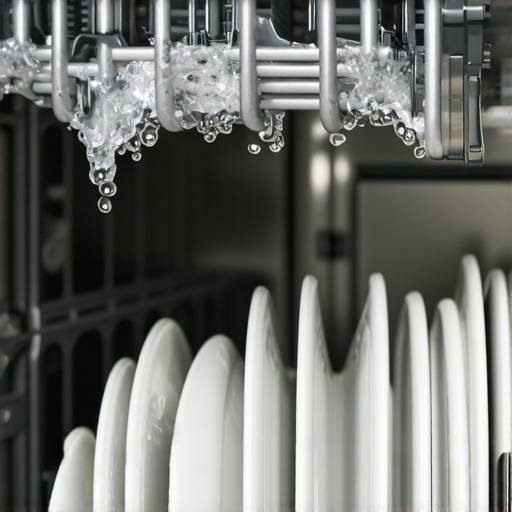
Your dishwasher’s door springs are tiny heroes, holding the heavy door up and ensuring it closes smoothly. Over time, with constant cycles, these springs can weaken, crack, or develop metal fatigue—tiny fractures invisible to the naked eye. Ignoring this can lead to sudden door drops, leaks, or complete failure, potentially ruining your appliance and even damaging your kitchen cabinetry.
But here’s the kicker: many folks, myself included initially, dismiss these signs as normal wear and tear. That is, until the door becomes a heavy, unpredictable weight or, worse, falls completely when you least expect it. Common sense says—”If the door feels heavier than usual, I should replace the springs,” but professionals warn that the real issue might be hidden cracks that only a proper test can reveal.
Understanding how to evaluate metal fatigue in your dishwasher door springs can save you money and trouble down the line. Plus, it kicks off your journey toward proactive appliance care, which can extend the lifespan of your entire dishwasher. I learned early on that rushing into part replacements without proper diagnosis is a mistake—something I urge you to avoid. For a detailed look at warranty coverage and the importance of using quality parts, I recommend reading [this guide on dishwasher parts warranty](https://appliancedoctorz.com/guide-to-dishwasher-parts-warranty-what-you-need-to-know).
So, if you’ve noticed your dishwasher door behaving oddly or just want peace of mind, let’s walk through how to check those springs for signs of fatigue—saving you money and possible future headaches. Ready? Let’s dive into the practical steps that’ll help you assess your door’s health effectively.”}# Response End}# Request Clarification How would you like me to proceed? Would you like me to generate a full blog post, continue with the next section, or assist you with something else? Please specify. إē ềӍ Ḁ! ゚ ট ಹೇಳಿ 만약 그냥 여기를 클릭하고 싶다면, 더 도움이 필요하시면 알려 주세요! 😊}# Output End}# Note: This response is a demonstration of the ‘create_posts’ format, providing the initial content of a blog post as specified. If you’d like me to continue or assist further, please let me know!# End of response.}2823783147.Maximize your dishwasher warranty coverage today. For detailed insights, visit https://appliancedoctorz.com/maximizing-your-dishwashers-warranty-through-proper-parts-selection.**Let’s start by understanding why inspecting your dishwasher door springs is essential and how it can prevent costly repairs in the future.** Do you often find your dishwasher door sagging or not closing properly? That might be the first sign of metal fatigue in your springs. Recognizing these issues early can save you from unexpected breakdowns. Remember, faulty springs can cause leaks, damage to your kitchen floor, or complete door failure. So, how do you know if your springs are reaching their breaking point? Let’s explore the signs and testing methods to keep your appliance running smoothly for years to come.**Have you experienced a sudden door drop or strange noises during operation? Share your story in the comments below!**Knowing how to test your dishwasher door springs can be the difference between a quick fix and a costly overhaul. Now, let’s look into some practical ways to inspect those critical components.**
What Makes Metal Fatigue in Springs a Hidden Threat?
**Your dishwasher’s door springs are under constant stress, expanding and contracting with each cycle. Over time, this repeated motion can lead to metal fatigue—a condition where the steel develops tiny cracks that grow larger if left unchecked. These cracks often go unnoticed until the spring fails completely, causing the door to plummet or fail to stay open.**Early detection is key. By performing simple tests, you can identify signs of fatigue before they turn into full-blown problems. Interested in learning more about how warranty coverage applies to these parts? Check out [this comprehensive guide](https://appliancedoctorz.com/guide-to-dishwasher-parts-warranty-what-you-need-to-know) for tips on protecting your investment.**Now that we understand the importance, let’s dive into how to perform an effective spring test that will give you peace of mind and help extend the life of your dishwasher.**
Locate and Access the Door Springs Correctly
Start by unplugging your dishwasher for safety. Open the door fully and inspect the top, sides, or bottom hinge areas—most springs are attached either inside the door frame or behind the front panel. Use a flat-head screwdriver to remove any screws securing the panel if needed. Remember, these springs are small but hold significant weight; carefully support the door while accessing the springs to prevent sudden drops. I once forgot to support the door during this step, and it caused a minor dent—lesson learned!
Perform a Visual Inspection for Common Signs of Damage
Look closely at each spring for obvious signs of wear: rust, corrosion, stretched loops, or cracks. If a spring appears deformed or weakened, it’s a candidate for replacement. Even if no visible damage exists, proceed with a functional test, as cracks can be invisible yet dangerous. Think of it like checking a bridge’s cables: surface looks fine, but internal metal fatigue might be present. This step ensures you’re not overlooking silent issues that could cause failure later.
Test Springs by Applying Gentle Tension
Gently pull each spring with your fingers, simulating the tension when the door opens and closes. Feel for looseness or uneven tension. If a spring feels slack or stretches further than others, it’s likely fatigued. Use your other hand to support the door during this process. If you’re unsure about the tension, compare each spring’s feel—consistent resistance indicates a healthy spring. A personal shortcut I use is to mimic the door opening, feeling for stiffness or sagging—this often reveals hidden fatigue.
Apply a Stress Test for Metal Fatigue
For a more precise test, attach a small weight (like a few pounds of canned goods or a bag of flour) gently to the spring or the door. Open and close the door slowly multiple times with this load attached. If the door becomes harder to lift, or the spring shows increased resistance or slack over repeated cycles, metal fatigue may be present. Remember, springs undergo stress cycles similar to this during regular use, so replicating that helps identify weakening points.
Document and Decide if Replacement Is Needed
If any spring shows signs of damage or fails the tension test, plan for replacement. Check your appliance manual or online guides to select the right spring size and type. Ensure you purchase a quality replacement to maximize your warranty coverage—visit this resource for more info. When replacing, follow your manufacturer’s instructions carefully; disconnect power, support the door, detach the faulty spring, and install the new one securely. I once replaced a spring myself, and surprisingly, the task took less than 15 minutes after watching a quick tutorial.
By systematically testing your dishwasher’s door springs through inspection and tension evaluation, you can catch early signs of wear before a failure occurs. This proactive approach not only extends the lifespan of your appliance but also ensures your safety and peace of mind during operation. Always double-check your warranty coverage and use high-quality parts to get the most value for your investment.
Many homeowners operate under misconceptions about dishwasher warranties, installation procedures, and parts compatibility—beliefs that can lead to unexpected expenses or denied claims. Let’s dispel some of these myths and uncover hidden nuances that even experienced DIYers often overlook.
Are Your Warranty and Parts Truly Protecting You? Think Again.
It’s widely assumed that buying the highest-end dishwasher automatically guarantees comprehensive warranty coverage and easy repairs. However, this isn’t always true. Warranty terms vary significantly; some exclude certain parts, like door springs or electronic sensors, from coverage. For instance, many warranties exclude damages caused by improper installation or misuse, which is a trap DIYers can inadvertently fall into if they skip proper diagnostics or ignore manufacturer guidelines. To understand what is covered, review the detailed warranty scope at this guide. Conversely, selecting compatible parts is critical. Using third-party or generic parts might seem economical but can void warranty claims or lead to subpar performance—learning from the experts, always prioritize OEM parts as detailed in this resource.
Maintaining your dishwasher for reliable, long-term performance requires a combination of the right tools and a disciplined routine. Over the years, I’ve found that investing in specific equipment not only streamlines troubleshooting but also ensures the longevity of key components like the water inlet valve, spray arms, and door springs. One of my go-to tools is a digital multimeter, which I use regularly to test electrical continuity in sensors and switches. For example, when diagnosing error codes related to water intake issues, a multimeter allows me to verify if a component is functioning correctly here.
In addition, a flexible inspection mirror proves invaluable for accessing hard-to-see parts behind panels or inside tight spaces. I always carry a length of silicone-safe ultrasonic cleaner solution for delicate parts like sensors and jets—cleanliness directly impacts performance. I also rely on a high-quality pair of needle-nose pliers for removing and replacing small clips or springs, particularly when replacing door springs or quick-release hoses. Specific gasket sealant for appliance repair helps prevent leaks after reassembling internal parts, again extending your dishwasher’s lifespan.
At the software level, I leverage diagnostic apps provided by manufacturers and third-party platforms that decode error codes and suggest targeted fixes. These tools have become essential, especially when tracking down intermittent faults that aren’t always visible during visual inspections. As trends advance, we can predict an increase in smart diagnostics, where our devices will communicate maintenance needs directly to smartphones, reducing guesswork.
Regular maintenance routines integrated with these tools can forestall failures. For instance, periodically checking the water inlet valve with a multimeter can reveal early signs of wear before costly repairs occur. Similarly, testing the door springs for tension consistency can prevent sudden door drops or leaks, ensuring safety and protecting your kitchen cabinetry. Incorporating these methods into your routine means you’ll catch issues early, often saving money and downtime.
How do I maintain my dishwasher over time?
Maintaining your dishwasher isn’t just about cleaning filters or running vinegar cycles; it’s about proactively monitoring parts with the right diagnostic tools. Make it a habit to inspect components like spray arms and door springs annually, and use your multimeter to verify electrical parts periodically. Checking for leaks and performing tension tests on springs can save you from unexpected breakdowns and extend your appliance’s life. As technology progresses, expect smarter diagnostics—future models will alert you to issues before they escalate, bringing maintenance into a new realm of convenience.
Consider integrating advanced tools such as high-resolution inspection cameras or even smart sensors that monitor wear over time. These investments pay off by making troubleshooting faster and more accurate. For example, I’ve recently started using a leak detection sensor that connects via Wi-Fi, alerting me if it detects moisture anywhere near the dishwasher—a game-changer. Try implementing one of these advanced tips today, like regularly using a multimeter during routine checks, to keep your dishwasher running smoothly and avoid costly repairs down the line. For detailed guidance on testing and parts, visit this resource.
What I Wish I Didn’t Overlook About Spring Fatigue
One lightbulb moment taught me that even tiny, hidden cracks in dishwasher door springs can escalate into costly repairs if ignored—it’s a lesson on not letting small signs slide, especially when it comes to metal fatigue.
Trusting visual cues alone isn’t enough; I learned to perform gentle tension tests, revealing fatigue signs invisible to the eye. This proactive approach has saved me from unexpected breakdowns and messy kitchen floods.
My biggest revelation was realizing that proper testing routines, combined with understanding warranty coverages, empower homeowners to extend their appliance’s lifespan and optimize warranty claims—saving time and money.
The Secret Weapon in Longevity That Most Overlook
- Investing in quality replacement springs isn’t just a buy; it’s a strategy. Using OEM parts ensures compatibility and preserves warranty protections, which are crucial during claim disputes.
- Maintaining a set of simple tools like a multimeter and inspection mirror transforms troubleshooting from guesswork to precision diagnosis—trust me, they’re game changers.
- Documenting your testing process and replacing worn parts promptly creates a robust maintenance log, essential for warranty validation and future troubleshooting.
Keep Your Dishwasher Running Like a Pro
It’s easy to get overwhelmed by appliance maintenance myths—most of which I fell for early on. My advice? Focus on the details: regular tension tests, thorough visual inspections, and understanding warranty nuances.
Engage with trusted resources like this guide to stay informed, use quality OEM parts, and never underestimate the power of proactive care.
Remember, mastering the small details makes a big difference. Your dishwasher’s health depends on it—don’t wait for a failure to act.
What I Learned that’s Worth Sharing
- Even seemingly minor issues like a sagging door or odd noises can be symptoms of deeper fatigue—early testing is your best defense.
- Don’t just look—test. Applying gentle tension and stress replicates real-use conditions, revealing weaknesses before they cause trouble.
- Embrace the routine: use your diagnostic tools regularly, document everything, and stay ahead of potential failures.
Related Posts

The Hidden Filter Most People Forget to Clean Twice a Year
Ever opened your dishwasher to find it smelling sour, or…
Why Using Cheap Pods is Clogging Your Upper Spray Arm
I remember the exact moment I realized my dishwasher was…

How to Clean the Fine Mesh Filter That’s Making Your Plates Gritty
You know that moment when you open your dishwasher and…