
I vividly remember the moment I realized I had made a costly mistake. After watching a few online tutorials, I confidently attempted to install my new dishwasher without professional help. Everything seemed straightforward—until days later, when water started leaking behind the cabinets, causing damage I couldn’t ignore. That experience taught me a harsh lesson: DIY appliance installation can be a risky gamble, especially for renters trying to save a few dollars.
Why DIY Dishwasher Installation Can Backfire for Renters
Many renters are tempted to handle appliance upgrades themselves, thinking it’s a simple matter of following instructions. However, neglecting the technical details and hidden liability factors can lead to bigger problems—ranging from costly repairs to voiding warranty coverage. For instance, improper sealing or incorrect plumbing connections may cause water damage, which could be your responsibility to fix. Worse still, some apartment complexes have strict policies or require professional verification before appliance modifications—failure to adhere can result in penalties or loss of security deposits.
Furthermore, improperly installed appliances often fail early or cause ongoing issues, leading to additional expenses and frustration. According to recent industry insights, nearly 70% of appliance problems stem from installation errors—many avoidable with proper professional oversight. To protect yourself and your rental situation, understanding when to call in the pros is crucial.
Is Skipping Professional Help Really Worth the Risk?
Admittedly, there’s a temptation to DIY because it feels cost-effective and empowering. But early on, I made the mistake of not fully understanding the importance of correct part selection and plumbing standards—especially in tight rental spaces. A simple misstep like using the wrong connector can cause leaks or violate warranty policies, making repairs even more expensive. Want to avoid this? Check out top tips for seamless dishwasher installation to see how professional installers handle these pitfalls.
So, how do you balance cost savings with risk mitigation? That’s where this guide comes in. We’ll explore the common hidden liability factors, mistakes to avoid, and how to know when it’s best to get expert help. Ready to get your installation right the first time? Let’s dive into the details and set you up for worry-free upgrades.
Preparing Your Space for a Flawless Installation
Begin by clearing the area where the dishwasher will be installed, ensuring enough space and easy access. Shut off the water supply and disconnect the power to avoid accidents. Remove any old appliances or obstructions. Check your kitchen’s plumbing and electrical setup to confirm compatibility with the new dishwasher’s requirements. For detailed preparation tips, visit preparing your kitchen.
Gathering the Right Parts and Tools
Use high-quality, compatible parts to prevent leaks and warranty issues. Always choose parts backed by your warranty, such as hoses, connectors, and mounting brackets. Refer to selecting the right parts for guidance. Essential tools include a level, adjustable wrench, screwdriver, and a hole saw if modifications are needed. Don’t forget to wear safety gear to protect against sharp edges or accidental slips.
Step-by-Step Installation Process
1. Positioning the Dishwasher
Carefully slide the dishwasher into its designated space. Use a level to ensure it sits perfectly for optimal operation. Misalignment can cause leaks or door issues. For help with leveling, see leveling tips. Once positioned, temporarily secure it with mounting brackets or shims to hold it steady.
2. Connecting the Water Supply
Attach the water inlet hose to the incoming water line, ensuring a tight fit to prevent leaks. Use a high-quality, stainless-steel braided hose for durability, as recommended in durable hoses. Hand-tighten connections, then give them a slight turn with an adjustable wrench, avoiding over-tightening which can damage fittings. Verify that the inlet filter screen is clean before connection.
3. Securing the Drain Hose Properly
Connect the drain hose to your home’s drain or garbage disposal outlet. Make sure the hose is secured and avoids sagging or kinking, which can prevent proper drainage. The drain hose should loop higher than the dishwasher’s tub to prevent backflow. For common mistakes, consult drain hose tips. Once connected, fasten it securely to prevent dislodging during operation.
4. Electrical Hookup Considerations
Plug the dishwasher into a GFCI outlet that matches your appliance’s voltage requirements. If wiring adjustments are needed, it’s safest to consult a licensed electrician—this ensures compliance and safety, especially if your wiring isn’t up to code. For troubleshooting electrical issues, visit electrical troubleshooting.
Final Checks and Testing
After connecting the water, power, and drain, carefully slide the dishwasher fully into place. Check all connections for tightness and leaks. Level the appliance again if necessary. Run a test cycle to ensure proper operation and that no leaks occur. Observe the discharge and water intake, listening for abnormal noises. Troubleshoot common issues promptly using warranty and troubleshooting guides. Successful installation not only protects your warranty but also ensures your rental remains damage-free and ready for use.Many homeowners believe that choosing the right warranty policy or parts guarantees hassle-free dishwasher maintenance. However, the reality is that most people misunderstand how warranties interact with installation practices and parts selection, leading to costly mistakes. For example, some assume that registering their dishwasher automatically ensures full coverage, but in reality, improper installation can void warranties regardless of registration. This misconception can trap uninformed users into paying for repairs that could have been covered if proper procedures were followed.
A common myth is that all replacement parts are interchangeable or equally warranty-approved. In truth, certain generic parts might not meet manufacturer standards, risking damage that isn’t covered by warranty. For instance, using incompatible or low-quality hoses can cause leaks or damage, which disqualifies warranty claims. To avoid such pitfalls, consult the detailed warranty policies and choose parts that are explicitly backed by your warranty, like those listed in warranty guidelines.
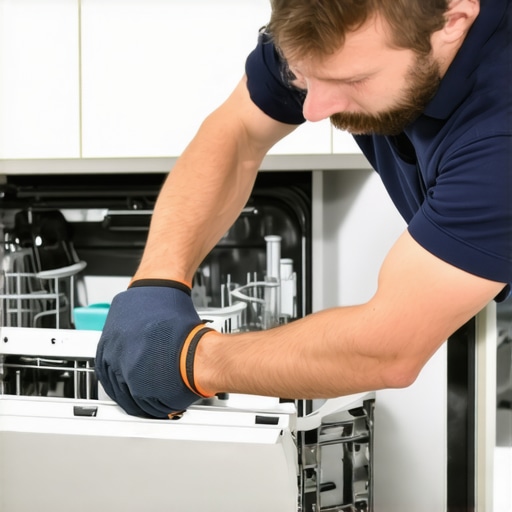
While many installers focus solely on “doing the job right,” the subtle nuances of warranty protection often get overlooked. For example, improper sealing during installation isn’t just a matter of water damage—it’s a warranty compliance issue. Even minor errors, such as incomplete connections or misaligned seals, can lead to warranty denial when damages occur. Therefore, understanding the complex interaction between installation quality and warranty clauses is crucial. Professional guidance can help prevent these oversights; explore installation best practices.
Another advanced mistake is neglecting to verify that all parts used are officially approved, especially in regions with strict standards. The use of third-party or unverified components often voids the warranty and compromises appliance longevity. Manufacturers’ warranties typically cover specific parts and installation procedures, emphasizing the importance of using certified options highlighted at premium parts resources. Remember: safeguarding your warranty isn’t just about the initial installation but maintaining proper upkeep with approved parts.
In conclusion, the hidden nuance lies in recognizing that warranty protection depends on meticulous installation and prudent parts selection. Many overlook these subtleties, risking future expenses. For comprehensive advice on protecting your investment, visit our warranty policies guide. Have you ever fallen into this trap? Let me know in the comments.
Tools I Recommend for Reliable Dishwasher Maintenance
Proper upkeep of your dishwasher isn’t just about cleaning; it involves precision tools that help you diagnose and fix issues efficiently. One indispensable item I personally rely on is a high-quality multimeter. It allows me to quickly check electrical continuity and voltage levels, ensuring components like the control board and heating elements are functioning correctly. For example, testing the heating element’s resistance with a multimeter helps prevent unnecessary part replacements and keeps my dishwasher running smoothly. Learn more about diagnosing parts here.
Another tool I swear by is a set of precision screwdrivers, particularly Phillips and flat-head. These are vital when accessing tight compartments or removing panels without damaging screws or the appliance itself. Investing in an anti-static brush also helps me clean delicate sensors and contacts, preventing electrical shorts that could cause malfunctions. Over time, these tools save me trips to the repair shop and extend my dishwasher’s lifespan.
Future of Maintenance: Smart Diagnostics and Automation
Looking ahead, the trend points toward integrating smart diagnostic tools that communicate directly with manufacturer apps. Imagine receiving real-time alerts about worn-out parts or upcoming maintenance needs via your smartphone—taking the guesswork out of long-term care. This technology is already emerging; some brands offer Wi-Fi-enabled sensors that monitor equipment health continuously. Staying updated with these innovations will empower homeowners to address issues proactively, ensuring ongoing performance and warranty compliance.
How do I maintain my dishwasher parts over time?
Regular inspection and proactive replacement are key. Begin by checking filters and spray arms monthly; clean out debris and calcium buildup that hinder water flow. Familiarize yourself with the most common wear parts—like door gaskets and inlet valves—and schedule their inspection against manufacturer guidelines. Using high-quality, warranty-approved parts during replacements not only preserves your warranty but also ensures durability. For guidance, review this article on optimal part replacement. Don’t forget to keep your tools clean and store them properly, so they’re always ready when a repair is needed. Check your local appliance manuals for specific maintenance intervals and recommended parts to keep your dishwasher functioning at its best over the years. Remember, investing in the right tools and routine checks can significantly extend your appliance’s service life and warranty coverage.
Surprising Lessons from My DIY Disaster
One of the biggest eye-openers I’ve experienced was realizing that even small installation mistakes can lead to significant damage and voided warranties, especially for renters who might think DIY is a quick fix. That moment of water leaking behind the cabinets taught me to respect the complexity of proper dishwasher setup and the importance of professional help. Sometimes, investing upfront in expert installation saves you time, money, and stress later.
The Hidden Caveats Most Renters Overlook
Many ignore the fine print detailing warranty requirements and proper part selection, assuming that following generic tutorials suffices. But incorrect plumbing connections or wrong parts can invalidate your warranty, leaving you responsible for costly repairs. My advice? Always double-check manufacturer guidelines and consult trusted resources like installation tips for seamless setup.
Why Skipping Professional Help Can Cost You More
It’s tempting to save a few dollars by going the DIY route, but that often results in mistakes that are hard to undo. Improper leveling, loose connections, or faulty seals can cause leaks and damage your apartment, jeopardizing your security deposit. From my experience, using professional services ensures your appliance is installed correctly, protecting both your warranty and your peace of mind. For detailed parts guidance, check selecting the right parts for installation success.
How Proper Preparation Saves the Day
Prepping your space meticulously—clearing the area, shutting off supplies, and verifying compatibility—can smooth out the installation process. I learned that rushing through these steps often leads to overlooked issues, which may cause delays or damage. For best results, refer to kitchen preparation strategies to avoid common pitfalls and ensure a hassle-free setup.
Final Wisdom: Invest in Knowledge and Tools
The key takeaways? Use high-quality, warranty-approved parts, follow precise installation steps, and when in doubt, seek professional help. Properly installed dishwashers not only function better but also preserve your warranty coverage, saving you from future expenses. Remember, preventative measures and informed choices are your best allies in appliance maintenance and warranty protection. Curious about specific tools or troubleshooting techniques? Explore essential troubleshooting parts.
Related Posts
Why Your Professional Installer Checks Your Sink Drain for Clogs First
I stood there with my toolkit, feeling like a DIY…
The Leak Prevention Step Most Professional Installers Charge Extra For
I remember standing in two inches of lukewarm, sudsy water…
The Specific Torque Needed for Leak-Free Water Connections
I'll never forget the day I spent hours troubleshooting a…