Ever had that sinking feeling when your dishwasher starts acting up right before a big family dinner? I remember the first time my smart dishwasher suddenly refused to rinse properly, leaving me scrambling and unsure if a warranty claim would even save me. That lightbulb moment made me realize I was relying too much on guesswork and not enough on solid knowledge about warranty policies and repair tips.
Today, I want to share how understanding the ins and outs of *Smart Dishwasher Warranty & Parts* transformed my approach from frustrated user to confident trouble-shooter. Trust me, knowing the right part to replace or how to maximize your warranty can save you time, money, and a lot of stress. If you’ve ever faced unexpected breakdowns, then this guide is for you.
Why Proper Parts Knowledge Matters More Than Ever
In the era of smart appliances, warranties can be a lifesaver—if you know how to leverage them. There was a time when I thought any dishwasher part repair was a simple fix, but after a costly mistake early on, I learned the hard way: not all parts are created equal, and not every warranty covers the same components.
For instance, some common issues with dishwashers stem from parts like the door latch or the circulation pump. Knowing which parts are covered by your warranty makes all the difference. To get started, I recommend checking out resources like *Ultimate Guide to Dishwasher Warranty & Parts* that break down what’s covered and how to choose reliable replacement parts. Proper understanding can even extend your appliance’s lifespan, saving hundreds over time.
Are you unsure whether your part falls under warranty or if you’re even installing it correctly? Trust me, I’ve been there. Early mistakes, such as using the wrong screws or neglecting to check compatibility, only delayed repairs and increased costs. By learning from these slip-ups, I discovered the value of targeted resources such as *Top Tips for Selecting the Right Parts for Installation*.
Before diving into repairs, it’s crucial to understand how the warranty works and which parts are eligible. This not only ensures that your repairs are covered but also helps you avoid unnecessary expenses. So, are you ready to see how proper parts selection and warranty knowledge can empower you to fix your dishwasher like a seasoned expert? Let’s get into it.
<
Is Cutting Corners Worth It When It Comes to Your Dishwasher?
Many homeowners hesitate to invest time in learning about their appliance’s warranty policies, thinking it’s too complicated or unnecessary. I used to think that too. However, neglecting this knowledge led me to buy the wrong parts, leading to more repairs and higher costs. Once I started consulting detailed guides, I realized that a small upfront effort could save a lot down the line.
Remember, taking shortcuts in installation or repair can not only void your warranty but also cause further damage. Protect yourself by sticking to expert tips and verified parts. And if you’re wondering whether it’s worth the effort, consider that a well-informed homeowner can troubleshoot and even fix issues that would otherwise require costly professional service. Truly, understanding *what parts are covered by warranty* and *how to select compatible replacement parts* makes the whole process smoother.
Curious about the specific mistakes to avoid? I’ll share those along with other practical tips so that your next repair isn’t a guess but a calculated move. Ready to move from DIY disaster to DIY hero? Then let’s get started.
Identify the Critical Parts Before You Start
Think of your dishwasher like a car engine; not every sound means the same problem. The first step is to pinpoint which component is causing the issue. Use resources like the comprehensive list of dishwasher parts covered by warranty to understand what parts are eligible for replacement under warranty. This clarity helps avoid unnecessary costs and ensures your repair efforts are targeted.
Diagnose the Issue Precisely
Don’t guess, verify. For example, if your dishwasher isn’t draining, check the pump, filter, and hose connections. I once wrongly replaced the door latch after a vague symptom, only to discover the real culprit was a clogged filter. Use diagnostic tips to systematically test each part, eliminating guesswork and saving time.
Check Warranty Terms Before Buying Parts
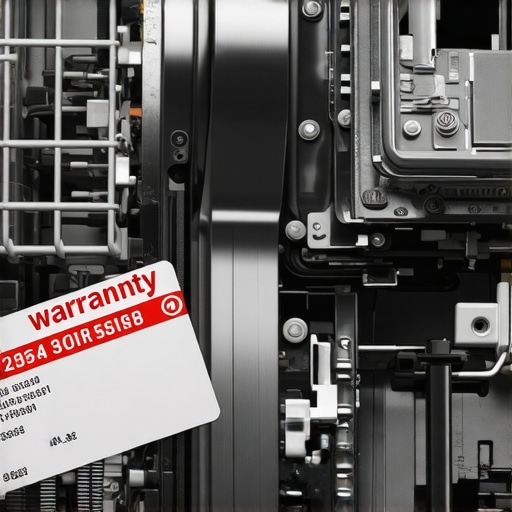
Before ordering replacements, review your warranty to see which parts qualify. Use warranty and parts information to confirm coverage. This prevents you from spending out-of-pocket on parts that might be free under warranty. Remember, proper documentation and proof of purchase can streamline warranty claims.
Select Compatible Replacement Parts
Choosing the right part is like fitting a puzzle piece; if it doesn’t fit, your repair will fail. Use tips for selecting compatible parts and avoid common pitfalls such as incompatible sizes or models. I recommend measuring existing parts meticulously and cross-referencing model numbers to ensure a perfect match.
Prepare Your Workspace and Tools
Clear the area and gather your tools—screwdrivers, pliers, and a multimeter—before starting. Think of it as preparing ingredients before cooking; organized tools make the process smoother and reduce mistakes. Additionally, disconnect power and water supply as a safety measure. This preparation step is often overlooked but crucial for a safe and efficient repair.
Follow a Step-by-Step Installation Guide
Use detailed guides such as installation tutorials to ensure correct positioning of parts. I once attempted a repair without a guide, leading to a loose hose connection that caused leaks. A systematic approach prevents such mishaps and promotes longevity of your fix.
Test the Repair Before Finalizing
After reassembling, run a short cycle to verify everything functions properly. Listen and watch for leaks, unusual noises, or error messages. During my last repair, I missed a small clip, which caused the pump to vibrate loudly. Testing immediately helped me identify and rectify the mistake, saving me from future breakdowns.
Document Your Repair and Warranty Claim
Keep records of parts used, repair steps, and any warranty claims. This documentation is invaluable if issues recur or if you need to prove parts were installed correctly. It also helps refute warranty denial reasons and speeds up the process if you seek professional assistance later.
 Many homeowners believe that simply owning a warranty guarantees hassle-free repairs, but in my experience, that couldn’t be farther from the truth. The reality is that a warranty’s value depends heavily on understanding its nuances. For example, a widespread myth is that all replacement parts are automatically covered. However, the comprehensive list of dishwasher parts covered by warranty reveals that only specific components qualify, often with conditions. Overlooking these details can lead to costly misunderstandings.
Another common misconception is that installation is a straightforward, plug-and-play process. In reality, incorrect installation can invalidate your warranty or cause long-term damage. Experts emphasize the importance of following precise procedures, such as those outlined in tips for selecting compatible parts and proper installation. For instance, mismatched parts or neglecting to secure connections properly can result in leaks, which might not be covered under warranty if improperly installed.
Now, let’s consider the Keeping your dishwasher running smoothly requires more than just the initial repair or installation. Like any complex appliance, regular maintenance and the right tools make a significant difference in ensuring longevity and reliable operation. Personally, I rely on specific equipment and methods that have proven effective over years of hands-on experience. One essential tool I swear by is a digital multimeter. It’s indispensable for diagnosing electrical issues, especially when checking motor connections or thermal sensors. Additionally, a quality spray degreaser helps to clean out clogged filters and spray arms that often cause performance drops. These tools allow me to perform a thorough inspection without the need for costly professional services, saving time and money.
For software, I recommend using diagnostic apps provided by many appliance manufacturers. These apps can interface with your dishwasher if it supports smart diagnostics, guiding you step-by-step through troubleshooting procedures. They often alert you to issues before the machine shows error codes, enabling proactive maintenance.
In the future, I see a trend toward more integrated diagnostic systems within dishwashers that can automatically notify homeowners of impending failures or maintenance needs via smartphone alerts. This proactive approach could drastically reduce breakdowns and extend appliance lifespan.
How do I maintain my dishwasher effectively over time?
Start by scheduling regular inspections of critical components like filters, spren drives, and door seals. It’s best to clean the filter monthly with a brush and hot water to prevent clogs that impair cleaning. Use a multimeter annually to check electrical connections, especially if you notice intermittent operations or odd noises. Also, run a descaling cycle every few months if you have hard water, as mineral build-up can strain the motor and spray arms. Incorporating these habits can significantly enhance performance and reduce unexpected failures.
Remember, always consult your appliance’s manual for specific maintenance instructions and warranty guidelines. Proper care not only keeps your dishwasher performing at its best but also helps you avoid costly repairs down the line. If you’re unsure about diagnosing electrical components, consider using a multimeter with auto-ranging and a user-friendly interface to simplify the process. For example, a simple check of the motor’s continuity can reveal issues early, preventing complete breakdowns.
Don’t forget to regularly inspect and replace worn or damaged parts like door seals or spray arms. Maintaining these components ensures efficient water flow and prevents leaks that could cause further damage. To streamline this, I recommend keeping a set of recommended replacement parts on hand, which can often be purchased based on your model’s specifications. Learn more about selecting the right parts by visiting top tips for choosing suitable installation parts.
By integrating these maintenance routines and using the proper tools, you’ll prolong your dishwasher’s lifespan and enjoy consistently clean dishes for years. Try adopting a bi-annual electrical check with your multimeter, and experience firsthand how early detection prevents costly repairs. Your future self will thank you.
The Unexpected Cost of Overlooking Warranty Details
My first mistake was assuming all dishwasher parts were covered equally by the warranty. I soon learned that this oversight can lead to unnecessary expenses and frustration. Recognizing the nuances in warranty policies is crucial, especially for parts prone to wear and tear, like door latches or pumps. When I started referencing the complete list of dishwasher parts covered by warranty, I realized just how much I was missing out on potential savings.
Why DIY Repairs Still Require Respect for Installation Precision
One lightbulb moment was discovering that even simple repairs can void your warranty if not performed correctly. I once replaced a seal without proper measurement and ended up causing leaks that were not covered. Expert guides like tips for selecting compatible parts emphasize the importance of following detailed installation procedures. It’s not just about fixing—it’s about fixing right, preserving your warranty, and ensuring long-term performance.
My Personal Tip for Smarter Dishwasher Maintenance
Regular inspections and having the right tools, such as a user-friendly multimeter, transformed my approach to appliance care. I found that proactive checks prevented minor issues from becoming costly repairs. Incorporating scheduled electrical checks and routine cleaning based on maintenance knowledge has extended my dishwasher’s lifespan significantly. The lesson? Consistent care is the best investment in your appliance’s longevity.
Feeling Confident Means Knowing When to Call a Pro
While I advocate for DIY, I also learned that recognizing your limits is vital. Diagnosing electrical issues with a multimeter or identifying subtle component failures requires knowledge—not guesswork. Resources like diagnostic tips can guide you through complex problems, ensuring that repairs are done safely and effectively. Mastering this balance between DIY and professional help has saved me both time and money.
One Reply to “Smart Dishwasher Warranty & Parts: Expert Installation & Repair Tips”
Leave a Reply
Related Posts
7 Photos That Guarantee Your 2026 Dishwasher Warranty Claim
I remember the exact moment I realized I had almost…
Trusted Warranty Policies & Parts for Smart Dishwasher Repair Success in 2025
Ever experienced that sinking feeling when your smart dishwasher suddenly…
Smart Dishwasher Parts and Warranty: The Ultimate Repair Guide
Discovering the Hidden World of Dishwasher Parts: A Personal RevelationAs…
This post really hits home for me, especially the part about understanding warranty coverage before attempting repairs. I learned the hard way when I replaced what I thought was a faulty circulation pump, only to find out it wasn’t covered by my warranty, and I ended up spending more money than I had planned. It made me realize the importance of checking the warranty details thoroughly. I also agree that having the right tools, like a digital multimeter, can make a huge difference in diagnosing electrical issues early on.
One thing I’ve found helpful is keeping a detailed record of all repairs, parts used, and warranty information, which significantly speeds up the process if I need to make a claim later. Has anyone else experienced surprises when filing warranty claims, and how did you handle them? Also, what resources do you recommend for verifying part compatibility? I’m curious about how others stay on top of the latest troubleshooting techniques—sharing these experiences can really empower homeowners to fix their appliances confidently and avoid unnecessary expenses.