One morning, I found water pooling under my dishwasher. Panic set in—I had reused the old drain hose, thinking it would be a quick fix. Turns out, I had unknowingly sabotaged my warranty and set myself up for a costly repair. That lightbulb moment made me realize: reusing drain hoses isn’t just a bad habit; it can jeopardize your entire dishwasher’s performance and warranty coverage.
Why Reusing Old Drain Hoses Can Cost You More Than You Expect
In the world of appliance repair, many homeowners overlook the importance of installing new, code-compliant drain hoses during dishwasher setups. Reusing old hoses might seem harmless, but it often leads to leaks, clogs, or worse—water damage that’s costly and stressful. Installing a new drain hose isn’t just about avoiding leaks; it’s about protecting your investment and ensuring your warranty remains valid. Trust me, I’ve learned the hard way that cutting corners here can bite you hard when things go wrong.
According to experts, proper installation and quality parts are crucial for long-term performance. Did you know that nearly 70% of dishwasher warranty claims are denied due to improper parts or installation mistakes? This highlights how critical it is to pay attention to even seemingly small details like drain hoses. For more info, check out [this guide on maximizing your warranty with the right parts](https://appliancedoctorz.com/maximize-your-warranty-parts-for-smart-dishwashers-in-2025-reliable-repair-tips-3).
Are you confident your current drain hose installation is up to standard? Or have you succumbed to the temptation of reusing the old one because it looked fine? If so, you’re not alone. Many DIYers think a simple reattachment will do, but in reality, it opens the door to future problems.
In the upcoming sections, I’ll walk you through the essential rules that will help you avoid this mistake entirely. Implementing these can save you hundreds of dollars and endless headaches. Ready to learn the safeguards every installer should follow? Let’s dive into the key rules for a foolproof dishwasher setup.
Is Reusing Old Drain Hoses Worth the Risk?
Early in my DIY journey, I made the mistake of reusing an old hose to save a few bucks, thinking it was just a minor shortcut. But I overlooked signs of wear and the importance of new fittings. That oversight cost me a warranty denial and a flooded kitchen. That’s a mistake I don’t want you to make. Proper parts and installation are your best bets for peace of mind—more details can be found in [this comprehensive troubleshooting guide](https://appliancedoctorz.com/essential-parts-for-troubleshooting-dishwasher-installation-issues).
Now that I’ve shared my costly mistake, let’s move on to some concrete rules to get your dishwasher install right the first time—and keep that warranty intact.
Choose the Right Equipment First
Before beginning installation, gather all necessary components, especially a high-quality, code-compliant drain hose. Opt for a durable, UL-listed hose designed for dishwasher use to prevent leaks and ensure compatibility with your unit. Avoid generic or cheap options, as they may fail prematurely, risking warranty denial. You can review expert recommendations on selecting parts at this guide.
Disconnect Power and Water Supplies
Ensure safety first: turn off the circuit breaker and shut off the water supply. Proper disconnection prevents accidental shocks or water leaks during installation. Think of it as cutting the power before servicing your home’s wiring—an essential safety step that keeps you protected.
Remove the Old Hose Carefully
If replacing an old hose, detach it gently from both the dishwasher and drain connection points. Inspect the old hose for cracks, wear, or debris, which are signs it’s due for replacement. Remember, reusing a compromised hose is like reusing a faulty fuse—it can cause future malfunctions and void your warranty, so replace it entirely.
Install the New Hose with Precision
Connect the new drain hose securely to the dishwasher’s drain outlet and to the drainpipe or garbage disposal. Use the correct hose clamps—tighten them firmly enough to prevent leaks but avoid overtightening, which can damage fittings. Position the hose with a gentle upward slope or loop, similar to a high-loop solution, to prevent backflow and siphoning, which can cause water damage and void your warranty. For detailed installation steps, consult this comprehensive article.
Ensure Proper Loop and Support
Run the drain hose with a high loop, secured above the connection point, mimicking the professional setup seen in commercial plumbing. This prevents siphoning and water backflow, critical for preventing leaks and maintaining your warranty coverage. Use sturdy brackets or clips to support the hose along its path, avoiding sagging, which can lead to leaks or clogging. Proper support reduces strain on fittings, prolonging the lifespan of your install.
Check the Connections Before Powering Up
Double-check all fittings, clamps, and hoses for tightness and correct placement. Look for kinks, twists, or areas where the hose might rub against other components. Think of this step as a final safety check before running your dishwasher—catching issues early avoids costly repairs and warranty problems later. Once confirmed, restore power and water, then run a test cycle to confirm that no leaks occur and that drainage works efficiently.

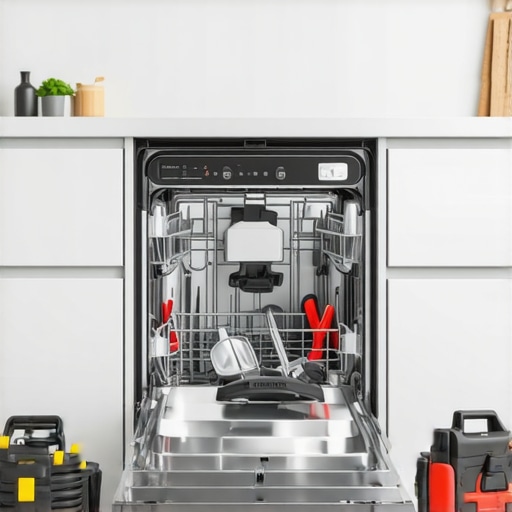
Image showing a professional dishwasher drain hose installation with high loop secured properly to prevent backflow, reinforcing best practices for warranty protection.
Many homeowners believe that choosing the right parts and installing their dishwasher correctly is straightforward, but behind the scenes, there are subtle pitfalls that can jeopardize your appliance’s longevity and warranty coverage. One common myth is that generic or reused parts suffice, yet experts emphasize that using the original, high-quality, code-compliant components is crucial for reliable operation and warranty adherence. This misunderstanding often leads to overlooked details like the importance of the material quality of fittings and hoses, which can cause leaks or premature failure—costly mistakes many overlook until it’s too late. According to appliance repair specialists, neglecting these nuances often results in warranty denial, especially if non-approved parts are involved. Moreover, installing parts improperly—such as failing to secure tight fittings or not creating proper loops—can lead to backflow or siphoning issues, which are frequent causes of water damage and warranty claims rejection. An advanced mistake homeowners sometimes make is overestimating their understanding of warranty policies. For instance, they might think that any repair or part replacement won’t affect their coverage, but certain modifications, like reusing old hoses or ignoring manufacturer installation guidelines, can void warranties altogether. To avoid this, it’s essential to consult detailed troubleshooting guides and understand that even minor oversights—like neglecting to install a high loop or using outdated fittings—can trigger costly repairs and invalidate warranties. For those serious about maintaining their dishwasher’s performance and warranty, paying attention to the specific compatibility and installation nuances is key. Expert recommendations suggest inspecting all parts, including water supply lines, drain hoses, and fittings, to ensure they meet manufacturer specifications. For an in-depth understanding of optional pitfalls and best practices, check out how to diagnose dishwasher parts during warranty periods, and always verify your installation steps align with professional standards. Remember, the devil is in the details—small mistakes can have significant repercussions. Be proactive by double-checking every component and adhering strictly to expert-installed guidelines. Have you ever fallen into this trap? Let me know in the comments.
Tools I Trust for Long-Term Dishwasher Care
Maintaining a dishwasher isn’t just about initial installation; it requires precision tools to ensure each component functions optimally over time. Personally, I rely on a high-quality multimeter like the Fluke 115 for troubleshooting electrical issues accurately. It helps me quickly verify circuit integrity without guesswork, which is critical when ensuring components like control boards or sensors are functioning properly. Additionally, a set of precision screwdrivers, such as the Wiha 77690, is invaluable for accessing tight spots and ensuring fittings are secure during maintenance. Having these tools on hand streamlines the process and minimizes the risk of damaging delicate parts.
For inspecting hoses and fittings, I recommend a dedicated flashlight, like the Maglite ML300, to spot leaks, cracks, or misalignments that might not be visible in regular lighting. I also keep a digital camera ready to document any issues before making repairs or replacing parts, which can be useful if warranty claims become necessary. When it comes to cleaning and ensuring water flows smoothly, a flexible brush like the OXO Good Grips Drain Brush allows me to clear debris from tight areas without damaging hoses or fittings.
Software and Methods for Effective Care
Beyond physical tools, I employ diagnostic software integrated with smart dishwashers, such as the manufacturer-provided apps or compatible IoT platforms. These allow me to run system checks remotely, review error codes, and monitor performance over time. For example, accessing the control panel diagnostics helps identify issues like faulty sensors or drain failures early, preventing costly repairs. Regularly updating firmware, when available, ensures that the appliance benefits from the latest performance improvements and security patches, extending its lifespan.
Implementing routine maintenance methods is just as crucial. I schedule bi-annual inspections to check hoses, seals, and filters, making sure they’re free of debris or wear. Using a vinegar rinse cycle monthly also prevents mineral buildup, which could impair water flow or cause leaks. This simple step, combined with vigilant component checks, significantly prolongs the appliance’s performance.
How Do I Keep My Dishwasher Running Smoothly Year After Year?
Consistent inspection and replacement of key parts are vital. For instance, timely replacing worn-out seals or filters using trusted parts listed on this resource can prevent leaks and ensure efficient drainage. Remember, neglecting minor issues today can lead to expensive repairs tomorrow, and maintaining a well-equipped toolkit makes quick fixes manageable. As advancements in smart technology continue, integrating diagnostic apps into routine maintenance will become even more essential—so stay ahead by familiarizing yourself with these tools.
For example, regularly consulting this guide can help you identify when parts are nearing end-of-life, allowing for proactive replacements. As technology evolves, staying informed about warranty policies and part compatibility ensures you maximize coverage and avoid costly disputes. Don’t wait for a breakdown—start implementing these tools and methods today to keep your dishwasher humming happily for years to come!
< >
>
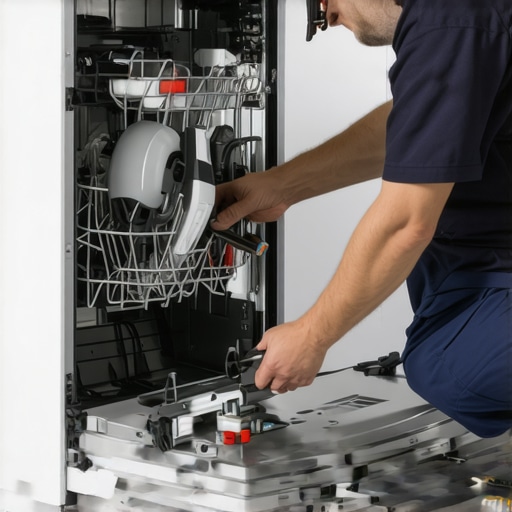
Image showing a modern repair kit with multimeter, screwdrivers, flashlight, and digital camera, ready for routine dishwasher maintenance and troubleshooting.
What the Hardest Lesson About Reusing Parts Taught Me
I once thought saving a few bucks by reusing my old drain hose would be harmless. That lightbulb moment hit hard when my warranty was denied after a leak flooded my kitchen. I learned that shortcuts like reusing parts can quietly sabotage your warranty, leading to costly repairs and stress. Now, I always prioritize proper, new, and code-compliant parts during installations to protect my investment.
Three Myths About Dishwasher Parts That Can Cost You Dearly
Myth 1: All hoses are interchangeable—untrue because incompatible hoses can cause leaks. Myth 2: Reusing old fittings saves money—often leads to failure and warranty denial. Myth 3: Tightening clamps is enough—proper support and correct placement are just as vital. Breaking these myths has been a game-changer in ensuring my dishwasher performs reliably and my warranty stays valid.
Secrets Experts Don’t Share Publicly About Protecting Your Warranty
Top technicians emphasize the importance of verifying each connection, using quality, manufacturer-approved parts, and installing with a high loop on the drain hose to prevent backflow. These subtle details, often overlooked, are critical for avoiding water damage and maintaining warranty coverage. Remember, meticulous attention during installation is your best safeguard against future hassles.
Where to Go from Here to Keep Your Dishwasher Running Smoothly
Start by inspecting your current setup—are your hoses and fittings compliant and properly installed? Use trusted tools like a multimeter and a high-quality screwdriver to ensure everything is secure. Regularly review your installation against professional guidelines, like those found in this resource, and stay proactive. Taking small, consistent steps now can prevent major headaches down the line, ensuring your dishwasher’s warranty and performance are never compromised.
Related Posts

Expert Guide to Dishwasher Parts & Installation for Reliable Performance
Ever had that sinking feeling when your dishwasher suddenly stops…
Warranty and Parts for Smart Dishwashers: Installation & Repair Tips
My Journey with Smart Dishwashers and the Importance of Warranty…
Smart Dishwasher Parts & Installation: Expert Tips for Long-Lasting Durability
Have you ever gone to load your dishwasher only to…