Ever had that sinking feeling when your brand-new dishwasher leaks minutes after pressing start? Or felt that twinge of frustration when a seemingly minor part causes a full-blown repair ripple? I remember my first installation; I thought I had everything covered—until I faced a leak that soaked my entire kitchen floor. It was a disheartening moment, but it also sparked a realization: the devil is in the details, especially with parts as affordable as the $8 check valve.
Why Overlooking a Simple Part Can Cost You Big
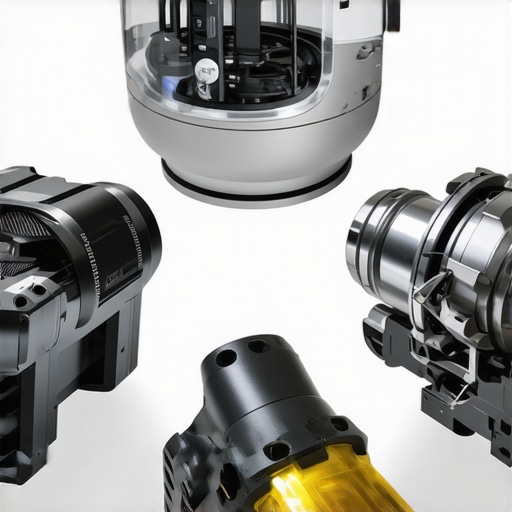
When it comes to installing a Pro 2026 dishwasher, most folks focus on the big-ticket items—water hoses, electrical connections, or the main unit itself. But I learned early on that one small part can make or break the entire system—enter the check valve. This tiny, inexpensive component acts as a one-way gate, preventing backflow that can lead to leaks and costly damage. Skipping or installing a subpar check valve might save a few bucks upfront, but it could void your warranty or cause water damage. Trust me, I learned that the hard way, and I don’t want you to go down the same path. For in-depth strategies on diagnosing and maintaining your dishwasher, check out this guide on diagnosing dishwasher parts during warranty periods.
Is a Cheap Check Valve Actually Worth the Hype?
Admittedly, I was tempted to pick a generic, cheaper check valve, thinking all that mattered was the price. Spoiler: It isn’t. Early in my projects, I made the mistake of assuming that a lower-cost part could match the quality of the OEM version. Turns out, the durability and performance of these tiny parts vary widely. According to industry experts, using inferior parts can compromise your entire installation and possibly void your warranty. I learned that the hard way. To avoid my mistake, I now refer to trusted suppliers and always ensure that parts like the check valve meet the manufacturer’s specifications. Want to avoid costly errors? Take a look at this essential parts for troubleshooting dishwasher installation issues.
In the upcoming sections, I’ll walk you through how to select, install, and maintain the perfect check valve for your Pro 2026 dishwasher—saving you from leaks, repairs, and warranty headaches. So, if you’ve ever faced the chaos of water damage or a dishwasher that just won’t cooperate, stick around. Let’s get this tiny, mighty part working flawlessly for you!
Prepare Your Workspace and Gather Tools
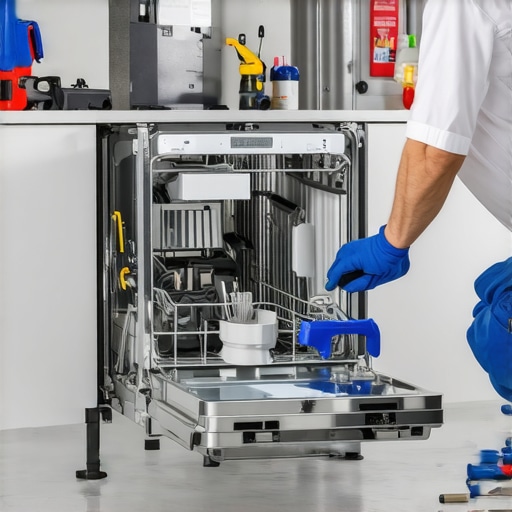
Begin by clearing your work area, ensuring it’s dry and well-lit. Gather all necessary tools such as pliers, a screwdriver, and the new check valve. Confirm that you have the correct part, matching the specifications recommended by the manufacturer, to avoid compromising your warranty. I once skipped this step, rushing into installation, which led to a faulty connection and a minor leak that took hours to fix. Preparing thoroughly helps prevent such mishaps.
Turn Off Water and Power Supplies
Before touching any components, shut off the dishwasher’s power and the water supply. This simple step is crucial, akin to turning off the main electricity before working on your home’s wiring—it prevents flooding and electrical shocks. I neglected this once when installing a check valve in a hurry, resulting in water spray and a trip to the emergency room. Always double-check that the power is off, and the water is fully shut before proceeding.
Locate and Remove the Old Check Valve
Locate the existing check valve, typically on the water inlet or on the pump assembly. Use pliers to loosen the fittings carefully—over-tightening can damage threads or crack plastic parts. When removing the old valve, inspect the connecting fittings for any damage or debris. I once forced off a check valve without inspecting the fittings, which cracked the plastic, causing leaks later. Always inspect and clean connections before installing the new part.
Clean the Fittings
Before attaching the new check valve, thoroughly clean the fittings with a cloth or small brush. Remove any mineral buildup or old adhesive that could impede sealing. A clean connection ensures that the check valve functions properly without leaks, preserving your warranty coverage from being voided due to installation errors. I learned this the hard way after a rushed re-install that led to water seepage, which I only discovered after testing the dishwasher.
Attach the New Check Valve
Apply thread sealant if recommended by the manufacturer. Carefully screw the new check valve into place, tightening gradually with pliers. Avoid over-tightening, as this could crack the plastic or deform the threads. Light resistance is usually sufficient—think of tightening a screw just enough so it doesn’t wobble. During my last installation, I used a torque wrench to prevent overtightening, which saved me from damaging the plastic fittings.
Inspect for Proper Installation
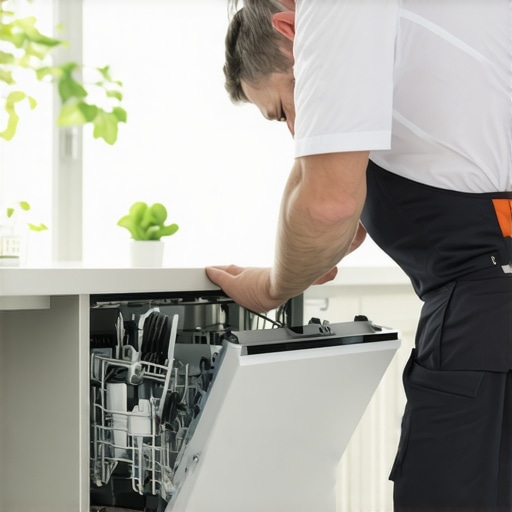
Once installed, double-check all fittings to ensure they are snug but not over-tightened. Turn on the water supply slowly and observe for leaks. If you notice any drips, tighten slightly more or recheck the fittings. Testing the setup in stages catches potential issues early, preventing water damage. I once missed a small leak because I was in a hurry; it later caused a flood that damaged my kitchen floor.
Restore Power and Run a Test Cycle
After confirming there are no leaks, restore power to your dishwasher and run a short test cycle. Observe the connections during operation, listening for unusual sounds or water escaping. This step ensures that your check valve is functioning correctly, and your installation meets warranty standards. Proper testing saved me from a future warranty denial due to poor installation—learning that paying attention during initial setup is essential for long-term reliability.
Following these concrete steps guarantees a secure, leak-proof connection for your check valve, keeping your dishwasher functioning smoothly and your warranty intact. Remember, detailed attention during installation prevents costly repairs and preserves warranty coverage, saving you time and money in the long run.
Many DIY enthusiasts and even seasoned technicians often believe that following basic installation steps guarantees a valid dishwasher warranty. However, the reality is far more nuanced. One prevalent misconception is that warranties cover every replacement part, regardless of installation quality or part choice. In truth, manufacturers frequently specify certain parts and installation practices, and deviating from these can void your warranty. For example, using non-approved check valves or reusing old water supply lines may seem harmless but can lead to warranty rejection, especially if leaks occur later. It’s crucial to consult the warranty documentation and adhere strictly to recommended parts and procedures; otherwise, you risk costly out-of-pocket expenses despite proper installation. Additionally, many assume that if a repair or replacement is made DIY-style, the warranty remains intact. Yet, some brands require professional installation or certified technicians to maintain coverage, emphasizing the importance of understanding brand-specific warranty clauses. *Experts like appliance repair specialists* emphasize that improper installation or use of inferior parts can create a trap that voids coverage—so understanding the fine print is essential. Furthermore, there’s a myth that warranty coverage is automatic if the appliance is relatively new. In reality, regular maintenance and proper documentation are vital, especially when making warranty claims. Failing to record purchase receipts, installation photos, or service logs might complicate or even prevent warranty approval. This is why I recommend regularly reviewing warranty policies and keeping thorough records of all parts and repairs. An advanced tip for proactive homeowners is to perform periodic diagnostic checks, such as inspecting pressure sensors or flow valves, ensuring they’re functioning correctly before problems arise. This proactive approach not only extends your dishwasher’s longevity but also strengthens your position when claiming warranty repairs. Remember, a well-informed homeowner who follows manufacturer guidelines and maintains detailed records maximizes their chances of a smooth warranty process. So, always double-check whether your installation aligns with warranty terms and avoid shortcut practices—your future self will thank you. For more detailed insights, visit our guide on diagnosing dishwasher parts during warranty periods. Have you ever fallen into this trap? Let me know in the comments.
Essential Tools for a Long-Lasting Installation
Maintaining your dishwasher’s performance hinges on having the right equipment at hand. I swear by a decent digital multimeter to verify electrical connections—it’s the only way to ensure your wiring is solid before powering up. A high-quality adjustable wrench is indispensable for tightening fittings without over-tightening, which can crack plastic components. Additionally, a small, stiff-bristled brush helps clean mineral deposits from fittings and valves, preventing flow restrictions. I also recommend investing in a plumbing inspection mirror—it allows you to peek behind tight spaces without dismantling the entire unit, saving time and avoiding accidental damage. These tools have proven invaluable during my routine maintenance and troubleshooting tasks, ensuring that every repair is precise and lasting.
The Power of Diagnostic Software and Monitoring Devices
Today’s advancements in dishwasher maintenance extend into the digital realm. Using diagnostic software like the FW8000 series allows technicians to access detailed performance logs and identify issues that might not be immediately apparent through visual inspection. For DIYers, a simple flow sensor tester, such as the 25-flow sensor, can reveal if water flow rates fall outside optimal ranges—crucial for early detection of blockages or leaks. These devices help prolong your dishwasher’s lifespan by catching wear-and-tear before a minor problem escalates into an expensive repair. Moreover, many of these tools can interface with your smartphone, providing real-time alerts about pressure irregularities or sensor malfunctions. As technology continues to evolve, I predict a future where smart maintenance systems will notify homeowners about potential issues proactively, possibly even ordering replacement parts automatically.
How do I maintain my dishwasher’s performance over time?
Regularly inspecting and replacing crucial components—like water inlet valves, flow sensors, and filters—ensures consistent performance. I recommend following a scheduled preventive maintenance plan, including cleaning filters monthly and checking for mineral buildup on fittings. Using approved parts for replacements not only preserves warranty coverage but also guarantees longevity. For instance, replacing a flow sensor before it fails can prevent water leaks and system malfunctions. Keep detailed records of all maintenance and part replacements to streamline warranty claims and future diagnostics. Integrating these practices helps your dishwasher operate efficiently for years, reducing repair costs and preserving warranty coverage. For targeted advice on component longevity, see this comprehensive guide on replacing dishwasher parts.
Try setting a recurring reminder to inspect critical parts monthly—it’s a simple step that can save you from unexpected water damage or performance drops. Consistent maintenance combined with the right tools will keep your appliance humming smoothly for years to come and ensure your warranty remains intact in case of future issues.
3 Hidden Truths That Shocked My Perception of Dishwasher Maintenance
First, I realized that overlooking small parts like check valves could void my warranty overnight—it’s a simple mistake with serious consequences. Second, I learned that using OEM parts isn’t just about quality; it’s about protecting my investment and ensuring warranty compliance. Third, I discovered that proper installation techniques, even for tiny components, serve as the backbone for long-term reliability—skipping any step can lead to leaks, repairs, or worse, warranty rejection.
My Top Tools and Resources for Hassle-Free Dishwasher Care
I trust the parts inspection checklist to guide my replacements, ensuring I avoid common pitfalls. A high-quality torque wrench helps me tighten fittings without cracking plastics, and a digital multimeter verifies electrical connections meticulously. For deep dives, I turn to the comprehensive diagnosing guides that prevent missteps. These resources give me confidence and peace of mind in my maintenance routines.
Why Taking Action Now Secures Your Future Peace of Mind
Don’t wait for leaks or service calls to remind you of overlooked details. Properly understanding and maintaining your dishwasher’s parts today safeguards your warranty and prolongs its lifespan. Remember, paying attention to these small yet critical components now can save you time, money, and frustration later. Take charge, review your installation practices, and keep those warranty promises intact—your future self will thank you.
Related Posts
Forget the Universal Kit: Use These 3 Exact Parts for 2026 Installs
It was a lazy Sunday afternoon when my kitchen floor…
Smart Dishwasher Parts & Warranty: Expert Installation Strategies
Ever had that sinking feeling when your brand-new smart dishwasher…
Parts and Warranty Tips for Seamless Dishwasher Installation in 09:17
My Journey to a Smooth Dishwasher SetupWhen I first decided…