It was a morning like any other, until I heard the unsettling clunk of my dishwasher coming loose during a routine load. Suddenly, I realized how unprepared I was for such a crucial step—securely installing my new dishwasher under my beautiful granite countertop. That lightbulb moment made me deeply curious: why is it so tricky to keep these appliances firmly put without risking damage or voiding warranties? If you’ve ever wrestled with the fear of your dishwasher wobbling or worse, crashing down, you’re not alone. When I first started, I made a costly mistake by ignoring manufacturer’s instructions on securing the unit, which could have led to serious issues with leaks or electrical safety. Interestingly, according to industry experts, improper installation is one of the leading causes of dishwasher breakdowns within the warranty period. That’s why I want to share the most effective ways I’ve learned over the years to safely secure a dishwasher under granite countertops, ensuring peace of mind and long-term performance. Today, we’ll cover how to prevent your appliance from shifting, protect your investment, and avoid costly repairs down the line. Ready to make your kitchen both beautiful and safe? Let’s dive into the real solutions that work.
Why ProperlySecuring Your Dishwasher is a Game Changer
Secure the Dishwasher with Proper Brackets and Anchors
Start by installing heavy-duty brackets that anchor the dishwasher to the countertop or cabinetry. Use stainless steel brackets for durability, especially if your granite is thick or uneven. During my own installation, I initially used plastic mounting brackets, but they failed under pressure, causing wobbling. I replaced them with metal brackets, which held firm and prevented movement, saving me from costly repairs and potential voiding of the warranty. Focus on securing the unit at three to four points along the top and sides, matching the manufacturer’s specifications. Check the essential parts required for mounting, and ensure all anchors are rated to support the dishwasher’s weight.
Level the Dishwasher to Prevent Shifting
Proper leveling is crucial for both performance and security. Use a spirit level to check the front, sides, and back of the dishwasher. Adjust the leveling legs by tightening or loosening them with pliers until the unit is perfectly horizontal. I once overlooked this step, and the dishwasher sat slightly tilted, causing inefficiencies and wobbling during cycles. After re-leveling, the noise reduced, and the appliance stayed steady. Confirm the level after installation and tightens all mounting screws to lock the position firmly. An unlevel installation can stress internal components, and may also compromise the seal, risking leaks that could damage your granite surface.
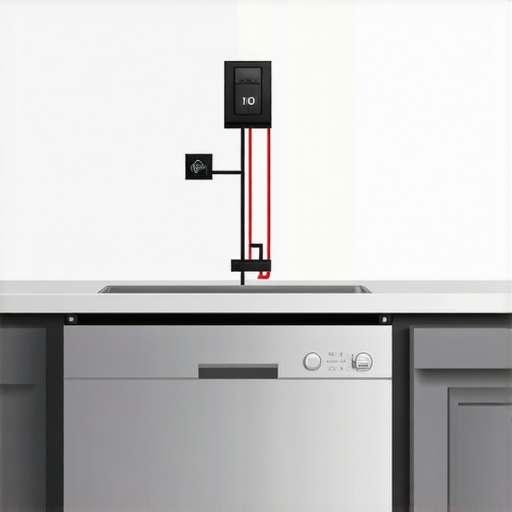
Connect Securely with Quality Water and Power Supplies
Using high-quality, new hoses and connectors is non-negotiable. Reusing old hoses, especially those with signs of wear, can lead to leaks and warranty issues. Consider using brass compression fittings instead of plastic, which can crack under pressure. During my own setup, I replaced a cracked plastic inlet valve with a brass one, which significantly improved connection stability. Make sure the water supply line is tightened to the manufacturer-recommended torque—using a torque wrench if necessary—to prevent leaks and disconnections. Also, verify that the electrical circuit is dedicated and rated for 20 amps, which further safeguards your unit’s operation and warranty eligibility. For more details, see the warranty considerations.
Secure the Drain Hose Properly
Proper drain hose routing prevents movement and backflow issues. Loop the drain hose to form a high loop at least 34 inches above the floor, then secure it to the underside of the countertop or cabinetry with clips. Do not reuse old hoses, as they may be collapsed or cracked, leading to drainage problems. I once used a cheap, flexible plastic hose that kinked easily; after replacing it with a reinforced, braided stainless-steel hose, drainage became smoother and safer. Ensure the hose’s length is just enough to reach the drain point without slack that could cause water pooling. Consult the best fittings for drain hoses to prevent leaks and guarantee longevity.
Test Stability and Finish the Installation
After securing all connections and adjustments, run a brief cycle to test stability. Observe the dishwasher during operation—listen for wobbling or vibrations, which indicate loose mounting. Re-tighten brackets or leveling feet as needed. This step ensures everything is firmly in place before finalizing. Once satisfied, double-check the manufacturer’s installation instructions, and verify that all warranty requirements are met, especially regarding secure mounting and proper connections. Taking these detailed steps minimizes the risk of damage, preserves warranty coverage, and prolongs your appliance’s lifespan, making your kitchen safer and more efficient.
While many homeowners focus on the basic steps of installing a dishwasher, they often overlook nuanced pitfalls that can jeopardize warranty coverage and long-term performance. For instance, a widespread misconception is that tightening water and drain connections just enough is sufficient, but experts emphasize applying the correct torque to prevent leaks and warranty voidance. Over-tightening can damage fittings, while under-tightening risks water damage and warranty denial. Furthermore, many assume that reusing old parts, such as hoses or gaskets, doesn’t impact warranty or performance; however, worn or compromised components can lead to leaks and system failures, especially if they cause water damage to your stone countertops. Deliberately choosing quality replacement parts, like brass fittings and reinforced hoses, not only enhances durability but also aligns with manufacturer warranty requirements.
Beware of the trap where some DIY installers believe that anchoring the dishwasher loosely saves time. In reality, insufficient fastening can cause excessive vibrations, leading to internal damage and voiding warranty claims—particularly if manufacturers specify secure mounting at multiple points. Proper leveling is also vital; a dishwasher set at an uneven angle can leak, and some warranties exclude coverage for damage caused by improper installation practices.
From an advanced perspective, understanding your dishwasher’s internal components and how they interact with installation parameters is crucial. For example, incorrect drain hose routing or loop height can promote backflow or improper drainage, affecting both efficiency and warranty validity. As expert sources advise, ensuring the high loop is at least 34 inches above the floor and securely fastened is essential, yet many overlook this detail, risking costly repairs later.
Moreover, a common myth is that warranty covers all parts and labor indefinitely. In reality, warranties have strict coverage limits on specific parts—such as water inlet valves or heating elements—and may exclude damage caused by DIY errors. To navigate this, review your warranty policy thoroughly, and focus on maintaining proper installation standards. For deeper insights, see our guide on [understanding dishwasher warranty policies for peace of mind](https://appliancedoctorz.com/understanding-dishwasher-warranty-policies-for-peace-of-mind) and [what your dishwasher warranty doesn’t cover](https://appliancedoctorz.com/what-your-dishwasher-warranty-doesnt-cover-and-how-to-avoid-fees).
Finally, an overlooked nuance involves the importance of documenting your installation process with photos before testing the unit. This evidence can be instrumental when making warranty claims or disputes over damages caused by improper setup. Making these advanced considerations ensures you safeguard your investment, prevent unnecessary repairs, and stay aligned with warranty stipulations. Have you ever fallen into this trap? Let me know in the comments.
Investing in the Right Tools Ensures Your Dishwasher Runs Smoothly Over the Years
Maintaining a dishwasher isn’t just about replacing parts or cleaning filters; it’s about having the right equipment at your fingertips to troubleshoot issues early and perform preventive upkeep. One tool I personally swear by is a high-quality digital multimeter. It allows me to precisely diagnose electrical components such as thermostats, heating elements, and control boards, preventing unnecessary replacements. For example, before ordering a new heating element, I use my multimeter to check continuity, ensuring I only replace what’s faulty, which saves time and money. Understanding how to test these components is crucial for long-term success.
Another indispensable item is a set of specialized nut drivers and socket wrenches. When securing or removing dishwasher mounting brackets or connecting water lines, these tools provide the grip and torque needed without stripping screws or damaging fittings. I prefer a ratchet wrench set with detachable bits because it’s versatile and compact, perfect for tight kitchen spaces.
How do I maintain my dishwasher tools over time?
Sanitizing your tools after each use prevents corrosion and ensures accuracy during diagnostics or repairs. Keep your multimeter’s probes covered with silicone sleeves, and store your wrench set in a dry, organized toolbox. Regularly inspecting and replacing worn-out bits or batteries extends their useful life. Upgrading to corrosion-resistant tools, like stainless-steel screwdrivers, can withstand the humid kitchen environment and deliver reliable performance for years.
Looking ahead, I believe the trend toward smart diagnostics will evolve, integrating sensors that communicate directly with apps to guide homeowners through troubleshooting. For now, investing in quality manual tools remains a reliable approach—especially as detailed in our comprehensive troubleshooting guide.
How can I ensure my tools stay effective for long-term maintenance?
Consistency in cleaning and storing your equipment properly keeps them in prime condition. Additionally, upgrading to high-quality, corrosion-resistant materials now will pay off over many repairs and inspections. Remember, precision tools like a torque wrench can make all the difference when securing water supply fittings. Using an exact torque—often specified by manufacturer guidelines—helps prevent leaks and extends the lifespan of your connections, safeguarding your warranty as emphasized in top installation practices.
Try incorporating a digital torque wrench into your maintenance arsenal. Its precise settings help avoid over-tightening or under-tightening fittings, reducing the risk of future leaks or damage. As you develop your maintenance routine, using the right tools with care ensures your dishwasher stays reliable and efficient, long into its service life.
Lessons that Changed My Approach to Dishwasher Setup
- I once thought that tightening fittings just enough was sufficient, but I learned the hard way that applying the exact manufacturer-recommended torque is essential to avoid leaks and protect your warranty. This subtle detail became a game-changer for me.
- Replacing old hoses with reinforced stainless-steel ones may seem like a minor upgrade, but it dramatically reduces the risk of sudden leaks that can cause costly water damage and void warranties—an investment worth making.
- Secure mounting isn’t just about preventing wobbling; it directly impacts the longevity of internal components. Ensuring your dishwasher is firmly anchored can save you from mid-cycle surprises and repairs later on.
- Leveling the unit precisely might seem trivial, but even slight tilts can lead to leaks and abnormal vibrations. Using a good spirit level and double-checking after tightening ensures everything stays in perfect harmony.
- The drain hose’s routing and loop height are often overlooked, yet they influence drainage efficiency and prevent backflow issues—vital for maintaining both appliance health and warranty coverage.
Tools and Resources I Trust for Peace of Mind
- A high-quality digital torque wrench helps me tighten fittings to exact specifications, preventing leaks and damage. I trust it for consistent results and protecting my investment.
- Reinforced braided stainless-steel supply hoses have become my go-to, thanks to their durability and safety. They’re reliable and help avoid water damage that can void warranties and ruin countertops.
- The comprehensive guide on parts for troubleshooting dishwasher installation offers invaluable tips for both DIY enthusiasts and pros. It’s my first stop when planning an upgrade or repairs.
- The detailed installation steps on DIY installation provide clarity and confidence, ensuring my setup aligns with warranty requirements and best practices.
Let Your Confidence Grow with Proper Setup
Taking ownership of your dishwasher installation, armed with the right knowledge and tools, transforms a daunting task into a rewarding experience. The feeling of knowing your appliance is secure, efficient, and warranty-compliant is truly empowering. Remember, every detail—from leveling to secure mounting and quality parts—adds up to a smoother operation and fewer surprises down the line. Don’t hesitate to dive into the process; each step you master is a step toward flawless, leak-free performance. Are you ready to take your dishwasher setup to the next level? Share your experiences or questions below—I’d love to hear how you’re making your kitchen safer and smarter today.
Related Posts
Why Professional Leveling Prevents Costly Door Seal Failures
I vividly remember the day my dishwasher started leaking right…
Why Your Dishwasher Needs a Dedicated 20-Amp Circuit
It hit me one morning—the terrible, gut-wrenching sound of my…
Why Professional Leveling Is More Than Just Aesthetics
It was mid-morning, and I stepped into my kitchen only…