I remember the day I finally convinced myself to replace my old, squeaky dishwasher. Eager and a bit overconfident, I dove into the project on a Saturday morning, armed with YouTube tutorials and a box full of parts. But halfway through, I hit a stumbling block that I hadn’t anticipated—water leaks. It was a small trickle at first, but it quickly turned into a slow drip that threatened my new hardwood floor. That moment was a lightbulb realization: I had skipped a crucial step that nearly cost me dearly.
The Steam Barrier That Many Overlook and Regret Later
The culprit? The often-dismissed but vital cabinet steam barrier. It’s easy to think of it as just an extra piece of plastic or foam, but neglecting this barrier can lead to wood rot, mold, and, ultimately, costly repairs. During my own installation, I underestimated its importance and learned the hard way that most DIYers tend to skip this step, only to regret it when the damage shows up years down the line.
Is Skipping the Steam Barrier Actually a Good Idea?
Many believe they can save time and money by neglecting the steam barrier. But trust me, that’s a gamble. Properly installed, it acts as a shield, preventing moisture from seeping into the wood cabinet and causing long-term damage. Skipping it might seem harmless initially, but over time, the accumulated moisture can wreak havoc. According to industry experts, moisture control is one of the most overlooked aspects of appliance installation, yet it’s pivotal for the longevity of your cabinetry and flooring. Studies show that water damage from poor installation practices costs homeowners thousands annually—it’s no trivial matter.
When I first started, I made the mistake of thinking a quick seal would suffice, but I now know better. To avoid my costly mistake, I looked into detailed resources on dishwasher maintenance and installation, like the comprehensive guides on how to properly install and seal dishwasher parts. For a DIYer, understanding the importance of sealing gaps and installing a proper steam barrier is essential; otherwise, future repairs could be a nightmare.
Are you facing difficulties with your dishwasher installation or worried about hidden moisture damage? If so, you’re not alone. Many enthusiasts overlook this small but critical step, and the results can be disastrous. Fortunately, by understanding and installing a proper cabinet steam barrier, you can protect your home from long-term damage and save money in the future.
Now that I’ve shared my experience, let’s dive into how you can identify the right materials and install a reliable steam barrier to ensure your dishwasher’s long-term performance and your peace of mind. Want to learn more? Check out detailed tips on assembling the perfect moisture barrier and safeguarding your cabinetry.
Select the Right Material for Your Steam Barrier
Choosing the appropriate material is crucial. Use a durable, waterproof, and heat-resistant plastic or foil sheet. Heavy-duty polyethylene or aluminum foil-backed insulation works well. Avoid thin plastic sheeting that can tear or warp over time. For guidance on selecting high-quality parts, check out this resource.
Measure and Cut with Precision
Measure the interior dimensions of your cabinet where the dishwasher sits. Add an extra inch on all sides to allow for secure fastening and expansion. Use a sharp utility knife or scissors to cut the material to size. Precision here prevents gaps that could let moisture escape. I remember a time I mistakenly cut the barrier too short, leading to water seeping behind; a lesson in double-checking measurements.
Positioning and Securing the Barrier
Place the barrier so it extends slightly above the bottom of the cabinet to intercept rising moisture. Secure it with waterproof tape or clamps designed for appliance installations. Ensure it covers all vulnerable areas, especially near the waste and supply connections. During my first attempt, I forgot to tape the edges, resulting in moisture leakage; now I make sure every seam is sealed tightly.
Seal All Gaps to Prevent Moisture Escapes
Use a high-quality, moisture-proof sealant, such as silicone caulk, to seal any seams or overlaps. Run a continuous bead along all edges and joints. This step is essential; even small unsealed gaps can lead to long-term water damage. I once saw a DIY project where neglecting this step caused mold growth behind the cabinet years later.
Test Before Final Assembly
Before sealing everything permanently, run a short cycle without dishes to inspect for leaks. Check the sides, edges, and connection points for any signs of moisture. Make adjustments as needed. Conducting this test saved me from installing a barrier that didn’t properly shield against water vapor. For comprehensive insights into diagnosing installation issues, visit this article.
Maintain the Barrier for Longevity
Periodically inspect the barrier for tears, detachment, or accumulation of dust and debris. Replace or reseal as necessary. Proper maintenance ensures it continues to protect your cabinetry and flooring. Once, I neglected this and found mold developing along the edges, which was costly to remediate. Regular checks are part of responsible dishwasher upkeep.
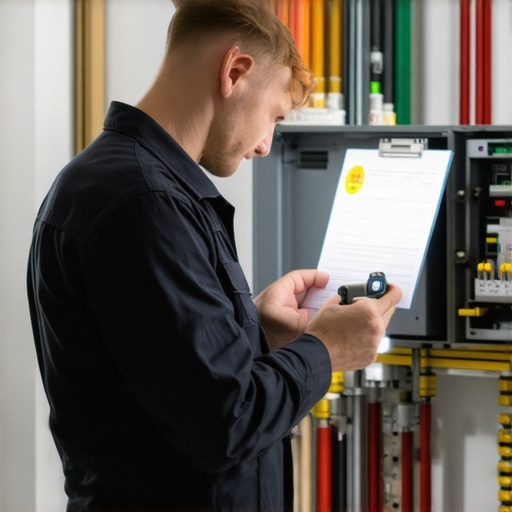
Many homeowners believe that installing a dishwasher is a straightforward task, but this oversimplification often leads to costly mistakes. A prevalent myth is that any flexible hose can serve as a water inlet or drain line; in reality, using incompatible or cheap materials can cause leaks or deterioration over time. Experts emphasize choosing high-quality, code-compliant parts, which you can verify by reviewing resources like this comprehensive guide. Additionally, a common error is neglecting to check the manufacturer’s warranty coverage for specific parts, which can be easily misunderstood. Many think all repairs or replacements are covered, but only certain components under warranty are eligible if installed correctly. You should familiarize yourself with the list of warranty-covered parts. A subtle but critical nuance involves understanding how small failures—like a wearing door gasket or a clogged filter—can escalate if overlooked, leading to systemic damage. Advanced users understand that regular inspection and early replacement can prevent major failures, saving money. For example, an unnoticed small leak from a faulty inlet valve might weaken the cabinet’s structure over time, ultimately voiding your warranty if deemed improper maintenance. Experts warn against delaying such repairs, citing studies that long-term moisture exposure accelerates wood rot and mold growth. If you’re unsure about diagnosing these issues, consult this troubleshooting resource. Lastly, I want to highlight a frequently overlooked component: the pressure switch, which prevents overfilling. Many default to ignoring it, risking water damage or pump failure. A precise understanding of such parts, including their proper testing and replacement, makes all the difference in maintaining an efficient dishwasher. Want to avoid the pitfalls most homeowners fall into? Dive into detailed insights at this troubleshooting guide. Have you ever fallen into this trap? Let me know in the comments.Maintaining your dishwasher over time requires more than just occasional cleaning; it demands precise tools and systematic methods to ensure longevity and optimal performance. One essential tool I personally rely on is a digital multimeter. Not just for electrical troubleshooting, but for verifying continuity on components like door switches or heating elements, which are critical for your unit’s operation. My favorite model is the Fluke 117 because of its accuracy, durability, and user-friendly interface. Using a reliable multimeter allows me to quickly identify faulty wiring or blown fuses without unnecessary guesswork, saving both time and money.
How do I maintain my dishwasher’s parts and prevent costly breakdowns over time?
In addition to electronic diagnostics, I recommend investing in a few specialized tools for mechanical inspections. For instance, a set of precision screwdrivers is indispensable for removing panels and accessing internal parts. I prefer magnetized, insulated screwdrivers to avoid slipping or short-circuiting sensitive components. When it comes to stubborn seals or gaskets, a plastic pry tool prevents damage and facilitates careful disassembly. Regularly testing water inlet valves with a simple hose pressure tester can prevent leaks—an issue that often becomes a nightmare if ignored early. For accurate readings, I follow the procedure outlined in industry standards, such as the detailed inspection techniques on [appliancedoctorz.com](https://appliancedoctorz.com/understanding-dishwasher-parts-a-key-to-effective-maintenance).
Future trends for upkeep tools
As smart appliances become more prevalent, the integration of diagnostic apps and IoT sensors is likely to revolutionize maintenance routines. Imagine your dishwasher app alerting you to a failing component before it completely breaks down, enabling preemptive repairs. Already, some brands incorporate leak detection systems that communicate directly with your smartphone, allowing quick intervention and preventing extensive damage. Staying ahead involves embracing these technologies and pairing them with traditional tools, like multimeters and manual inspection kits, for comprehensive monitoring.
Maintain performance by regularly checking crucial parts
How do I keep my dishwasher’s parts in top shape over the years? Start by periodically inspecting components like door seals, spray arms, and water inlet filters. Use a soft brush or cloth with mild cleaning solutions to remove mineral buildup and residual debris. Additionally, review your warranty coverage regularly—understanding which parts are protected can guide you in timely replacements, avoiding inconvenience during critical moments. For specific guidance on warranty coverage, check out [appliancedoctorz.com](https://appliancedoctorz.com/the-complete-list-of-dishwasher-parts-covered-by-warranty). Remember, proactive maintenance combined with the right tools is your best defense against unexpected failures and costly repairs. To test your troubleshooting skills, try diagnosing a minor electrical fault using your multimeter today—it’s a skill that pays off in the long run!
3 Lessons I Wish I Had Known About Dishwasher, Installation, Warranty, and Parts
First, never underestimate the power of proper moisture barriers; skipping this step can cost you hundreds in repairs later. Second, investing in quality replacement parts not only prolongs your dishwasher’s lifespan but also saves you from repeated headaches. Finally, understanding your manufacturer’s warranty coverage and adhering to installation guidelines safeguards your investment and simplifies claims if issues arise.
My Trusted Arsenal for Dishwasher Maintenance Progress
For detailed insights into selecting the right parts, I recommend this resource, which helped me choose durable, compatible components. I rely on a reliable digital multimeter, such as the quality multimeter, for electrical troubleshooting, and a set of precision screwdrivers for internal inspections. These tools empower me to diagnose and fix issues efficiently, preventing costly replacements and ensuring safety.
Your Next Step to Peace of Mind with Dishwasher Care
Taking proactive steps today can dramatically extend your dishwasher’s life—regular inspections, choosing high-quality parts, and understanding warranty nuances are critical. Embrace these practices, and you’ll enjoy reliable performance for years to come. Have you ever encountered a leak after ignoring a small seal? Share your experience below and let’s learn from each other’s mistakes.
Related Posts

How to Document a Professional Install for Future Warranty Security
Imagine finally finishing a professional dishwasher installation only to face…
Why You Should Always Keep Your Original Installation Manual
I remember the exact moment I realized I’d fallen into…
How to Audit a Professional Installation Before the Technician Leaves
I vividly remember the day I watched a technician walk…