
It was late on a Saturday afternoon when I finally decided to tackle that stubborn leak under my kitchen sink. As I pulled out my old dishwasher, I realized something was off—my new hose was way too short, forcing me into awkward contortions just to connect it. That moment was a lightbulb flickering in my mind: how hard could it be to pick the right hose length? Turns out, quite a lot. The wrong length can turn a simple installation into a frustrating mess and even cause costly damage over time.
Nailing the Perfect Hose Length: Why It Matters
Choosing the correct hose length for your dishwasher isn’t just about convenience or aesthetics. It influences the appliance’s performance, safety, and longevity. Too short, and you risk kinking the hose, which can restrict water flow and increase pressure on connections, leading to leaks or ruptures. Too long, and you’ll end up with excess slack that can trap debris or create tripping hazards. Early in my DIY days, I made the mistake of assuming any hose would do—it wasn’t until I had water dribbling onto my kitchen floor that I understood the importance of measurement and planning.
For reliable information, the appliance experts at Consumer Reports emphasize that proper hose sizing is crucial for preventing water damage and maintaining manufacturer warranties. They recommend consulting your dishwasher’s installation manual or a professional to determine the ideal length tailored to your kitchen setup.
Is the fuss over hose length really that important?
Many homeowners think they can save by choosing the shortest hose possible or trying to extend it with cheap connectors. I used to believe that too, but I quickly learned that such shortcuts often lead to more trouble. A mistake I made early on was assuming I’d get away with a makeshift extension, and that cost me when it leaked during the first wash cycle. Proper hose selection isn’t just a technicality—it’s a safeguard for your entire dishwasher’s performance and your home’s safety.
To get the lowdown on critical parts and installation tips, check out this helpful overview on [common dishwasher parts and their role in proper installation](https://appliancedoctorz.com/common-dishwasher-parts-and-their-role-in-proper-installation). Next, let’s dive into how to measure and choose the right hose length for your specific space, so you can avoid the costly mistakes I made.
Measure Your Space Carefully Before Buying
Start by measuring the distance from your water inlet connection to the intended position of your dishwasher’s drain and water supply hoses. Use a tape measure, and add an extra 10 to 15 inches to accommodate the path of the hoses, ensuring they aren’t stretched tight or hanging loosely. I learned this lesson the hard way when I underestimated the space, and my hose was too short, forcing me into awkward positions during installation. Once I measured accurately, I was able to select a hose that provided enough slack for movement without excess loops, which helps prevent tripping or debris trapping. Proper measurement is the foundation for a smooth installation and long-term performance.
Choose the Correct Hose Length Based on Your Measurements
After measuring, consult your dishwasher’s manual or the manufacturer’s specifications to determine the recommended hose length. Many models specify maximum and minimum lengths for optimal operation. When selecting a hose, avoid the temptation to use extension connectors or adapters that aren’t approved or recommended, as these can introduce leaks or reduce pressure. Instead, opt for a hose that matches your measurements or slightly longer if needed, ensuring it can comfortably reach the water inlet and drainage point. Remember, a hose that’s too long can create slack that traps debris or causes kinks, while too short forces you into risky installations. My experience with a hose that was just a few inches too short resulted in frequent leaks—precision matters.
Use a Flexible Measuring Tape for Accuracy
Employ a flexible tape measure to follow the path where your hoses will run. This approach provides an accurate reading, especially in tight or oddly shaped spaces. During my last project, I wrapped the tape around corners and along cabinets to ensure I accounted for every bend. This method helped me avoid purchasing a hose that would fit in theory but was impractical in practice, saving both time and money. Make sure to measure both the water supply and drain paths separately, as they may require different lengths.
Prioritize Quality and Compatibility
Choose hoses that meet safety standards and are compatible with your dishwasher’s model. Quality hoses have reinforced walls and secure fittings, reducing the risk of leaks. In my case, I invested in a certificate-approved hose from a reputable brand and checked its compatibility with my unit, referencing [common dishwasher parts and their role in proper installation](https://appliancedoctorz.com/common-dishwasher-parts-and-their-role-in-proper-installation). Using a compatible and high-quality hose not only prolongs lifespan but also safeguards your warranty by adhering to manufacturer specifications.
Suppose Your Space Has Obstacles
If you have cabinets, pipes, or other obstructions, factor these into your measurements and hose selection. Consider using a slightly longer hose if obstacles limit the direct path, but avoid excessive slack. Flexible hoses with braided reinforcement are ideal for navigating tight spaces without kinking. In my kitchen, a quick assessment of cabinet ornamentations led me to choose a longer, braided hose, which prevented kinks when I routed it around a corner, avoiding costly repairs later.
Make an Informed Purchase for Peace of Mind
Once you’ve measured and identified the appropriate length, purchase a hose designed for dishwasher applications. Check the specifications and certifications, and avoid universal or overly cheap options that can jeopardize your installation. Remember, proper hose length and quality are a small investment with a big payoff—preventing leaks, prolonging your appliance’s life, and maintaining safety. For more tips on selecting compatible parts, visit [top tips for selecting the right parts for dishwasher installation](https://appliancedoctorz.com/top-tips-for-selecting-the-right-parts-for-dishwasher-installation).
When it comes to dishwasher warranties, many homeowners operate under the misconception that all repairs and parts are fully covered, leading to false confidence and costly surprises. Let’s dig deeper into what most people get wrong about warranty coverage, installation nuances, and parts, so you can avoid falling into avoidable traps.
Why assumptions about warranties can backfire
Many assume that purchasing a new dishwasher means it’s protected against all failures for the duration of its warranty. However, **warranty policies often exclude issues caused by improper installation, misuse, or third-party parts**, which are common pitfalls. For instance, if a homeowner replaces a faulty water inlet valve with a generic part, the warranty may be voided, leaving them liable for costly repairs.Understanding dishwasher warranties is critical. Manufacturers frequently specify that only OEM (original equipment manufacturer) parts installed according to the manual are covered, helping to prevent unnecessary expenses down the line.
Installing parts correctly isn’t just optional—it’s vital
One advanced mistake I often see is homeowners using non-compatible or low-quality parts during DIY repairs, thinking they’re saving money. While it might seem like a minor detail, using the wrong parts or skipping proper installation procedures can cause leaks, breakages, or even safety hazards. In fact, a simple misalignment of a gasket or an incorrect screw torque can compromise the entire system.Parts to check during installation are designed to ensure longevity and performance. Paying attention to these nuances preserves your warranty and avoids costly emergency repairs, making the difference between a quick fix and a major breakdown.
Are all parts created equal in warranty coverage?
No. The quality and origin of parts significantly influence warranty validity. Counterfeit or cheaply made components might appear identical but can fail prematurely, and most warranties explicitly exclude such parts. A study by consumer advocacy groups confirms that inferior parts can damage your appliance and void warranty claims, emphasizing the importance of choosing certified, compatible parts.Effective maintenance in warranty protection involves not just timely part replacement but also understanding which parts are covered and how to install them properly. Doing so ensures your dishwasher runs efficiently and that your warranty remains valid.
Let’s be clear: neglecting these subtleties can cost you hundreds—either through repairs or warranty denial. So, take the time to read your warranty policy, use quality parts, and follow installation guidelines meticulously. Have you ever fallen into this trap? Let me know in the comments, and share how you avoided costly mistakes in your appliance maintenance journey.
Tools I Recommend for Longevity and Performance
Maintaining your dishwasher over time requires more than just knowing the right parts—it demands the right tools. I personally rely on a set of specific equipment that makes diagnostics and repairs more precise and less time-consuming. A high-quality digital multimeter is indispensable for testing electrical components like the thermostat and motor wiring, ensuring your dishwasher’s electronics are functioning correctly. I prefer one with auto-ranging capabilities, as it simplifies readings and minimizes errors.
Another must-have is a niveling gauge or a digital bubble level. Proper leveling affects water drainage and cycle effectiveness. Using a precise level helps me ensure the machine sits perfectly, preventing leaks and uneven wear. For cleaning and clearing clogged parts, I favor a precision long-nose plier with a fine tip. It lets me reach into tight spots, verify connections, and replace small parts like spray arms or gaskets without damaging surrounding components.
When it comes to diagnosing issues, a smartphone with diagnostic apps—such as Bosch’s Home Connect or GE’s SmartHQ—has become invaluable. These apps can sometimes detect error codes and even reset the system remotely. I routinely use them alongside traditional tools to streamline troubleshooting sessions.
How do I maintain dishwasher parts over time? Regularly inspecting and testing key components like the water inlet valve, door latch, and spray assembly with these tools helps catch problems early, saving money and preventing damage.
How to Keep Your Dishwasher Running Flawlessly for Years
One technique I swear by is implementing a monthly cleaning routine that includes descaling with citric acid and inspecting filters. Coupled with the right tools, this ensures optimal flow and hygiene. As technology advances, I predict that smart diagnostics and remote monitoring will become standard, making proactive maintenance even easier.
If you haven’t tried using a digital multimeter or a smartphone diagnostic app during your routine checks, I highly recommend giving it a shot. It’s a game-changer for catching issues before they escalate. Regular use of these tools can extend your dishwasher’s lifespan and keep it performing like new. For more guidance on maintaining your appliance, check out when to replace dishwasher parts.
Three Lessons That Changed My Approach to Dishwasher Maintenance
First, I realized that shortcuts in selecting hoses, like opting for the shortest or using cheap extensions, can lead to costly repairs and voided warranties. Taking the time to measure and choose the right length is a simple step with lifelong benefits. Second, understanding that quality and compatibility matter more than price saved me from future leaks and headaches. The high cost of a proper hose is tiny compared to the expenses of water damage or replacing a machine. Lastly, I learned that the most detailed measurements and careful planning empower homeowners to avoid the common pitfalls I faced early on—like kinks, leaks, or tripping hazards—making appliance upkeep smoother and more reliable.
Related Posts
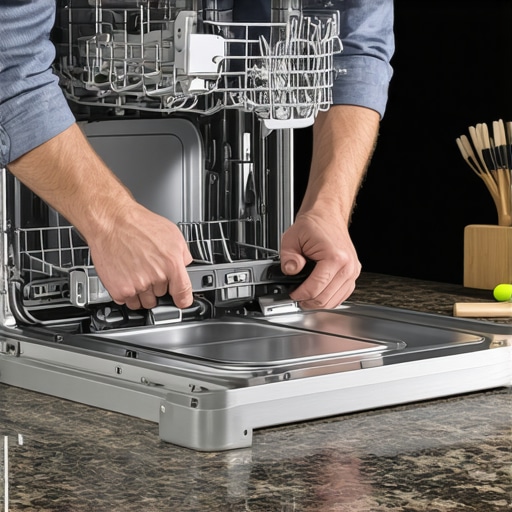
The Proper Way to Secure a Dishwasher to Granite Counters
I remember the first time I installed a dishwasher on…
Why Your Dishwasher Needs a High-Loop More Than a Fancy Filter
I'll never forget the day my dishwasher started leaking for…

The One Bolt You Must Check Before Leveling Your Machine
I remember the day I thought my dishwasher was on…