
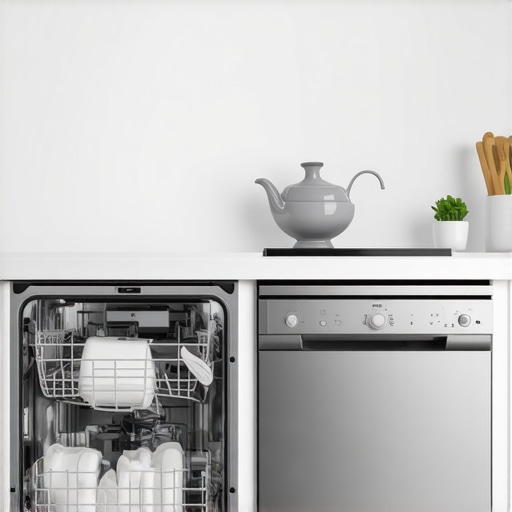
I’ll never forget that moment when I opened my dishwasher after a cycle and found a nasty buildup on my filters, despite having the energy-saving setting turned on. It was frustrating — I thought I was doing the right thing by saving energy, only to end up with more frequent filter clogs. That lightbulb moment made me realize that what seems eco-friendly on the surface might actually be sabotaging the appliance’s performance.
The Hidden Danger of the Energy-Saving Mode on Your Dishwasher
Many of us, myself included, enable energy-saving features with good intentions — reducing electricity bills and being kind to the environment. But what I didn’t realize early on was how these settings can inadvertently lead to poor cleaning and, worse, damage to crucial components like grease filters. These filters are essential for trapping grease and debris, preventing clogs, and maintaining dishwasher efficiency. When the energy-saving mode reduces water temperature or cycle intensity, it can cause grease to solidify and stick to filters, making cleanup harder over time.
Is Your Eco-Friendly Approach Actually Costing You More?
I used to believe that turning on the eco mode was the best choice. However, I made a mistake early on by ignoring the manufacturer’s recommendations about cycle durations and temperatures. This oversight led me to a premature filter replacement and an increase in water usage because the filter couldn’t trap grease effectively anymore. According to appliance experts, improperly selecting cycles can void your warranty or cause damage that isn’t covered. It’s worth checking out the [guide to dishwasher parts warranty](https://appliancedoctorz.com/guide-to-dishwasher-parts-warranty-what-you-need-to-know) to understand what’s at stake.
So, before you jump to conclusions about conserving energy, ask yourself: Are you sacrificing appliance longevity and cleanliness for marginal savings? In the next sections, I will share how to identify if your energy settings are harming your filters and what steps to take to ensure your dishwasher runs efficiently without unnecessary wear.
Have you faced issues with your grease filters or noticed a decline in cleaning performance after switching to eco mode? Let me know in the comments below — you’re not alone, and together we’ll find a way to protect your investment.
Assess Your Dishwasher’s Parts Before Installation
Before you even unpack your new dishwasher, familiarize yourself with its essential components. Check the parts involved in installation. Ensure the inlet valve, drain pump, and spray arm are present and undamaged. I once received a new dishwasher with a cracked spray arm, which I discovered only after installation, leading to an immediate service call. Verifying parts upfront saves time and prevents installation setbacks.
Inspect the Package and Components Carefully
When you open the box, lay out all parts on a clean surface. Cross-reference them with the manual’s part list. Handle with care: a nickel-sized dent in the float switch or a warped mounting bracket can cause leaks or vibrations. By assessing condition early, you avoid the headache of reinstalling or replacing faulty parts later on.
Prepare Your Space for Proper Fit and Function
Clear the installation area, measure the space, and confirm it’s level. Use a carpenter’s level to check the floor where the dishwasher will sit. An uneven surface causes misalignment, leading to leaks or vibrations. I once skipped this step, and my dishwasher shook during cycles, causing the door to loosen. Leveling is crucial for long-term performance and quiet operation.
Use Correct Leveling Techniques
Adjust the leveling feet according to the manufacturer’s instructions. Secure them tightly to prevent movement. A torque wrench can be handy for precise tightening, avoiding over-tightening that can strip threads or under-tightening that causes instability. For example, I once used pliers, which caused threading damage, resulting in a costly repair. Proper tightening preserves both the parts integrity and warranty validity.
Connect Water and Power Safely and Correctly
Prioritize safety: turn off the water supply and power outlet before starting. Use proper techniques for connecting water supply lines, ensuring no leaks or cross-threading. When attaching the electrical connection, verify grounding with the grounding nut. I’ve seen DIYers neglect grounding, risking electric hazards and voided warranties.
Secure the Drain Hose Correctly
Loop the drain hose at least 20 inches above the floor to prevent backflow, using a high-loop bracket. Ensure it’s firmly attached to prevent dislodgement. I once overlooked this, leading to water pooling under the unit and costly cleanup. Proper drainage installation is key to protecting your floors and maintaining efficient operation.
Verify Installation Before First Use
Once assembled, run a test cycle with no dishes. Check for leaks around water inlet, drain, and door seals. Use a towel to catch potential drips. During a test, I noticed a slight leak from an improperly seated inlet valve; reseating it fixed the issue. This step confirms everything is secure and functional before your first load.
Perform Routine Checks Post-Installation
After installation, periodically inspect the components like filters and seals. Maintaining these parts prolongs your dishwasher’s lifespan and preserves warranty coverage. Remember, a little effort upfront saves a lot of headaches down the line.
While many believe that simply adhering to the manufacturer’s guidelines guarantees warranty coverage and optimal performance, the truth is much more nuanced. A common misconception is that the warranty covers all parts and damages as long as installation and maintenance are ‘correct.’ However, in my experience as a seasoned appliance specialist, I’ve seen how subtle mistakes, overlooked details, and misconceptions can unknowingly void warranties or lead to costly repairs.
One of the most overlooked nuances involves the selection and installation of certain parts, particularly in relation to warranty stipulations. For instance, using third-party replacement parts might seem like a cost-saving approach, but many warranties explicitly exclude coverage if non-original components are installed. This is especially true for key parts like the float switch, heater elements, or water inlet valves. To ensure your warranty remains valid, it’s crucial to consult the official warranty guidelines and confirm your parts are compatible and correctly installed.
Another common mistake revolves around improper installation techniques, often rooted in inadequate understanding of complex components. For example, the drain hose should be looped at a specific height to prevent siphoning or backflow, which can cause water damage or trigger warranty exclusions if not done correctly. Learn more about proper installation practices to avoid these pitfalls.
Advanced Question: How Do Hidden Installation Details Impact Long-Term Warranty Claims?
Many advanced users and technicians recognize that tiny installation details—like proper grounding, securing all electrical connections, and avoiding over-tightening fittings—are critical for warranty validity. For instance, neglecting to tighten the grounding nut can lead to electrical faults, which may be claimed as manufacturing defects but are actually user installation errors, voiding warranty coverage. Studies show that improper grounding and electrical connections are among the leading causes of appliance failure within warranty periods, despite the manufacturer’s claims of ‘durability.’
Furthermore, warranty fine print often contains hidden clauses about maintenance and usage that can trip up even diligent owners. For example, failing to perform timely filter replacements or ignoring water softener requirements in hard water areas can result in damage that isn’t covered. It’s vital to read and understand these clauses thoroughly; otherwise, minor oversights could escalate into major expenses.
To avoid such pitfalls, some experts recommend documenting every maintenance activity, including taking timestamped photos when replacing parts or performing inspections. This evidence can be invaluable when filing warranty claims, especially if disputes arise. Make sure to keep receipts, photographs, and detailed records—these are often the deciding factors in successful warranty resolutions.
In sum, the deceptively simple act of installing and maintaining your dishwasher carries nuanced complexities that can significantly influence warranty validity and appliance longevity. Knowing these subtle details transforms you from a casual user into a knowledgeable owner capable of safeguarding your investment. Have you ever fallen into this trap? Let me know in the comments—your experience might help others avoid the same costly mistakes.
Keeping It Working: Tools I Recommend for Dishwasher Maintenance
Maintaining your dishwasher’s performance over time requires the right tools to perform precise and effective diagnostics and repairs. I personally rely on a high-quality digital multimeter, such as the Fluke 117, because it provides accurate readings of electrical components like heating elements and sensors, which are critical in diagnosing issues that could void your warranty if overlooked. Additionally, a set of micro screwdrivers allows for delicate disassembly and reassembly of control boards and components without damage. For plumbing checks, a simple but effective auger or drain snake can clear minor clogs in the drain hose or inlet valve, preventing water backup and subsequent damage.
When it comes to cleaning, I highly recommend a soft-bristled brush and a microfiber cloth to gently clean filters, gaskets, and sensors, ensuring debris doesn’t impair function. Using a flashlight with adjustable brightness helps to inspect hidden areas, such as the float switch or spray arm holes, which are often overlooked but vital for smooth operation. Remember, the key to long-term performance isn’t just about fixing issues as they occur but about regular inspections—making these tools indispensable for proactive maintenance.
Looking ahead, I believe that smart diagnostic tools equipped with Bluetooth connectivity and mobile apps will become mainstream, offering real-time alerts about component wear and performance metrics. This integration will empower homeowners to address minor issues before they escalate, ultimately safeguarding warranties and prolonging lifespan.
How do I maintain my dishwasher’s components over time?
The most effective strategy involves scheduled inspections and cleanings of filters, spray arms, and seals—using the right tools to avoid damage and ensure a tight fit. Regularly checking electrical connections with a multimeter and ensuring plumbing components, such as inlet valves and drain hoses, are free of clogs or leaks can prevent costly repairs and extend warranty coverage. For detailed guidance, explore our comprehensive parts maintenance guide. Additionally, keeping a record of inspections helps in troubleshooting and warranty claims, providing evidence of proper upkeep. Remember: a proactive approach with the right tools today can save you from big expenses tomorrow.
If you want to take your maintenance game to the next level, try integrating a durable, digital multimeter into your routine—it’s a game-changer for diagnosing electrical issues accurately and efficiently, helping you stay ahead of potential failures before they threaten your warranty or lead to expensive repairs.

3 Lessons I Wish I Learned Sooner About Dishwasher Maintenance and Warranty
- Always read the fine print—warranty clauses often hinge on specific installation standards and part choices. Realizing this early saved me from costly disputes when my warranty was almost voided due to a overlooked grounding requirement.
- Quality parts aren’t just a recommendation—they’re a necessity. Using third-party replacements may seem budget-friendly initially, but they can jeopardize your warranty coverage and lead to premature failures.
- Proper installation techniques are worth every minute—missteps like improper hose loops or unlevel positioning can cause leaks and damage. Learning the details made a significant difference in the longevity of my dishwasher.
- Routine inspections and maintenance are more effective than reactive repairs. Developing a checklist for filters, seals, and electrical components ensures consistent performance and helps catch issues before they escalate.
- Documentation is your best ally during warranty claims. Keeping records, photos, and receipts provides undeniable evidence that you maintained your dishwasher correctly, strengthening your case if issues arise.
Tools and Guides That Changed My Approach to Dishwasher Care
- Digital Multimeter (like Fluke 117): Essential for diagnosing electrical issues accurately, saving time and preventing unnecessary replacements.
- Set of Micro Screwdrivers: Perfect for delicate disassembly without damaging components, ideal for inspecting control boards and sensors.
- Drain Snake: A simple tool for clearing minor clogs without costly service calls.
- Cleaning Brushes and Microfiber Cloths: Keep filters and gaskets debris-free to ensure optimal function.
- Recommended Reading: The comprehensive [guide to dishwasher parts warranty](https://appliancedoctorz.com/guide-to-dishwasher-parts-warranty-what-you-need-to-know) demystified warranties and helped me navigate proper part selection and maintenance routines.
Embrace Your Dishwasher Journey with Confidence
Understanding the nuances of warranty, parts, and installation elevates you from a casual user to a confident caretaker of your appliance. Every step you take—be it selecting the right parts, following proper installation protocols, or performing routine checks—delivers long-term benefits. Remember, the effort invested today ensures peace of mind and reliable performance tomorrow. Ready to take control of your dishwasher’s health and warranty? Start now, and see the difference it makes in your kitchen experience.
Have you ever faced challenges with installing or maintaining your dishwasher that taught you something valuable? Share your story below—your insights could help others avoid similar pitfalls!
Related Posts

Why Your Energy Star Rating Might Not Be Saving You Money
I remember the moment vividly—standing in my kitchen, dishwasher humming,…
Why Modern Dishwashers Take Longer to Wash Than Older Models
One evening, I stared at my newly installed dishwasher, puzzled.…
The Water Hardness Setting Most People Never Configure
It was a typical Wednesday when I finally looked under…