
Ever had that sinking feeling when your brand-new dishwasher suddenly stops working, just outside the warranty window? I remember the moment vividly—thinking I had to call in a pro, spend a fortune, and pray that my warranty would cover it. But here’s the twist: a small, often-overlooked habit can stretch your dishwasher’s lifespan by years. That realization hit me after a frustrating repair attempt, realizing I’d missed a crucial step that’s simple but powerful.
In this post, I’ll share how a straightforward filter maintenance routine can dramatically prolong your dishwasher’s life, save you money, and keep the appliance performing like new. If you’re tired of premature breakdowns or feeling unsure about what repair steps truly matter, this guide is for you. We’re diving into the little habits that make a big difference—nothing fancy, just practical know-how that anyone can master.
Why Neglecting This Simple Step Could Cost You Big in Repairs
The most common mistake I made early on was ignoring the dishwasher’s filter. I thought as long as water drained, all was well. Wrong. Over time, food particles and debris gather in the filter, restricting water flow and putting extra strain on the motor and pump. A clogged filter doesn’t just cause poor cleaning; it can lead to system failures that are costly and frustrating.
Did you know that regular filter cleaning can prevent up to 80% of dishwasher breakdowns? According to appliance repair experts, neglected filters are a leading cause of early appliance failure. This simple habit is like cleaning your car’s air filter—it keeps everything running smoothly and prevents costly damage. That’s why I now schedule quick filter checks every few months, a habit that’s simple but effective.
To help you get started, I’ve linked a detailed guide that explains the importance of understanding dishwasher parts, including filters, and how proper maintenance can extend your unit’s life. Proper maintenance isn’t just about avoiding repairs; it’s about keeping your warranty intact and ensuring your appliance serves you well for years.
Have you noticed your dishes haven’t been coming out spotless lately? Or maybe you’ve experienced strange noises or water pooling at the bottom? These could be signs your filter or other parts need attention. Don’t wait for a breakdown—addressing small issues early can save you hundreds.
Stay tuned as we explore exactly how to perform this simple maintenance step. Trust me, once you get into the habit, you’ll wonder why you didn’t do it sooner—and your dishwasher will thank you.
Locate and Access the Filter
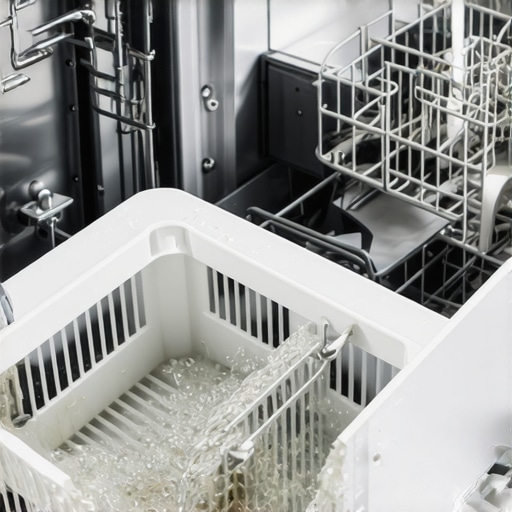
Start by opening your dishwasher and removing the lower rack to expose the filter assembly, which is usually at the bottom center. Consult your specific model’s manual if needed, or visit this guide to understand your dishwasher’s parts. Use a flashlight if visibility is poor. Carefully unscrew or lift out the filter cage, taking care not to damage any clips or seals. Remember, some filters twist off like a bottle cap, while others lift straight out.
Remove and Clean the Filter
Once detached, disassemble the filter components—main filter, screen, and any small parts. Rinse each piece under warm water to remove trapped debris. Use a soft brush or toothbrush to gently scrub stubborn grime, especially calcium deposits or food particles. Avoid using harsh chemicals, as they may damage plastic parts. For tough buildup, soak the parts briefly in vinegar solution to dissolve mineral deposits. This step prevents blockages that can cause poor cleaning results and mechanical strain. I once split my filter in half during a messy cleaning session—lesson learned to handle with care, but the thorough cleaning improved my dishwasher’s performance immediately.
Check and Replace Worn Parts
Inspect the filter and surrounding seals for cracks, tears, or signs of wear. Damaged filters won’t trap debris effectively, risking motor strain or damage to internal components. If you notice degradation, consider replacing the entire filter assembly by ordering a compatible part. For guidance on selecting proper parts to maintain your warranty, visit this resource. Correct part selection ensures seamless fit and optimal performance, protecting your investment.
Reassemble and Secure
After thorough cleaning and inspection, reassemble the filter components in reverse order. Ensure they click or screw into place securely; loose parts can lead to leaks or poor water flow. Double-check the seal integrity to prevent water damage. Return the lower rack and run a short cycle with a rinse aid to flush out residues and verify the installation is airtight. Regularly repeating this process every few months keeps the machine running smoothly. Remember, neglecting this simple step can accelerate wear, void warranties, and increase repair costs over time.
Document Your Maintenance Routine
Keep a record of your filter cleaning schedule and any replacement parts used. This documentation is valuable if you need to make warranty claims or troubleshoot recurring issues. It also helps establish a maintenance habit that prolongs your dishwasher’s lifespan. If you encounter persistent problems or uncertainties, contact a professional for assistance at our contact page. Mastering this routine transforms dishwasher upkeep from a chore into a simple, rewarding step toward appliance longevity.
Many homeowners believe that once their dishwasher is installed correctly, their job is done, and subsequent issues are solely due to appliance malfunction. However, this oversimplification overlooks crucial details that can impact both performance and warranty coverage. Contrary to popular belief, improper installation habits and misunderstanding of warranty policies often cause problems down the line, which most people don’t realize until it’s too late.
One common myth is the notion that using generic or off-brand parts during installation won’t affect your warranty. In reality, many manufacturers specify that only OEM (Original Equipment Manufacturer) parts are eligible for warranty claims. Using non-approved parts can inadvertently void your warranty, especially if the replacement part leads to further damage. For example, a study by appliance repair specialists emphasizes that mismatched or incorrect parts often result in system failures, which could have been avoided with proper part selection. To ensure your warranty remains valid, always consult resources like this guide on selecting the right components.
Another significant pitfall is assuming that professional installation guarantees long-term reliability without your involvement. While professional installers follow strict protocols, some critical steps—such as verifying the correct positioning of the drain hose or ensuring the machine is perfectly level—are often overlooked. These oversights can cause water pooling, leaks, or stress on internal components, ultimately leading to premature failure. For detailed guidance, visit this article on installation best practices.
Yes. Many warranties stipulate that proper setup must include securing a dedicated circuit, correct water inlet connections, and compliance with local plumbing codes. Neglecting these can result in warranty denial if a fault arises from improper electrical grounding or plumbing issues. Moreover, manufacturers often require documented proof of installation, such as photos or receipts, to approve warranty claims, which your installer should provide.
Finally, homeowners frequently underestimate the importance of reading and understanding warranty policies. Not all damages or failures are covered—some exclusions involve misuse, neglect, or improper maintenance. By not familiarizing yourself with specific policy details, such as the coverage limits outlined in this resource, you risk facing surprise expenses. Staying informed empowers you to identify issues early and communicate effectively with repair professionals.
In summary, avoiding these common misconceptions requires a more nuanced understanding of installation practices and warranty limitations. Do you think you have overlooked any of these factors? Share your experiences below, and remember: proper part selection, installation diligence, and policy comprehension are your best defenses against costly mishaps. For expert assistance, don’t hesitate to reach out and ensure your dishwasher operates flawlessly for years to come.
Invest in Quality Tools for Long-Term Maintenance
Having the right equipment is essential for periodic dishwasher upkeep. I personally swear by a high-quality multi-bit screwdriver set because it allows me to tackle various screw types on filters, spray arms, and panels without damaging components. Additionally, a digital thermometer helps monitor water temperatures, ensuring the heater operates within optimal ranges, which is critical for energy efficiency and effective cleaning. Knowing essential parts is foundational to effective repairs, so I recommend keeping a detailed diagram of your model’s components handy.
Why a Magnetic Pick-up Tool Is a Game Changer
Small parts like screws or clips often fall into tight spaces. I recommend a magnetic pick-up tool with a flexible shaft—it’s a lifesaver when retrieving dropped parts from inaccessible areas. This tool saves time and avoids damage caused by blindly fishing around with makeshift solutions. In my experience, being able to quickly locate and retrieve tiny parts keeps repairs on schedule and prevents frustration.
Embrace Software and Maintenance Apps
Modern appliances often support firmware updates that enhance performance or fix known bugs. I stay ahead of issues by subscribing to manufacturer alerts and using professional apps that monitor appliance health over time. These digital tools can suggest scheduled maintenance actions based on your usage patterns, which helps prevent breakdowns before they happen. Predictions indicate that in the future, AI-driven diagnostic platforms will make troubleshooting even more accessible, guiding homeowners step-by-step through complex repairs without a technician’s visit.
How do I maintain my dishwasher over time?
Regularly using a comprehensive maintenance routine ensures longevity. This involves cleaning filters every 3-6 months, inspecting spray arms for calcium deposits, and checking for worn seals or hoses. Applying a vinegar rinse every few months also helps dissolve mineral buildup, maintaining optimal water flow and wash quality. Remember, staying vigilant about small issues like leaky connections or unusual noises can save you from costly repairs later. Consider integrating diagnostic apps that alert you to potential parts failures based on usage data; such technology is on the rise and will soon become standard in home appliances.
Practicing Preventive Care for Better Results
Adjust loading habits to prevent blockages and ensure water reaches all dishes uniformly. Using the correct detergent amount and type—preferably phosphate-free eco-friendly variants—can also reduce internal scaling and prolong lifespan. Additionally, setting reminders to check and replace aging parts, like rubber hoses and filters, extends warranties and maintains performance.
Take Action Now
One practical step you can implement today is investing in a professional-grade multimeter. Not only does this enable you to test electrical components safely, but it also helps identify issues like faulty wiring or failed heating elements early. For detailed guidance on diagnosing electrical faults, visit this resource. By mastering a few essential tools, you’ll become more independent and confident in handling routine maintenance, ultimately saving money and extending your dishwasher’s service life.
When I first started caring for my dishwasher, I thought minimal effort meant better convenience—until recurring repairs and warranty denials taught me otherwise. One surprisingly overlooked detail taught me that paying close attention during installation and maintenance can be the difference between a decade of smooth operation and costly early failure. That lesson is clear: embracing thorough, proactive habits in installation and parts management isn’t just about fixing problems—it’s about empowering yourself to safeguard your investment.
By understanding the subtle nuances of manufacturer warranty terms, selecting the correct OEM parts, and maintaining a vigilant approach to every service step, you’re setting the stage for long-term success. This insight isn’t readily available in generic guides but is crucial for homeowners eager to avoid surprises.
So, the real takeaway? Always dig deeper than surface-level advice. Let your curiosity about your appliance’s inner workings guide your actions, and you’ll discover that the biggest savings come from small, intentional decisions. Ready to take control of your dishwasher’s longevity? Your knowledge today is the warranty coverage of tomorrow.
Related Posts
Why Your Dishwasher Still Smells Like Raw Sewage After Cleaning
It was a morning like any other when I opened…

The One Maintenance Task That Prevents Expensive Motor Failure
It hit me one morning, standing in my kitchen, watching…

The Easiest Way to Clean Calcium From Your Heating Element
I’ll never forget the sound of my dishwasher screaming for…