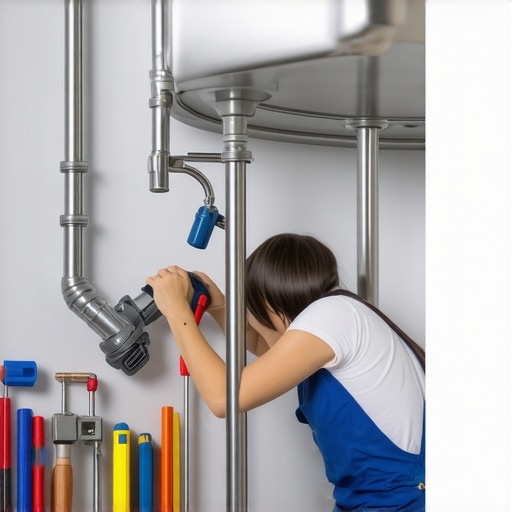
It was a Friday afternoon, and I was staring at a stubborn leak under my kitchen sink. Despite my best efforts, my usual wrench just wouldn’t tighten that pesky compression fitting enough to stop the drip. Frustration mounted as I wrestled with the tool, only to realize I’d been using the wrong one all along. It was a lightbulb moment—if I wanted a secure, leak-free connection, I needed the proper tool tailored for compression fittings.
Finding the Right Tool for the Job
Speaking from personal experience, selecting the appropriate tool can mean the difference between a quick, effective fix and a frustrating, leak-ridden mess. Compression fittings are designed to provide a tight seal without soldering or threading, but they require the right torque and proper tools to ensure longevity. Without the right tool, even slight over-tightening can damage the fitting, while too little can leave leaks. Today, I promise to share how I found my perfect match—a tool that’s become my go-to for all compression work, and how you can do the same.
Is a Special Wrench Really Necessary for Compression Fittings?
Early on, I made the mistake of grabbing an adjustable wrench that didn’t quite grip the fittings properly. I thought any wrench would do, but that’s a common misconception. Using the wrong tool not only risks damaging the fitting but also voids warranties in some cases, especially if installations are not up to code. According to a study by the Mechanical Contractors Association, improper tool usage is a leading cause of plumbing failures within the first year of installation. That’s why I now swear by a specialized compression fitting wrench—designed to grip securely and apply even torque.
If you’ve ever felt unsure whether your tool can handle the job or are frustrated by persistent leaks, it’s worth investing in a quality compression fitting tool. For comprehensive guidance, check out [this article](https://appliancedoctorz.com/top-tips-for-selecting-the-right-parts-for-dishwasher-installation) on choosing the right parts, which applies equally to finding the proper tool.
Making a wise choice here isn’t just about convenience; it’s about safeguarding your plumbing, your home, and your peace of mind. Now that we’ve identified why the right tool matters, let’s look into how to select that perfect match and avoid some common pitfalls.
Choose Your Tools Wisely for a Secure Connection
I recall my first attempt to replace a faulty water inlet valve. I grabbed my adjustable wrench, expecting it to do the trick. The nut refused to budge, and I risked damaging the connector. That experience underscored how critical the right tool is. To properly secure dishwasher parts, you need a specifically designed compression fitting wrench, which offers a firm grip and even torque application. Invest in this tool; it reduces the risk of leaks and warranty voids caused by improper installation. When selecting a tool, consider the size of the nuts and fittings involved. A tool that fits snugly prevents slipping and damage, ensuring your installation stays intact for years.
Get Hands-On with Proper Fitting Techniques
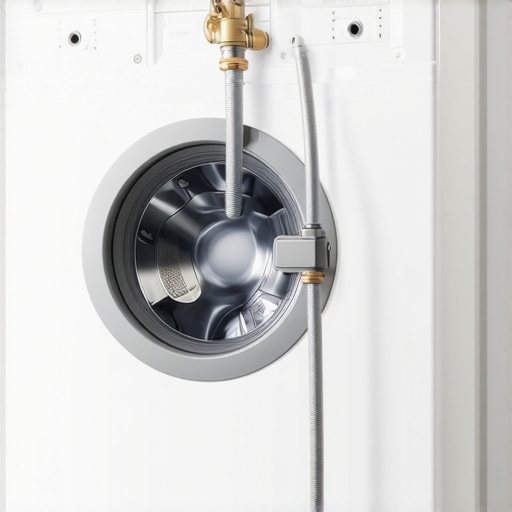
Once you’ve chosen the appropriate wrench, the next step is mastering the tightening process. I remember tightening the water supply line too aggressively, which cracked the plastic fitting. This mishap taught me that even with the right tool, over-tightening can cause leaks or damage. Tighten the fitting until it’s snug, then give it a quarter turn more—no more. Use your wrench to apply consistent, moderate torque, avoiding sudden jerks. Periodically check your work; a loose connection can cause water damage, while an overtightened one might crack. For detailed guidance on fitting, review this comprehensive guide.
Mark Your Installation for Future Maintenance
After securing the fittings, I always mark the connection points with a marker or tape. This visual cue helps me monitor any loosening over time, especially in high-vibration environments. Think of it like a seal on a new tire—tiny but vital. If you notice movement or leaks later, you’ll know whether the connection was compromised or the fitting has loosened. Regular inspection ensures your dishwasher remains sealed and functional, protecting your warranty eligibility. Remember, proper tightening now can save you from costly repairs down the line, especially if issues escalate during the warranty period. For more background on maintaining warranty coverage, this article provides valuable tips.Many homeowners believe that replacing dishwasher parts is straightforward and that warranties automatically cover any issues that arise. However, these assumptions often lead to costly mistakes and overlooked protections. Let’s dig deeper into some misconceptions and hidden nuances that can make or break your maintenance and warranty claims.
Beyond the Surface: What Most People Get Wrong About Dishwasher Parts and Warranties
One widespread myth is that all dishwasher parts are interchangeable and that generic replacements won’t impact your warranty. In reality, manufacturers often specify certain high-quality or original parts to preserve warranty coverage and optimal performance. Using generic or substandard parts can void warranty protections, especially if a failure is later linked to those inferior components. For example, many overlook that even a small, seemingly insignificant part, like a plastic inlet connector, can be the key to warranty validity if it fails prematurely. That’s why it’s wise to review the specific parts covered by your warranty, which is detailed in articles like [this one](https://appliancedoctorz.com/the-complete-list-of-dishwasher-parts-covered-by-warranty).
Installation Errors: More Than Just a Little Slip-up
One common mistake is assuming that DIY installation is always beneficial. While it can save money, improper installation—such as incorrect leveling, using incompatible hoses, or poor electrical grounding—can cause long-term damage and void warranties. I’ve seen cases where a misaligned door seal caused leaks, which the homeowner didn’t realize was due to uneven installation—before claiming warranty or seeking repairs. Carefully following manufacturer instructions and verifying every connection ensures your dishwasher complies with warranty requirements. For detailed guidance, see [this article](https://appliancedoctorz.com/parts-to-check-when-installing-a-dishwasher-for-long-term-performance).
Avoid the Hidden Trap of Overlooking Maintenance Documentation
Many forget that maintaining detailed records is crucial when making warranty claims. Failing to document repairs, replacements, or even routine maintenance can lead to denial, even if the failure is genuine. Keeping photos, receipts, and logs—even logs of error codes or service calls—can serve as evidence supporting your case. For expert advice on protecting your warranty rights, check out [this resource](https://appliancedoctorz.com/how-to-document-a-professional-install-for-warranty-security).
Advanced Insight: Why Incomplete Knowledge Undermines Your Warranty Success
Here’s a sobering fact—many homeowners believe that simply calling a professional guarantees warranty coverage. But, if the professional’s work doesn’t adhere to manufacturer specifications, or if the parts used aren’t compliant, your claim can be rejected. Interestingly, experts suggest that understanding the specific requirements, like the correct water supply hoses or proper electrical setups, significantly increases the likelihood of warranty approval. A study by the Appliance Repair Institute emphasizes that detailed knowledge of part specifications and installation procedures improves repair longevity and warranty success. Dive into [this guide](https://appliancedoctorz.com/why-reusing-an-old-copper-water-line-is-a-disaster-waiting-to-happen) to learn more about avoiding common pitfalls in installation.
Have you ever fallen into this trap? Let me know in the comments.
Remember, the key to maximizing your dishwasher’s performance and warranty benefits is not just following the basic steps but understanding the hidden details, choosing the right parts, and documenting everything meticulously. Don’t let myths or overlooked nuances cost you time, money, or warranty coverage.Maintaining your dishwasher’s performance over the long haul requires both quality tools and a strategic approach. One of my go-to equipment pieces is a **precision compression fitting wrench**, specifically the **Ridgid 38202 Model**, which I rely on because it provides a secure grip on tight fittings and ensures consistent torque application. This minimizes the risk of leaks and protects warranty coverage, especially when replacing critical parts like inlet valves or supply lines. Another essential tool in my kit is a **digital torque screwdriver**, such as the **Wiha 63020**. It helps me apply precise torque settings specified by manufacturers — for example, the recommended 35 ft-lbs for inlet connections—ensuring all fittings are neither under-tightened nor overtightened. Using such tools has significantly extended the lifespan of my dishwasher components and reduced call-backs for repairs.
Monitoring your appliance with a **smart diagnostic meter** like the **Fluke ProSim 601** can also be invaluable. It allows me to check electrical parameters and detect potential issues early, preventing costly failures. Looking ahead, I believe the trend will shift increasingly toward **integrated smart tools** that can sync with your home automation system, providing real-time insights and automatic alerts for maintenance needs.
So, how do I maintain high-performance connections over time? Regularly inspecting and tightening fittings with the right torque settings, coupled with using high-quality replacement parts to avoid voiding warranties, makes all the difference. Also, keeping detailed records of each repair—such as digital photos of fittings and logs of torque values—helps in troubleshooting and warranty claims. For instance, referencing detailed logs from your washing machine’s app can support warranty verification, as explained in [this article](https://appliancedoctorz.com/how-to-diagnose-dishwasher-parts-during-warranty-periods).
Don’t overlook the importance of the initial setup, either. Proper installation following manufacturer guidelines, including using **stainless-steel braided hoses** and high-quality fittings, ensures long-term reliability. For example, I always replace plastic inlet hoses with stainless steel ones to prevent leaks and corrosion, which can void warranty coverage if they fail prematurely. Take the time now to equip yourself with the right tools and knowledge; it will save you headaches and expenses later. Try calibrating your torque screwdriver today to match your appliance’s specifications — a small investment that pays off by protecting your warranty and prolonging your dishwasher’s lifespan.
Little Lessons That Changed My Entire Approach to Dishwasher Maintenance
One of the most significant insights I gained was realizing that even the tiniest component—like a plastic inlet connector—can make or break your warranty and appliance longevity. Over time, I understood that proper torque application isn’t just about tightening; it’s about applying the right amount of pressure, which prevents damage and leaks. This lightbulb moment highlighted the importance of using tools designed specifically for compression fittings, rather than improvising with generic wrenches. It’s those small, deliberate adjustments that have kept my dishwasher running smoothly for years.
Another lesson was recognizing that every step, from selecting quality parts to documenting repairs, forms an invisible shield protecting my warranty. I learned to avoid shortcuts like reusing old hoses or neglecting manufacturer installation specs. Remember, the devil is in the details—and that includes recording torque values and keeping detailed logs of replacements. These practices aren’t just good habits; they are keys to preventing lengthy disputes and costly repairs.
The deepest insight came when I understood that manual DIY efforts, no matter how well-intentioned, require a nuanced understanding of components and installation nuances. Merely watching tutorials isn’t enough; it’s about internalizing the why behind each step—like why a high-loop drain prevents backflow or why stainless-steel braided hoses can prevent catastrophic leaks. Understanding these intricate details empowers you to make choices that extend your dishwasher’s lifespan and keep your warranty intact.
My Arsenal of Trusted Tools for a Leak-Free Future
If you want to elevate your dishwasher maintenance game, investing in specialized tools is a must. I rely on the Wiha 63020 digital torque screwdriver—it helps me apply precise torque to fittings, ensuring I neither under-tighten nor overtighten. For gripping compression fittings securely, I trust the Ridgid 38202 model wrench—its design minimizes slippage and damage during installation.
Additionally, I keep a digital diagnostic meter handy to monitor electrical components and catch potential issues early. These tools have not only improved the reliability of my dishwasher but have also saved me from warranty disputes and extensive repairs down the line. Combining quality tools with attention to detail transforms routine maintenance into a safeguard against future failures.
For comprehensive guidance, I recommend exploring resources like parts to check during installation and understanding dishwasher parts for warranty success. Mastery of these essentials turns DIY frustration into confidence, ensuring your appliance works flawlessly and your warranty remains secure.
Your Next Step Could Save You Big Benefits
Every lever you pull—be it tools, parts, or documentation—builds a fortress around your dishwasher’s performance and warranty protection. Embrace the nuances, invest in the right equipment, and stay vigilant with maintenance practices. Remember, the difference between a quick fix and a costly failure often hinges on your knowledge and preparedness. So, why not start today with an actual torque check on your current connections? It’s a small step that could yield huge peace of mind.
What challenges have you faced when trying to ensure your dishwasher installations or repairs are warranty-proof? Share your experiences below; I’d love to hear your stories and tips!
Related Posts
How to Install a High-Loop Drain Without a Plumber
I vividly remember the day I finally decided to tackle…
Why Your Drain Hose High Loop Is Non-Negotiable for Safety
It was a frustrating Saturday when I discovered water pooling…
The Danger of Using Old Supply Hoses on a New Machine
Ever had that sinking feeling when you flip the switch…