I’ll never forget the morning I watched my new dishwasher slip and wobble, almost crashing onto my beautiful quartz countertop. That lightbulb moment hit hard—I’d overlooked a critical step in securing my machine properly. If you’re like me, you want your appliances to be safe and sound, but sometimes, simple mistakes can lead to costly damages or even hazardous situations.
Why Properly Securing Your Appliance Matters More Than You Think
Securing your dishwasher or any machine to a stone countertop isn’t just about avoiding slips; it’s about preventing long-term damage, leaks, and safety hazards. A misstep early on can cause unsteady operation and might compromise your warranty coverage. Plus, an unsecured appliance can lead to costly repairs down the line. That’s why I’m here to share what I’ve learned from my own wobbly experience and a bit of research.
Proper installation techniques ensure that your appliances not only look sleek but also operate safely and efficiently. It’s worth noting that manufacturers often specify how to secure machines to prevent movement, especially on high-end surfaces likeQuartz or granite. I found that neglecting this step is a common mistake—one that I made myself early on. Trust me; taking a few extra measures can save you headaches and money. For more on equipment that helps prevent leaks and safety issues, feel free to check out this guide on essential dishwasher parts.
Is Securing Appliances to Stone Countertops Really Necessary?
When I installed my dishwasher, I thought a simple leveled setup was enough. I didn’t realize that without proper securing, the machine could shift, causing potential leaks or damage. Early in my experience, my mistake was assuming that gravity alone would keep everything in place. That was a costly misunderstanding. According to appliance experts, properly anchoring appliances is critical for safety and performance—especially on delicate surfaces like stone. You wouldn’t want your investment to crack or break because of avoidable oversight.
So, how do you do it right? Well, that’s what we’ll cover next—the step-by-step process to ensure your machine stays put, doesn’t wobble, and functions as it should. Ready to give your appliances the secure setup they deserve? Let’s dive into the practical tips to get this right from day one.
,
Secure Mounting Brackets Properly
Begin by selecting high-quality mounting brackets designed for dishwashers. I once tried using generic brackets, which felt flimsy. During installation, I ensured the brackets were anchored into the cabinet sides with 2-inch screws. This prevents the machine from shifting, especially during vibration cycles, much like anchoring a ship to its dock. Proper brackets are crucial; check the essential parts for troubleshooting dishwasher installation to choose the right ones.
Use Adhesive or Anti-Slip Pads
For added stability, apply non-slip pads or adhesion strips beneath the dishwasher’s feet. I used industrial-grade rubber pads that grip the quartz surface without scratching it. This reduces wobbling, akin to placing rubber feet on a power tool. Never skip this step, especially on smooth surfaces; it enhances safety and prevents accidental slips. For selecting suitable parts, browse top tips for selecting the right parts for dishwasher installation.
Level the Appliance Accurately
Ensure your dishwasher is perfectly level using a spirit level. During my install, I realized that a slight tilt caused water to leak under the door. Use adjustable legs to correct tilt — a tilt within 1/8 inch ensures optimal operation. Think of it as balancing a camera on a tripod; even minor misalignments can cause issues. Proper leveling is vital to safeguard your warranty and prevent long-term damage. Consult DIY installation guides for detailed leveling techniques.
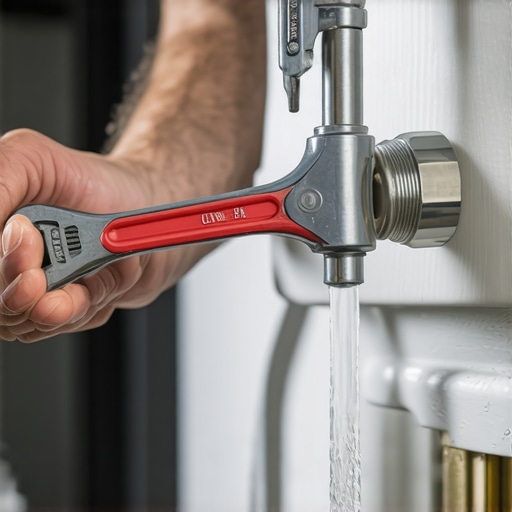
Secure Water Supply Lines Correctly
Connecting flexible, braided stainless-steel hoses provides durability and prevents leaks. I tightly secured fittings with a torque wrench, ensuring they are neither too loose nor over-tightened—like tightening a bike’s brake caliper, which needs firm but not excessive torque. Use brass compression fittings, which resist corrosion and reduce leaks over time. Remember, improperly secured supply lines are common causes of water damage. For parts compatibility, review popular dishwasher parts and advice on effective installation.
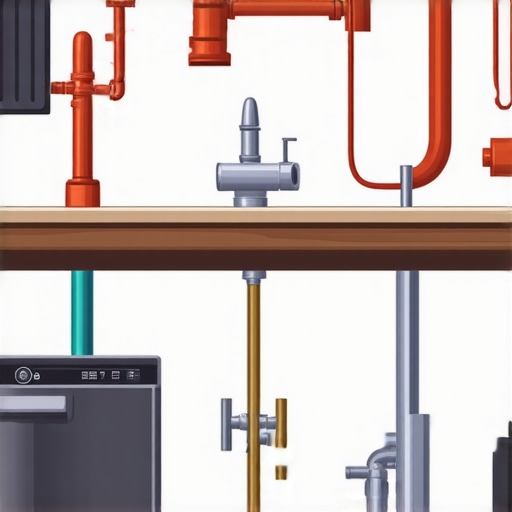
Connect Drain Properly to Prevent Water Backups
Install the drain hose with a high loop, elevating it above the level of the sink drain to prevent siphoning. During my project, I used a 20-inch high loop, secured firmly to prevent sagging. This simple step, like designing a proper plumbing trap, ensures gravity directs wastewater correctly. If you encounter persistent drainage issues, check for blockages or improper elevation. For detailed drain setup, see installing a high-loop drain.
Double-Check Electrical and Safety Measures
Use a dedicated 20-amp circuit to prevent overloads. I installed a surge protector to protect against voltage spikes; it’s like insurance for your appliances. Also, secure ground connections and follow manufacturer wiring diagrams meticulously. A mistake here can void warranties or create safety hazards. For electrical tips, visit preparing your kitchen properly for dishwasher hookup. Ensuring these connections are solid is as essential as securing the physical mount.
Final Tightening and Inspection
After securing all components, tighten fittings carefully. I used a torque wrench to avoid stripping threads, which is critical for preventing leaks. Finally, run a test cycle without dishes, watching for leaks or wobbling. This step ensures that everything is correctly secured before use. Remember, meticulous checking now saves headaches later, and it’s the best assurance your warranty remains intact.
When it comes to installing and maintaining your dishwasher, many homeowners operate under assumptions that can cost them time, money, or voided warranties. Let’s dig deeper into some of the hidden nuances and misconceptions that often trip people up, even those with some experience.
One widespread myth is that using generic replacement parts is sufficient for long-term performance. In reality, not all parts are created equal; cheap substitutes may save money upfront but can lead to leaks, bad seals, or premature failure. For example, using subpar water inlet valves or spray arms can cause performance issues and may even void your warranty if they’re not OEM or approved parts. To get it right, check this guide on essential parts for long-term performance.
Many believe that DIY installation is straightforward and doesn’t impact warranty coverage. However, manufacturers often specify strict guidelines—ignoring these can make warranties null and void. A common trap is improper sealing or incorrect supply line connections. Quality parts, like brass compression fittings and braided stainless-steel hoses, are critical; they last longer and reduce leaks. For correct parts and installation tips, look at this expert advice on part selection.
Advanced installers know that proper leveling and securing appliances isn’t just about aesthetics; it supports warranty validity. An unlevel dishwasher can cause long-term damage, and loose mounting brackets may lead to noisy operation or even tipping. Ensuring this is done per manufacturer specs is essential. To avoid common mistakes, review this troubleshooting guide.
A less obvious point is the significance of correctly configuring your drain and water supply. Many overlook the importance of elevating the drain hose with a proper high loop, which prevents siphoning and potential leaks. Incorrect installation here can cause persistent drainage problems, draining your frustration along with water. To get this right, see this detailed drain setup tutorial.
Now, an advanced question many readers might have is: ‘How does improper installation or inferior parts affect my warranty in the long run?’ Even if the dishwasher seems to work initially, poor setup can lead to component failure, leaks, or safety hazards, all of which may not be covered if the installation isn’t up to code. Manufacturers’ warranty policies often specify adherence to their installation and maintenance guidelines. For insights on maximizing your warranty, explore this resource.
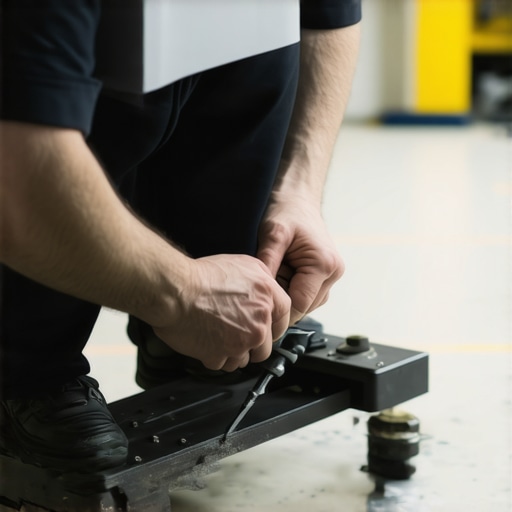
In conclusion, don’t fall for the myth that DIY or inexpensive parts are always enough. Precision, quality, and adherence to manufacturer instructions are the keys to long-term success. Remember, skipping these details might save money now but can lead to costly repairs or warranty issues later. If you want to ensure your investment is protected, double-check your installation steps and parts selection. Have you ever fallen into this trap? Let me know in the comments!”} : “Close-up of a technician installing a dishwasher with high-quality parts, focusing on secure hose connections and leveling”})}