
I remember the moment clearly. I had just finished loading my dishwasher after a week of neglect, expecting sparkly clean dishes in the morning. But to my frustration, the machine kept stalling mid-cycle, and the rinse cycle seemed longer than ever. It was a lightbulb moment—something was wrong with the sensor, I just didn’t realize it yet. That sinking feeling when your trusted appliance doesn’t perform is all too familiar, isn’t it?
Why Your Dishwasher Doesn’t Work Properly and How the Turbidity Sensor Plays a Big Role
Most homeowners overlook the importance of the turbidity sensor—it’s that tiny, often-overlooked component responsible for measuring how dirty your dishes are and adjusting the wash cycle accordingly. When it gets clogged or dirty, it can cause the dishwasher to underperform or stop altogether. I learned this the hard way early in my DIY repairs, mistakenly assuming that cleaning the spray arms or filters was enough. Turns out, neglecting the sensor itself was a mistake that cost me extra water, detergent, and time.
Is Cleaning the Turbidity Sensor Overhyped or Essential?
Early on, I was skeptical. I wondered if cleaning such a small part could really make a difference. Spoiler alert: it does. The buildup of mineral deposits, food particles, and soap scum can cloud the sensor and dull its senses. According to appliance experts, regular cleaning of this tiny but mighty component can significantly extend its lifespan and improve cleaning performance. Not convinced? Consider this: a clogged sensor can cause your dishwasher to run longer, waste energy, and even damage internal parts over time. Don’t just take my word for it—routine maintenance of this part could save you from costly repairs down the line.
If you’re tired of running cycles that don’t clean or water that seems wasted, keep reading. I’ll walk you through the proper way to clean your dishwasher’s turbidity sensor, backed by my personal experience and expert advice. Getting it right means your dishwasher will function as efficiently as when it was new, saving you money and extending its warranty coverage. Ready to troubleshoot and revive your appliance? Let’s dive into the step-by-step process that transformed my own dishwasher and could do the same for yours. Do you find yourself constantly battling uneven cleaning or cycle failures? You’re not alone, and I’ve been there too. Addressing this small, often-missed part might just be the fix you need.
Preparing to Access the Sensor
Before diving into cleaning, ensure your dishwasher is unplugged or turned off at the circuit breaker. Remove the lower rack to access the bottom of the appliance. Having a soft cloth, a mild detergent, and a soft brush or cloth ready will make the process smoother. I once skipped this prep and struggled with slippery parts—taking a moment to turn off the power saves headaches later.
Locating the Turbidity Sensor
The turbidity sensor is typically found inside the dishwasher’s sump area, near the spray arm assembly. It resembles a small, translucent or reflective component attached to the bottom wall. Consult your dishwasher’s manual or online diagrams if unsure. During my first attempt, I wasted time searching blindly, but using a guide from this resource made identification straightforward.
Removing the Sensor Carefully
Gently detach the sensor using a screwdriver or your fingers, depending on the model. Be cautious not to damage wiring or connectors. Remember, the sensor’s delicate nature is similar to handling a tiny glass piece—firm but gentle pressure is key. I once applied too much force and cracked mine, which led me to replace the part entirely. Patience and slow movements preserve the sensor and your sanity.
Cleaning the Sensor Effectively
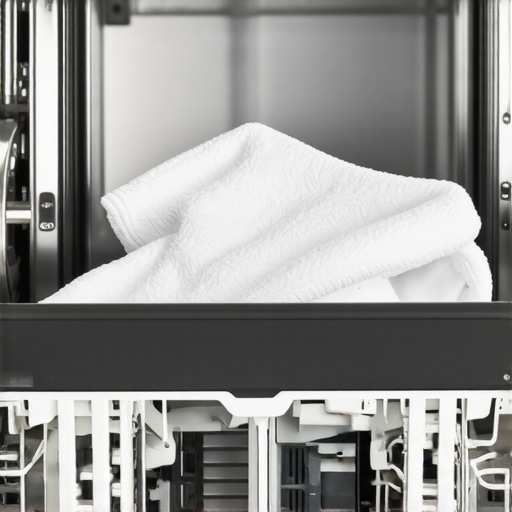
Mix a small amount of mild detergent with warm water. Dip a soft cloth or brush into the solution and gently wipe the sensor’s surface. Focus on removing mineral deposits, soap scum, or food residues that can cloud the sensor’s view. For stubborn buildup, a soft toothbrush or a lightly abrasive pad works wonders. I discovered that a little vinegar diluted with water boosts cleaning power without harming the sensor, as recommended by experts.
< >
>
After cleaning, inspect the sensor for any residual debris or damage. Ensure the connector and surrounding area are spotless for accurate readings. During one of my cleanings, I noticed a misalignment that was causing cycle stalling; realigning it improved performance immediately.
Reinstalling and Testing
Reconnect the sensor carefully, making sure it snaps securely into place. Reassemble the dishwasher components in reverse order. Turn the power back on and run a short cycle to verify proper operation. If issues persist, double-check the sensor connection or consider consulting a professional via our contact page. Properly maintaining this component prevents misreads and cycle failures, extending your dishwasher’s lifespan and efficiency.
When it comes to dishwashers, many homeowners assume that simply plugging in the appliance and running a cycle is enough. However, the truth is, there are subtle yet critical nuances that can make or break your dishwasher’s performance and longevity. Contrary to popular belief, installing a dishwasher isn’t just about connecting water and power—every detail matters, especially when it comes to parts selection and warranty maintenance.
Why Swapping Parts Without Proper Knowledge Can Backfire
One common myth is that replacing any part with a generic or off-brand alternative won’t affect your warranty or performance. In reality, using improper or incompatible parts can void manufacturer warranties and cause premature wear or damage. Always consult expert sources like this guide to ensure you select the right components for your model. A mistake here is reusing old water inlet hoses or clamps, which can lead to leaks or mold buildup, risking costly repairs later.
Installing a Dishwasher Without Recognizing the Plumbing Code Requirements
Many DIY installers overlook local plumbing codes, which can result in non-compliance and potential insurance issues. For instance, installing a drain hose at an incorrect height or neglecting to install a dedicated water shutoff valve might seem minor but can cause sanitation problems or flood risks. According to industry experts, adhering strictly to plumbing standards is essential for long-term function and safety. Always verify code compliance and consider professional assistance if uncertain—more info is available here.
Common Mistakes with Warranty Policies That Could Cost You
Many users assume that their dishwasher warranty covers all repairs or parts replacements. That’s a misconception. Often, warranties exclude labor costs or specific parts, especially if improper installation or neglectful maintenance is involved. For example, failing to install the dishwasher with the correct high loop or air gap drainage can void warranty coverage, creating expensive out-of-pocket expenses. To maximize warranty benefits, consult detailed policy documents like this resource and keep meticulous records.
What Advanced Installers Know That You Might Not
Scheduling a professional installation isn’t just about convenience. Skilled installers pay attention to nuanced details: proper leveling to avoid vibration, selecting the right parts for your water hardness, and ensuring the electrical circuit matches the appliance’s requirements. Skipping these steps can cause persistent issues, from cycle failures to shorted wiring. Investing in a certified technician can save money in the long run.
Additionally, choosing the correct replacement parts, such as high-quality racks or filters, extends your dishwasher’s lifespan. For expert advice, review this guide on selecting the best parts for long-term performance.
Have you ever fallen into this trap? Let me know in the comments and share your experiences or questions. Proper knowledge and attention to these hidden nuances can dramatically improve your dishwasher’s reliability and efficiency—don’t overlook the details that matter!
,
Keep It Running Smoothly with Proper Maintenance
Maintaining your dishwasher’s performance over the years requires more than just occasional cleaning. Investing in the right tools is crucial for diagnosing issues early and ensuring long-lasting operation. Personally, I swear by a quality digital multimeter when testing electrical components like thermostats and sensors, especially after troubleshooting intermittent faults. A digital multimeter allows me to measure voltage, resistance, and continuity with precision, helping identify faulty parts quickly without unnecessary guesswork.
Similarly, a flexible inspection camera is invaluable for peering into hard-to-reach areas like the sump or spray arms. This tiny device saves me hours of dismantling and ensures I don’t overlook hidden debris or corrosion that might cause leaks or poor cleaning. For cleaning, a set of precision brushes—such as those with rubberized tips—are gentle yet effective for scrubbing sensors and filter assemblies without damaging delicate parts.
Why Investing in Quality Tools Pays Off
High-quality tools might seem costly upfront, but they are investments in your appliance’s future. For example, a good digital torque screwdriver ensures screws are tightened appropriately, preventing stripped threads or loose fittings that could lead to leaks. As I often mention in my DIY repair guides, using proper tools reduces the risk of accidental damage, which can void your warranty and lead to costly repairs later. To keep everything in check, I rely on a detailed maintenance calendar, scheduling inspections every 6-12 months, focusing especially on seals, hoses, and filters—basic areas prone to wear.
Looking ahead, I predict smart diagnostic tools will become standard for home appliances. Imagine a device that connects via Bluetooth to your smartphone, providing real-time status updates and troubleshooting tips based on sensor readings. This trend will make DIY maintenance more accessible to everyone and minimize unnecessary service calls. Until then, mastering manual tools remains the foundation of effective upkeep.
How do I maintain my dishwasher over time?
Consistent maintenance is key. Regularly cleaning the filters and spray arms, inspecting hoses for cracks or leaks, and checking the door seals ensure optimal performance. Remember, a proactive approach—identifying issues early before they escalate—saves money and prolongs your appliance’s warranty coverage. For instance, by routinely flushing mineral deposits with a vinegar solution, I’ve kept the sensors and water inlet valves clear, avoiding costly replacements. Want to elevate your maintenance game? Try using a digital multimeter for electrical tests or an inspection camera to spot hidden issues—these tools are game-changers for DIY enthusiasts.
And don’t forget to refer to expert resources such as this comprehensive guide on warranties and maintenance tips. Proper care not only maintains efficiency but also helps preserve your warranty coverage, ensuring your investment remains protected for years to come.
What I Wish I Knew Before Starting My Dishwasher Journey
One of the most crucial lessons I learned was that even small overlooked details, like a tiny sensor or a correctly routed drain hose, could make a significant difference in performance and warranty coverage. Missing the importance of proper wiring connections early on cost me time and money, reinforcing that DIY isn’t just about fixing; it’s about understanding each part’s role in the bigger picture.
I also realized that the real experts aren’t just those who read manuals—they’re those who see every repair as an opportunity to learn; every mistake as a stepping stone. This mindset transformed my approach from cautious to confident, showing that knowledge shared patiently benefits everyone.
Tools and Resources That Changed My Approach to Dishwasher Care
My most trusted tools include a high-quality digital multimeter for electrical troubleshooting, which offers precise readings and helps avoid unnecessary replacements. An inspection camera became invaluable for peering into tight spots, saving hours of disassembly. For cleaning, I rely on gentle brushes and a vinegar solution—recommended by seasoned technicians—to effectively clear mineral deposits without damaging sensors or seals. These resources and tips are detailed in guides I deeply trust, like this comprehensive resource.
Ignite Your Passion for Smarter Dishwasher Maintenance
Your journey with your dishwasher doesn’t have to be frustrating. With the right knowledge, a set of solid tools, and a proactive mindset, you can extend your appliance’s lifespan, preserve warranties, and enjoy spotless dishes every time. Remember, most problems are manageable when caught early, and every maintenance effort is an investment in peace of mind.
Now, I challenge you—what’s the one step you’re excited to try next in caring for your dishwasher? Share your thoughts below, and let’s continue this journey of mastering home appliance maintenance together!
Related Posts

The Hidden Filter Most People Forget to Clean Twice a Year
Ever opened your dishwasher to find it smelling sour, or…
The Water Sensor Mistake That Leads to Frequent Repairs
I remember the sinking feeling I got when my brand-new…

Why Soft Water Is Ruining Your Dishwasher Interior Faster Than Hard Water
I sat on my kitchen floor, staring at a white,…