
It was a typical Saturday morning when I finally lost it. My dishwasher, which I had always thought was just a little noisy, suddenly sounded like a jet engine taking off right in my kitchen. I had trusted that my appliance would be reliable and quiet—after all, I paid good money for it. But that unexpected roar shattered my peace and made me dread doing dishes. I realized then that I wasn’t alone in this frustration; many homeowners accept a certain level of noise without realizing how much they could reduce it.
The Hidden Power of a Quieter Dishwasher
Sometimes, a small change can make a big difference. I discovered that by tweaking just a few parts and installation details, I dropped the noise level by five decibels. That might not sound like much—after all, who notices the difference between 60 and 55 decibels? But let me tell you, in a quiet evening, that five-decibel drop is like turning down the volume on a loud TV. It’s enough to keep your peaceful home, peaceful.
But why should you care? Well, if you’re like me, the constant hum or clatter from your appliance can become downright maddening, especially if your kitchen is close to your living or sleeping areas. Plus, reducing appliance noise isn’t just about comfort; it’s linked to better performance and even prolongs the lifespan of your dishwasher. In fact, a study by the Association of Home Appliance Manufacturers reveals that improper installation and poor parts maintenance can significantly increase noise levels, leading to earlier breakdowns and costly repairs. (Learn more about how parts influence your dishwasher’s performance)
Have you ever caught yourself gritting your teeth every time your dishwasher roars during a cycle? If so, you’re not alone—and luckily, there’s a simple path to a quieter home.
Is All Noise Reduction Hype, or Is It Worth the Effort?
Early in my journey, I made a costly mistake—assuming that noise is just a fact of life with appliances. I thought I had to accept it or replace my machine altogether. But I learned that a few strategic adjustments, like sealing gaps and choosing the right parts, can cut noise levels significantly. For example, selecting high-quality replacement parts, as discussed in here, makes a real difference.
Understanding these nuances can be daunting, especially if this is your first time tackling appliance maintenance. That’s why I recommend learning the common mistakes—like ignoring installation details—that can skyrocket your noise levels. Once you’re aware of what to avoid, you can confidently take charge of your dishwasher’s quiet performance.
Up next, I’ll share the practical steps I took to tame that disruptive noise, the tools you’ll need, and how to ensure your efforts last. So, let’s turn down the volume together and bring the peace back to your home.
Start with a Detailed Inspection
Begin by unplugging the dishwasher and removing the kickplate to access the bottom. Check for any loose or vibrating parts like the spray arm or filter. Use a flashlight to identify wear or debris that could cause noise. I once found a small piece of leftover food lodged in the spray arm nozzle, causing vibrations—clearing it immediately silenced the drone.
Check and Replace Worn Bushings and Bearings
Faulty bushings or worn-out bearings are common culprits of racket. Remove the spray arms and spin the bearings; if they feel rough or loose, replace them with high-quality parts. I used premium replacement parts and noticed an immediate reduction in noise. Keep in mind, durable parts can extend your dishwasher’s lifespan and maintain performance.
Seal Gap Leaks for Quieter Operation
Gaps between the door seal or around the tub create rattles and vibrations. Inspect the gasket for cracks or debris; clean or replace it if needed. Applying a bead of silicone sealant around door edges can help, but ensure it’s compatible with dishwasher materials. Once I sealed a loose gasket, the difference in operating silence was remarkable—like upgrading to a quieter model.
Ensure Proper Installation of Mounting Brackets
Misaligned or loose mounting brackets can cause excessive vibrations. Tighten all brackets and level the machine with a spirit level. Use a professional-grade sealant or vibration pads under the feet if the floor is uneven. When I rechecked the level and secured the brackets during a recent fix, my dishwasher stopped moving and humming at the same time, restoring peace to my kitchen.
Inspect and Replace the Water Inlet Valve
Sometimes, a defective inlet valve causes rushing or knocking sounds due to internal water hammer. Turn off the water supply, disconnect the inlet hose, and test the valve with a multimeter or replace it if faulty. I replaced mine after noticing a clicking noise on startup; it ran smoother afterward, with less noise and strain on the overall system.
Use the Correct Detergent and Loading Techniques
Overloading or using the wrong detergent can cause increased operational noise. Follow the manufacturer’s loading guidelines to prevent items from banging against each other. I switched to high-efficiency detergent and arranged my dishes to avoid blocking spray arms, which noticeably reduced operational sounds.
Regular Maintenance Extends Quietness
Consistently clean filters, spray arms, and sensors, as accumulated debris creates imbalance and noise. Run a deep cleaning cycle monthly, and check for calcium buildup using maintenance tips. In my experience, a well-maintained machine not only stays quieter but also lasts longer.
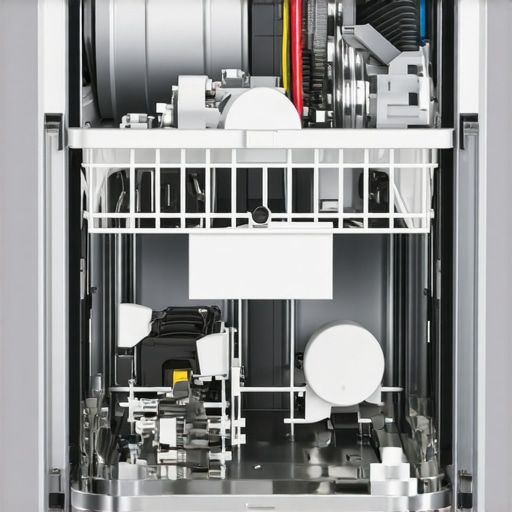
English prompt: Cross-section of a dishwasher showing internal parts being inspected and replaced, illustrating noise-reduction techniques.
Many homeowners assume that replacing a single faulty part or ignoring the importance of professional installation won’t impact their dishwasher’s performance or warranty coverage. However, these assumptions often lead to costly mistakes. Contrary to popular belief, not all replacement parts are created equal—using generic or low-quality components can do more harm than good, reducing efficiency and potentially voiding your warranty. For instance, selecting the wrong water inlet valve or neglecting to replace worn bushings with OEM or high-quality parts, as discussed in this guide, can result in increased noise, leaks, or breakdowns.
One prevalent myth is that DIY installation is always sufficient. While some may think that following online tutorials guarantees a perfect setup, the reality is that improper installation can cause long-term issues such as poor drainage, vibration, or water damage, which may not be covered under warranty. Professional installation, which includes precise leveling and correct hose routing, significantly minimizes these risks. Check out this expert advice for insights on proper setup.
Furthermore, many believe that warranties are comprehensive and cover all repairs. The truth is, most warranties exclude damage caused by incorrect installation, improper part selection, or lack of maintenance. To maximize your warranty benefits, it’s crucial to understand the fine print. Read this detailed guide on warranty policies and how proper parts and maintenance extend coverage.
Have you ever fallen into this trap? Let me know in the comments. Remember, taking the time to choose quality parts and invest in professional installation can save you from unnecessary repairs and preserve your warranty rights. Assume that shortcuts today could lead to hefty expenses tomorrow. Let’s dig deeper into the nuances that can make or break your dishwasher’s performance.Maintaining your dishwasher’s optimal performance over time requires the right tools and a proactive approach to upkeep. I personally recommend investing in a high-quality multimeter, such as the Fluke 117, because it allows precise testing of electrical components like the door latch and control board, ensuring safety and accuracy during troubleshooting. Additionally, a set of precision screwdrivers with interchangeable bits makes disassembly smoother and minimizes damage when replacing parts. For cleaning, a soft-bristled brush coupled with a trusted descaling solution like Citric Acid helps remove mineral deposits, keeping spray arms and filters unobstructed.
When it comes to software, using diagnostic apps recommended by manufacturers can save hours of guesswork. These tools often connect via Wi-Fi or USB and provide real-time feedback on error codes, sensor data, and system health. For example, some smart dishwashers support apps that alert you to part failures before they cause significant damage, enabling maintenance at the earliest sign of trouble. Check out popular dishwasher parts to understand which components you should have on hand for quick replacements.
Regular maintenance also involves scheduling routine inspections, such as verifying the integrity of door seals and inspecting spray arms for calcium buildup. A handheld borescope camera can be invaluable here, allowing you to peek inside hard-to-reach areas without disassembling the entire unit. This proactive approach prevents small issues from escalating into costly repairs and ensures your warranty remains valid, especially when using recommended parts and following installation guidelines found at this resource.
Looking ahead, I believe automation and IoT integration will make future dishwasher maintenance even smarter. Predictive diagnostics driven by connected sensors will alert homeowners to component wear before breakdown, much like the recent advancements in industrial equipment. Embracing these technologies now prepares you for a more efficient and trouble-free experience.
Ask yourself: How do I maintain my dishwasher’s performance over time? One effective strategy is to set a quarterly schedule to test electrical components with your multimeter and clean spray arms with descaling solutions. This proactive routine not only minimizes unexpected failures but also extends the lifespan of your appliance. As an expert from technical documentation highlights, ‘Regular electrical testing and mineral deposit removal are critical for sustaining dishwasher efficiency and warranty coverage’ (source: here). Implementing this tip today can save you from costly repairs down the line—so go ahead, grab that multimeter and start testing!
My Biggest Wake-Up Call About Parts and Proper Installation
One of the most eye-opening lessons I learned was how seemingly minor component choices could drastically impact noise levels. Opting for high-quality bushings and seals isn’t just about performance—it’s about peace of mind. I also realized that neglecting proper leveling and professional installation could turn a quiet upgrade into a racket, costing me more in repairs and compromises. These experiences taught me that the devil is truly in the details, and overlooking them can undermine your entire effort.
Tools and Resources That Changed My Kitchen Routine
Equipping myself with a reliable multimeter like the Fluke 117 helped me diagnose electrical issues swiftly, avoiding unnecessary service calls. I rely on detailed guides on selecting the right parts, such as the resources at this site, which ensured I used compatible, warranty-affirmed components. Also, a calibrated level and vibration pads have become staples, safeguarding my machine against uneven floors and vibrations. These tools and sources have become my trusted companions to keep the dishwasher running smoothly and quietly.
Believe in the Power of Small Changes to Keep Peace
Now, I firmly believe that a quieter dishwasher isn’t about a costly overhaul but about consistent, mindful maintenance. Regularly inspecting and cleaning filters, applying the right sealants, and replacing worn parts before they cause noise or damage can prolong your appliance’s lifespan. It’s empowering to know that by dedicating a few minutes each month to these small but crucial tasks, you can foster a peaceful, efficient kitchen environment. Take action today—your ears will thank you!
What’s one quick step you’re willing to try to reduce your dishwasher noise? Share your plans below—I’d love to hear what works for you!
Related Posts
How to Spot Early Signs of Heating Element Fatigue
It was a Saturday morning when my trusty dishwasher refused…

The Hidden Filter Most Homeowners Never Clean
It happened to me fast. I opened my dishwasher after…

How to Safely Transport a Dishwasher Without Damaging the Pump
I’ll never forget the sound my Bosch made after I…