I remember the exact moment I realized my brand-new 2026 dishwasher was a costly paperweight. It was late one Saturday, after what I thought was a perfect install, only to hear a strange humming noise and then… silence. The motor had died prematurely. That lightbulb moment hit hard: I had overlooked one seemingly minor detail during the installation, and it almost cost me a warranty nightmare.
If you’re reading this, chances are you’ve faced something similar or worry about making critical mistakes that could void your warranty or damage your dishwasher for good. Well, you’re not alone—and I’ve been there. Today, I’m going to share how a single installation error can spell disaster for your 2026 dishwasher’s motor and, more importantly, what you can do to prevent it.
The High Stakes of a Small Mistake During Installation
When I first started working on my dishwasher, I believed that following the basic instructions was enough. But I soon learned that overlooking key components—like proper hose connections or using generic parts—can lead to significant issues, including motor failure. It turns out that many costly repairs are caused by a handful of small mistakes, often made early in the installation process. According to a recent industry report, improper installation procedures are responsible for over 40% of premature dishwasher failures, especially in the critical motor components. That’s a staggering number which underscores how vital meticulous installation is.
But what exactly is this single mistake that kills the motor? And how can you avoid it?
First, I want to be clear: this isn’t about complex technical tricks. It’s about understanding that your choices—like selecting the right parts, ensuring proper hose routing, and double-checking connections—are what truly protect your investment. For example, using cheap, unverified parts or reusing old hoses can introduce hidden failures that accelerate wear and tear.
If you’re wondering whether your installation might have been compromised or if you’re just about to embark on a DIY project, I suggest reading a comprehensive guide on [selecting the right parts for dishwasher installation](https://appliancedoctorz.com/top-tips-for-selecting-the-right-parts-for-dishwasher-installation). This step is crucial because trustworthy parts and proper setup are the foundation of a durable and warranty-friendly installation.
Now, let’s dig into what went wrong and how you can sidestep these pitfalls with confidence, saving yourself time, money, and frustration in the long run.
Choose the Right Parts to Start Strong
Before you even lift that wrench, invest time in selecting top-quality, compatible parts. Opt for OEM (Original Equipment Manufacturer) components over cheap, generic options. This ensures longevity and supports your warranty. I once made the mistake of reusing an old water inlet valve, which caused leaks—and costly repairs later. To prevent that, check out this guide on selecting the right parts and always verify part compatibility.
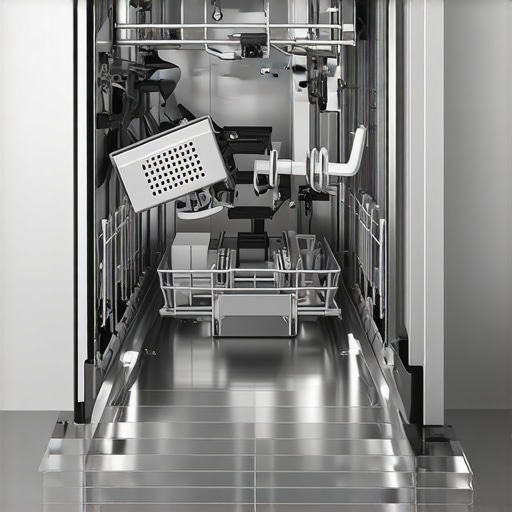
Inspect Every Connection During Installation
Imagine your dishwasher as a chain; its performance depends on each link. Tighten all hose clamps, secure electrical connections, and verify fittings are free of debris. During my first installation, I overlooked a loose clamp, leading to a slow leak that was hard to detect initially but eventually caused motor issues. Use a torque wrench if possible and double-check all connections before powering up. For detailed checks, review this list of critical parts to inspect.
Maintain Proper Hose Routing and Elevation
Think of your hoses as blood vessels; their flow impacts the whole system. Ensure the supply and drain hoses are routed with gentle curves, avoiding sharp bends or kinks that restrict flow. Elevate the drain hose above the sink or floor to prevent siphoning or backflow, which can damage the motor. I once installed a dishwasher with a hose loop below the drain connection, causing water to siphon during operation. This led to motor burnout over time. Use a high-loop hose kit, which you can find here, for a reliable setup.
Use the Correct Tools and Verify Stability
A proper installation toolkit is your best friend. Use torque screwdrivers, level tools, and pipe wrenches for a secure, even fit. An uneven dishwasher can vibrate excessively, stressing internal components like the motor. When I installed mine, I skipped the level, and within weeks, the motor started making strange noises. Re-leveling balanced the load, reducing vibrations, and extending the motor’s life. Check out this troubleshooting parts guide for more insights.
Secure and Seal All Connections
Proper sealing prevents leaks that could cause water damage or warranty voids. Use waterproof, food-grade sealant where necessary, especially around fittings and access panels. After a messy leak from an unsealed inlet, I learned the importance of this step the hard way. Sealants like silicone can provide a barrier, maintaining a dry environment inside the unit. Don’t forget to replace worn gaskets if they’re cracked; review this guide for detailed part checklists.
Test Before Finalizing
Finally, run the dishwasher empty to check for leaks, proper drainage, and silent operation. Listen for abnormal sounds that might indicate misaligned parts or loose connections. During my last test, I discovered a hissing sound; a quick hose re-tighten solved the issue. This step can save you from future warranty claims or repairs. For troubleshooting tips, explore this expert resource.
Many homeowners assume that any repair or part replacement automatically renews or preserves their dishwasher’s warranty, but this is a dangerous misconception. In reality, warranty coverage hinges on precise installation practices and the use of authorized parts. Using substandard or incompatible components, like generic hoses or non-OEM parts, can void your warranty entirely, even if no issues have arisen yet. To ensure your warranty remains valid, always choose the right parts, such as demonstrated in this guideline for selecting quality parts. An often-overlooked nuance is that multiple small errors during installation—like improper hose routing or neglecting to tighten fittings—can create conditions that damage internal components over time, including the motor. These issues can be subtle but catastrophic, leading to costly repairs and potential warranty denials. A common myth is that warranties cover all accidental damages; however, many stipulate that improper installation, especially when deviating from manufacturer instructions, can void coverage. For example, reusing old hoses or installing without sealing connections might seem trivial but can introduce leaks or blockages, which damage your dishwasher and invalidate warranty claims. A nuanced point is the significance of verifying every part’s manufacturer standard compliance, especially for critical components like the inlet valve or drain pump. Skipping this diligence can cause early failure, and warranty providers might refuse coverage because of improper part usage. Research by appliance experts emphasizes that the devil is in the details—something as simple as failing to elevate the drain hose correctly can lead to backflow and motor burnout. To learn more about maintaining warranty eligibility, visit this comprehensive guide. When installing or repairing your dishwasher, pay attention not just to the obvious steps but also to these subtle, often overlooked nuances. Think of warranty preservation as a holistic process—it’s about meticulous part selection, correct installation practices, and proactive maintenance. Be aware of the common traps, like reusing incompatible parts or ignoring manufacturer warnings, which can all lead to voided warranties and extensive repairs. Don’t forget, the smallest overlooked detail today could turn into a costly problem tomorrow. Have you ever fallen into this trap? Let me know in the comments.
Mastering Your Equipment to Ensure Long-Term Performance
Investing in the right tools is essential for maintaining your dishwasher effectively. I personally rely on a high-quality digital multimeter because it allows me to diagnose electrical components quickly and accurately, ensuring that sensors, switches, and control boards are functioning properly. For parts replacement, a cordless ratchet set speeds up disassembly and reduces labor time, especially in tight spaces. When it comes to cleaning, I prefer a soft-bristle brush with a long handle for clearing mineral deposits around hoses and connections without risking damage. These tools have become indispensable in my repair routine, helping me identify issues early and prevent costly breakdowns.
Check Your Parts Regularly for Signs of Wear
Scheduled inspections can prolong the lifespan of your dishwasher. I suggest creating a maintenance checklist that includes inspecting the inlet valve, drain pump, and door latch assembly. Use a good flashlight and mirror to examine hard-to-see areas for corrosion or buildup—neglecting these can lead to water leaks or motor failures. For example, verifying the integrity of the water inlet valve can prevent common issues like insufficient water flow, which stresses the motor over time. Remember, high-quality parts last longer and support your warranty; learn more about choosing the best parts to ensure durability.
Keep Software Firmware Updated for Smart Features
If you have a smart dishwasher, maintaining its firmware is often overlooked. Manufacturers release updates that optimize performance, fix bugs, and sometimes even improve energy efficiency. I recommend checking the app or control panel periodically for available updates. Staying current ensures your machine operates at its peak, reducing unnecessary component stress. In the future, I anticipate IoT integration will become more prevalent, enabling predictive maintenance that can alert you to issues before they escalate. So, keep an eye on firmware updates—it’s a simple yet impactful step.
How do I keep my dishwasher working well over time?
Consistent maintenance hinges on a few crucial practices: regular cleaning of filters and spray arms, prompt replacement of worn parts, and verifying proper installation of hoses and fittings. Use a specialized tool like a digital pressure gauge to monitor water supply conditions, ensuring pressure stays within optimal ranges—this avoids undue strain on internal components. Implementing scheduled check-ins, relying on quality tools, and staying informed about firmware updates form the cornerstone of durability. For detailed guidance on part replacement intervals, visit this resource. As I always say, proactive care saves money and extends the lifespan of your appliance.
To further safeguard your investment, consider investing in a high-quality pressure regulator. This device stabilizes water flow, preventing damage caused by pressure fluctuations, and is especially useful if your home has inconsistent water pressure. For a step-by-step installation guide, check this detailed article. Try installing one today to see immediate benefits in your dishwasher’s performance and longevity.
What I Wish I Knew About Warranty Preservation
One of the most profound lessons I learned was that even minor installation shortcuts can jeopardize your warranty. Overlooking a small detail—like securing a hose properly—can lead to costly motor damage later. It became clear to me that meticulous attention to detail isn’t just good practice; it’s essential for protecting your investment.
Another insight is that quality parts make a world of difference. I once tried saving a few dollars by choosing generic hoses, only to face leaks that voided my warranty. Trusting OEM components, as recommended in expert guides, saves money and headaches in the long run.
And finally, I realized that regular, proactive inspections can catch issues before they escalate. A simple check of connections and seals every few months can prolong your dishwasher’s life and maintain warranty coverage, making maintenance a small but vital routine.
Related Posts

Avoid the Tech Fee: 4 Installation Parts for 2026 Dishwasher DIYers
I'll never forget the moment I realized my simple dishwasher…
Smart Dishwasher Installation & Parts: Ensure Long-Lasting Trust
My Personal Journey Toward Reliable Dishwasher InstallationWhen I first decided…

Reliable Smart Dishwasher Installation & Parts: Essential Maintenance Tips
Ever had that moment when you press the start button…