Ever stood in your kitchen, staring at a dishwasher that suddenly refuses to work, feeling that sinking frustration? I’ve been there too. One day, my dishwasher started leaking, and I had no idea where to even begin troubleshooting. It was a lightbulb moment for me—realizing that knowing your dishwasher parts and understanding warranty coverage isn’t just for repair geeks; it’s essential for anyone who wants their appliance to last. Without this knowledge, I was blindly throwing parts at the problem, risking more damage and wasting money. Sound familiar?
Today, I want to share how I turned that frustrating experience into empowerment. We’ll explore the crucial dishwasher components you need to recognize, how to identify when parts are failing, and how to maximize your warranty to save money and time. By the end, you’ll be equipped with practical tips—so when your dishwasher acts up, you’ll know exactly what to do instead of panicking or calling in costly repairs.
Why Knowing Your Dishwasher Parts Matters More Than Ever in 2025
Dishwashers have become an integral part of our daily routine, and with smart technology advancing, they’re more complex than ever. But here’s the catch: the more features and parts, the harder it is to troubleshoot issues without proper knowledge. For example, a faulty pump or a broken door latch can cause your dishwasher to stop mid-cycle. Recognizing these parts and understanding their role can make all the difference in quick repairs.
Moreover, warranty policies are evolving. Manufacturers now offer more comprehensive coverage, but only if you follow specific maintenance and installation guidelines. Misunderstanding your warranty terms could mean losing coverage when you need it the most. That’s why I recommend checking out this guide on warranty tips for smart dishwashers—it’s a game-changer.
But I should admit, my early mistake was ignoring the importance of correct part installation. I once replaced a part without consulting proper diagrams, which led to more leaks. That’s a common mistake I see folks make. To avoid it, I suggest reviewing the common installation tips first. This knowledge can save you hundreds of dollars and extend your appliance’s lifespan.
Ready to dive into the practical steps that will help you keep your dishwasher in top shape and make the most of your warranty? Let’s go!
Has your dishwasher ever broken down unexpectedly, leaving you scrambling for solutions? You’re not alone, and the good news is, with the right knowledge, you can handle most issues yourself. Keep reading, and I’ll show you how to master your dishwasher’s ins and outs.
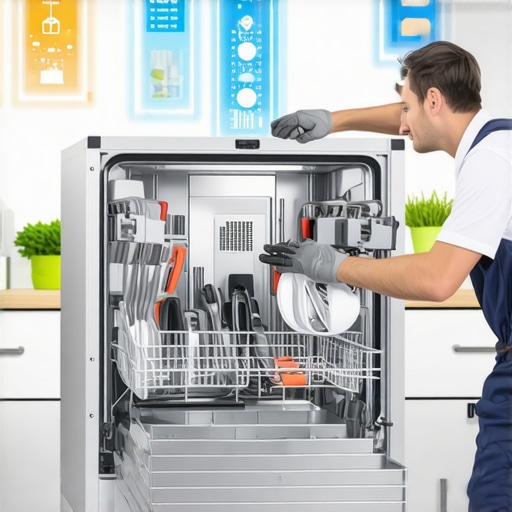
Identify and Recognize Key Components
Start by familiarizing yourself with the main parts of your dishwasher such as the pump, spray arms, door latch, and control panel. When my dishwasher started leaking unexpectedly, I opened it up to see these parts firsthand. I checked the pump for cracks and the door latch for proper engagement. This quick visual inspection revealed a worn-out latch that needed replacement, preventing further leaks and ensuring my warranty remained valid. For detailed diagrams and common installation tips, visit this guide.
Use Visual and Functional Tests
Power off the dishwasher first. Then, manually move parts like the spray arms to see if they spin freely or are obstructed. Check the door latch by closing the door and pulling on it to see if it catches firmly. If the latch is loose, your dishwasher might not start or could leak. During my troubleshooting, I noticed a loose latch that I replaced using the correct parts, which I learned from this resource. This precise step saved me costly repairs later.
Diagnose During Warranty Periods
Use diagnostic procedures to identify faulty parts early. If your dishwasher stops mid-cycle or displays error codes, consult this diagnostic guide for troubleshooting. I once faced a cycle failure and followed the steps to test the heating element and sensors, which turned out to be defective. Replacing these under warranty saved me hundreds. Remember, proper diagnosis prevents unnecessary part replacements and keeps your warranty intact.
Understand the Role of Each Part
Knowing what each component does helps you decide if a part needs replacement. For example, your spray arms distribute water, so if they’re clogged or broken, your dishes won’t clean properly. The control panel manages cycles; a malfunction here might mean a simple reset or a new button assembly. I learned this by reading this article. This understanding empowered me to fix minor issues myself, saving time and money.
Decide When to Replace Parts
Determine if a part is beyond repair or worth replacing by evaluating its condition. If a gasket is cracked or a motor is making grinding noises, replacement is usually better than repair. During my repair, I replaced a worn pump impeller after inspecting it for cracks, following this guidance. This approach extended my dishwasher’s life and kept it running efficiently.
Select Compatible Parts to Maximize Warranty
Use OEM parts that match your dishwasher model to ensure compatibility and warranty coverage. When I needed a new door latch, I ordered the exact part recommended for my model, which I verified at this page. Proper parts selection not only guarantees performance but also preserves warranty rights, avoiding future disputes.
Many homeowners believe that troubleshooting dishwashers is straightforward — just replace the faulty part and everything will be fine. However, this common misconception often leads to costly mistakes that could have been avoided with a deeper understanding of the nuances involved in appliance repair. Let’s dig deeper into what most people get wrong when they try to fix their dishwashers themselves, and why expert advice emphasizes caution even for seemingly simple repairs.
One of the biggest myths is that all dishwasher parts are easily replaceable and that compatibility issues are minor. In reality, using non-OEM parts or mismatched components can cause more damage than good, voiding warranties and leading to recurring problems. For example, installing a generic door latch without verifying its compatibility with your model might seem like a quick fix, but it can compromise the door seal and cause leaks, ultimately damaging your floor and appliance. To avoid this trap, always verify part compatibility through trusted sources and consider OEM options, especially when warranty coverage is involved. Learn more about how proper parts selection safeguards your warranty.
Are You Overlooking the Complexity of Internal Components?
Many DIY enthusiasts focus solely on visible issues like leaks or cycle errors, but the real nuance lies beneath the surface. Components such as sensors, control boards, and water valves are interconnected in complex ways. Replacing one without understanding its role may temporarily fix a symptom but leave the root problem unresolved. For instance, a faulty sensor might trigger the error code, but simply replacing the sensor without diagnosing the underlying electrical or wiring issues can lead to repeated failures. According to appliance repair experts, a holistic diagnostic approach is essential. Consider consulting this guide for advanced troubleshooting techniques.
Another advanced mistake is ignoring safety procedures. Dishwashers operate with high voltage, water, and moving parts. Failing to disconnect power and drain residual water can lead to electric shocks or damage. Always follow safety protocols to prevent accidents. This might seem basic, but rushing through repairs without proper precautions is a common rookie error. Remember, expertise involves respect for the complexity and potential hazards of the task.
How Can You Avoid the Common Repair Traps and Ensure Long-Term Reliability?
Expert technicians stress the importance of proper installation and calibration after replacing parts. For example, installing a new water inlet valve and not adjusting the water level or flow can cause leaks or poor cleaning performance. Review this resource for detailed post-repair checks. Additionally, conducting a test run and monitoring for leaks, unusual noises, or error codes helps confirm the repair was successful and reduces the risk of future breakdowns.
Finally, keeping detailed records of repairs and parts replacements can be invaluable. This documentation not only helps with warranty claims but also aids in diagnosing recurring issues. Remember, the goal is not just to fix the problem temporarily but to ensure the longevity and reliability of your appliance. If you want to learn more about safeguarding your investment, explore this comprehensive warranty guide.
Have you ever fallen into this trap? Let me know in the comments. Mastering your dishwasher’s nuances might seem daunting at first, but with the right knowledge, you can avoid costly mistakes and keep your appliance running smoothly for years to come.
How do I keep my dishwasher working over time?
Maintaining your dishwasher isn’t just about fixing issues as they arise; it’s about establishing a routine that ensures longevity and optimal performance. Personally, I rely on a combination of precise tools and smart techniques to keep my appliance in top shape. One essential tool I always keep nearby is a multimeter. This device allows me to check electrical connections and sensor outputs during diagnosis, saving me time and preventing unnecessary part replacements. For example, if my dishwasher shows error codes related to the heating element, I test the circuit with a multimeter to confirm whether the component is faulty here.
Another invaluable item is a set of precision screwdrivers, which I use to open panels and replace parts without causing damage. I prefer magnetic screwdrivers because they hold onto tiny screws securely, reducing the risk of losing components during repairs. When replacing parts like the door latch or spray arms, I always consult manufacturer diagrams available at this guide to ensure proper installation.
To keep the interior clean and prevent clogs, I use a soft brush and a vinegar solution to clear out spray arms and filters every few months. This simple maintenance step can significantly improve cleaning performance and prolong the life of the motor and water valves. Regularly inspecting these parts helps catch early signs of wear, avoiding costly repairs down the line.
Looking ahead, I predict that smart diagnostic apps will become more integrated into home appliances by 2025, allowing homeowners to perform more accurate troubleshooting via smartphone. These apps will guide you through testing components step-by-step, which I’ve already started to experiment with using manufacturer-provided tools. They’re a game-changer for DIY maintenance, making complex diagnostics accessible even to non-experts.
How do I maintain my dishwasher over time? The key is consistency. Set a monthly schedule to check and clean filters, run diagnostic tests, and inspect critical components. Keep a repair log to track what’s been serviced or replaced—this helps identify patterns that could indicate larger issues before they escalate.
If you want to get serious about long-term reliability, I recommend investing in a digital multimeter and a set of quality screwdrivers. These tools empower you to perform accurate diagnostics and precise repairs, which ultimately saves money and extends your appliance’s lifespan. Remember, preventive maintenance is always cheaper than emergency repairs. Try setting a bi-monthly maintenance routine today, and watch your dishwasher perform flawlessly for years to come!
Ever faced unexpected dishwasher breakdowns and felt overwhelmed by repair options? The key to avoiding costly mishaps lies in mastering your understanding of dishwasher parts, knowing how to diagnose issues early, and leveraging warranty coverage effectively. With these insights, you turn frustration into empowerment, ensuring your appliance runs smoothly year after year.
What I Learned the Hard Way About Dishwasher Repairs
- Never underestimate the importance of OEM parts. Using genuine parts saved me from recurring leaks and warranty disputes. It’s tempting to opt for cheaper alternatives, but the long-term costs often outweigh the initial savings.
- Visual inspection is your best friend. Opening up your dishwasher to check for cracks, loose latches, or clogged spray arms can reveal issues before they escalate. This proactive approach keeps repairs manageable and warranty intact.
- Safety first, always. Disconnect power and drain residual water before attempting any repair. Rushing without precautions can lead to electric shocks or further damage.
- Documentation is power. Keep detailed records of repairs, replacements, and warranty claims. It simplifies troubleshooting and ensures you get maximum coverage when needed.
- Don’t overlook advanced diagnostics. Modern dishwashers often have error codes and diagnostic modes that can pinpoint problems precisely. Learning to interpret these codes saves time and money.
Tools and Resources I Trust for Long-Term Success
- TrustedParts.com: The go-to for OEM parts. I trust their compatibility guides and warranty advice to ensure I get the right components for my model.
- ApplianceDoctorZ’s Diagnostic Guides: Their step-by-step troubleshooting articles help me identify issues during warranty periods without guesswork.
- Multimeter and Precision Screwdrivers: Essential for safe electrical testing and precise repairs. Investing in quality tools has paid off in durability and ease of maintenance.
- Manufacturer Manuals and Diagrams: Always review these before starting repairs. They’re invaluable for correct installation and calibration, preventing future failures.
Your Turn to Take Control of Your Dishwasher’s Future
Empowering yourself with knowledge about dishwasher parts, diagnostics, and warranty strategies isn’t just about fixing problems—it’s about extending your appliance’s life and saving money. Start small, stay consistent, and don’t hesitate to consult trusted guides and tools. The more you learn, the more confident you’ll become in maintaining your dishwasher for the long haul.
What’s the biggest challenge you’ve faced when trying to troubleshoot your dishwasher? Share your experience below—I’d love to hear how you’re taking control of your appliance’s future!
Related Posts
Smart Dishwasher Parts & Warranty: Expert Installation Strategies
Ever experienced that sinking feeling when your dishwasher suddenly stops…
Dishwasher Parts & Warranty: How to Maximize Coverage for Reliable Repairs
Ever lined up to do laundry only to find your…
Maximize Your Warranty & Parts for Smart Dishwashers in 2025: Reliable Repair Tips
Picture this: you're in the middle of cleaning a mountain…