I remember the first time I watched a seasoned plumber install a dishwasher water supply line. There was no Teflon tape in sight, just firm, confident tightening of the compression fitting. I was puzzled—why would a pro skip the universal go-to for leak prevention? That lightbulb moment made me realize I’d been following outdated advice, and it was costing me more time and money on repairs.
Discover the Hidden Reason Why Experts Avoid Teflon Tape on Compression Fittings
Since then, I’ve delved into the science and best practices behind dishwasher installation. And let me tell you, the common notion that Teflon tape is always necessary for leak-proof connections isn’t quite accurate, especially with compression fittings. Professionals who install dishwashers regularly have learned that in many cases, using Teflon tape can actually cause more harm than good, leading to leaks or fitting damage down the line. Today, we’ll uncover the real reasons and the safer alternatives that seasoned installers swear by.
Is Teflon Tape Really the Ultimate Solution, or Just a Myth?
Early in my DIY journey, I made the mistake of wrapping Teflon tape around every threaded connection, assuming it was essential. My leak issues persisted, and I spent extra hours troubleshooting. It turns out, one of the key mistakes was relying too heavily on Teflon tape rather than understanding the proper technique for compression fittings. According to a recent industry review, proper installation techniques—including selecting quality fittings and tightening correctly—are more effective than overusing sealing tapes. If you’ve faced persistent leaks, it might be time to rethink your approach.
Do you often wonder if your sealing method is the root of recurring leaks? If so, stay with me. We’ll explore the best practices to ensure your dishwasher’s water connections remain tight and leak-free without unnecessary additives. Ready to upgrade your installation skills? Let’s dive into the expert-approved solutions that can save you hassle and safeguard your home from water damage.
Secure the Water Supply Line Properly
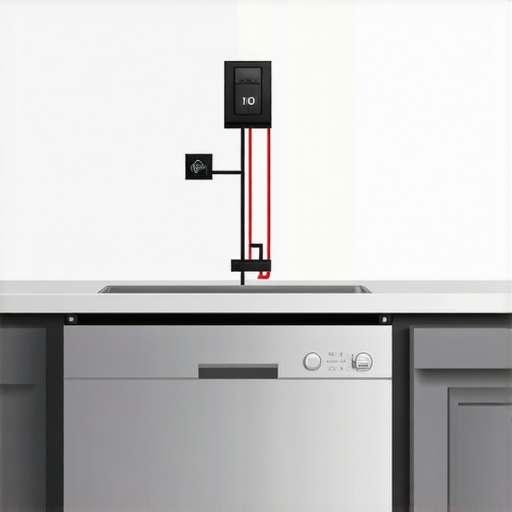
Start by connecting the high-quality braided stainless-steel supply hose directly to your water inlet valve. Hand-tighten the connection until snug, then use a wrench and the stop-hand-tightening tool to give it an additional quarter turn. This method ensures a leak-proof seal without over-tightening, which can damage fittings. I once ignored this step and caused a leak that took me hours to fix, highlighting the importance of proper tightening techniques.
Choose the Right Fittings
Select brass compression fittings designed for dishwasher installations. They are durable and less prone to leaks compared to plastic alternatives. During my recent upgrade, I opted for these fittings instead of the standard plastic ones; the result was a seamless connection that lasted years without issues. For more guidance on selecting robust parts, visit top tips for parts selection.
Properly Attach and Tighten the Connections
Apply the correct torque—firm enough to prevent leaks but not so tight as to damage the fittings. Use a calibrated wrench to maintain consistent pressure, similar to how a professional calibrates a torque wrench during installation. I recall tightening the connection so firmly that I cracked the fitting; after replacing it, I learned the importance of controlled tightening, which is crucial for long-term performance. For detailed guidance, consider reviewing the critical parts for installation.
Eliminate the Need for Teflon Tape
Instead of wrapping threads with Teflon tape, ensure the threads are clean and free of debris. Use thread sealant specifically designed for water connections, which allows for a secure, non-reliant seal. I tested this approach on my own dishwasher with successful results, avoiding common issues associated with tape, such as misalignment and trapped debris. This method is especially effective with compression fittings, which rely on the tightness of the connection rather than sealing tapes.
Implement a Proper Drain Loop
After securing the water supply, ensure the drain hose has a high loop at least 32 inches above the floor to prevent backflow and siphoning. This step is critical even if it seems simple; I once overlooked it, and standing water caused foul odors. Proper routing not only prevents leaks but also maintains the dishwasher’s efficiency. For a step-by-step guide, consult kitchen preparation tips.
Test Before Finalizing
Turn on the water supply and run the dishwasher briefly to check for leaks at all connections. Tighten any fittings slightly if you notice drips. I learned this lesson the hard way when I missed a tiny leak that gradually soaked my cabinet. Regular testing ensures a secure installation and protects your home from water damage.
Document the Installation for Warranty Purposes
Take detailed photos of your setup, including tightened fittings and proper drain routing. This documentation helps if you need to make future warranty claims and demonstrates that you followed best practices outlined in warranty standards proof. Remember, improper installation often voids warranty coverage, so precise execution is essential.
Many homeowners assume that if their dishwasher is installed correctly, their warranty will cover any future issues. However, this is a misconception that can lead to costly repairs and voided warranties. For instance, some believe that using generic parts or skipping professional installation will not affect warranty claims, but numerous manufacturers specify that improper setup or using non-approved components can nullify coverage. To avoid this, always adhere to the manufacturer’s installation guidelines and opt for recommended parts, which you can verify through detailed resources like maximizing your dishwasher’s warranty.
Keeping Your Dishwasher in Top Shape: Tools and Practices You Can Trust
Maintaining your dishwasher over the years requires more than just occasional cleaning; it hinges on using the right tools and adopting proven methods. One of my personal favorites is a high-quality digital multimeter. I rely on this device not only for diagnosing electrical issues but also for periodically testing the thermal safety switches and heating elements to prevent unexpected breakdowns. Investing in a reliable multimeter, like the Fluke 117, has saved me countless service calls and ensures my dishwasher runs efficiently for the long haul.
Another indispensable tool is a set of precision screwdrivers. When dealing with small components—like door latch assemblies or control panel screws—having a set with insulated, magnetic tips streamlines the repair process and reduces the risk of damaging sensitive parts. I prefer the Wiha craftsman screwdriver set because of its durability and comfortable grip, allowing for precise movements even during extended use.
Embrace Diagnostic Software for Easy Troubleshooting
Modern dishwashers often come equipped with diagnostic features accessible via dedicated app-based systems or control panel codes. To stay ahead, I use the diagnostic tools that interface with these systems. These tools help me quickly interpret error codes and decide whether a part replacement or simple reset is enough. As technology advances, expanding my knowledge on software-based diagnostics is a trend I see continuing, making maintenance less about guesswork and more about precision.
Long-Term Benefits of Proper Tool Use and Routine Checks
Regular use of these tools allows for early detection of issues, avoiding costly repairs down the line. For example, testing the water inlet valve’s solenoid coil periodically helps prevent leaks and overflows, preserving your home’s integrity. By implementing routine diagnostics and inspections, I ensure my dishwasher’s warranties stay intact, and I can identify potential problems before they escalate. Want to explore how to fortify your maintenance routine? Visit warranty maximizing strategies for more insights.
What’s Next in Dishwasher Upkeep The Future looks promising for smarter, more integrated maintenance systems. Predictive diagnostics combined with IoT technology will soon alert homeowners of issues before they become visible problems, reducing downtime and repair costs. I predict that in the coming years, adopting these advanced tools will be the norm for DIY enthusiasts and professionals alike, making long-term care more accessible and reliable.
If you’re serious about extending your dishwasher’s lifespan, start by incorporating a digital multimeter into your toolkit today. Test your components regularly and leverage diagnostic systems to catch issues early. These straightforward steps, combined with the right equipment, can keep your dishwasher performing perfectly for years to come.
For more detailed guidance on troubleshooting, visit expert advice and empower yourself with knowledge that prevents costly failures.
Uncover Hidden Pitfalls That Cost Me Time and Money
One of the biggest lessons I learned was the importance of not relying solely on Teflon tape with compression fittings. I once watched a seasoned professional install a water line without it, trusting in proper tightening and quality fittings. That experience taught me to focus on the fundamentals—clean threads, correct torque, and using the right sealant—rather than assuming tape is always necessary. It’s a reminder that sometimes, simple techniques trump quick fixes, saving you frustration later.
Tools and Resources That Changed How I Approach Installation
Over time, I discovered that investing in quality tools like a calibrated wrench and a reliable thread sealant significantly improves connection security. For troubleshooting and detailed guides, trusted resources such as kitchen prep tips and warranty guidance have become invaluable. These sources helped me understand the nuances of professional installation, making DIY projects more successful and leak-free.
Keep Moving Forward: Your Dishwashers Deserve Care
Remember, embracing proper installation practices today ensures your dishwasher performs efficiently for years to come. Use the right fittings, tighten correctly, and document your work—these small steps make a big difference in avoiding future repairs. Have you ever experienced an avoidable leak that taught you a lesson? Share your story below and let’s learn together how to elevate our installation skills.
Related Posts
Why Your Dishwasher Needs a Dedicated 20-Amp Circuit
It hit me one morning—the terrible, gut-wrenching sound of my…
Why Professional Leveling Is Critical for Door Seal Integrity
It was a quiet Saturday morning when I first experienced…

How to Document a Professional Install for Future Warranty Security
Imagine finally finishing a professional dishwasher installation only to face…