It happened during a quiet Sunday morning—my dishwasher suddenly emitted an odd rumbling noise, vibrating so fiercely I thought the entire kitchen was about to shake apart. Frustration bubbled up as I realized that something as simple as a tiny brass fitting could cause such chaos. That lightbulb moment hit hard: I needed a solution, and fast. When I discovered that this silent culprit cost just about $12, I couldn’t believe I hadn’t addressed this sooner. Today, I want to share how this small upgrade transformed my dishwasher’s performance—and how it can do the same for you.
The Quiet Power of a Brass Elbow
Pollution of my peace was caused by a familiar noise—vibration that reverberated through the entire kitchen wall. After some digging, I learned that many of these issues stem from cheap, plastic fittings that can’t handle pressure or vibrations properly. Replacing my old, squeaky elbow with a sturdy brass one made all the difference. Not only did it silence the noise, but it also prevented potential leaks and long-term damage. That’s the thing about small parts—sometimes, they make the biggest difference. If you’re tired of waking up to vibrating appliances or fear hidden leaks, a brass elbow could be your best friend.
Is the Hype Around Cheap Plumbing Parts Just Overrated?
Early in my DIY journey, I made a critical mistake—over-tightening fittings, thinking more pressure meant better seals. Turns out, I was just cracking the plastic parts and setting myself up for future disasters. I’ve learned that choosing quality parts like a brass elbow isn’t just about quiet operation; it’s a matter of long-term peace of mind. For more insights on how proper part selection impacts your appliance’s warranty and performance, check out [maximizing your dishwasher’s warranty coverage](https://appliancedoctorz.com/maximizing-your-dishwashers-warranty-coverage-today). If you’ve experienced recurring vibration or leaks, I’ll walk you through simple steps to fix these issues, starting with this affordable upgrade.
Prepare Your Workspace and Gather Tools
Before diving in, clear the area around your dishwasher and unplug it to ensure safety. Assemble essential tools: adjustable wrench, Teflon tape, bucket, and safety gloves. Having everything at hand prevents interruptions and reduces frustration during installation. Remember, a clean workspace is key to a successful DIY upgrade.
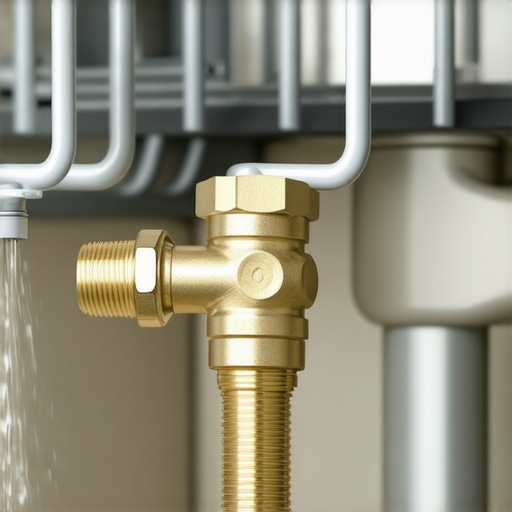
Identify and Access the Brass Fitting
Remove the lower kickplate or access panel at the base of your dishwasher to reach the water inlet connection. Use a screwdriver if necessary. Locate the existing plastic or rusty fitting—this is usually where the water supply line connects to the dishwasher. Take a photo if needed to remember the orientation for reassembly.
Disconnect the Water Supply Line Carefully
Place a bucket beneath the connection to catch any residual water. Use an adjustable wrench to loosen the nut holding the water supply hose to the fitting. Turn counter-clockwise; expect some water to drip. Be gentle to avoid damaging the hose or valve. If the line is old or corroded, consider replacing it with a braided stainless steel hose for added durability, referencing this guide.
Remove the Old Fitting and Prepare the New Brass Elbow
Unscrew the old fitting completely. Clean the hose end and threads with a rag. Wrap Teflon tape clockwise around the threaded end of the new brass elbow for a tight seal, which prevents leaks and prolongs the part’s lifespan. Ensure the fitting’s orientation matches the original setup to avoid water flow issues.
Install the New Brass Elbow
Hand-tighten the brass elbow onto the water inlet valve. Use the adjustable wrench for a secure fit—avoid over-tightening, which can crack plastic or cause leaks. Reattach the water supply line to the brass fitting, tightening the nut firmly but gently to prevent stripping threads. If unsure about torque specifications, refer to this resource.
Check Your Work and Test for Leaks
Turn the water supply back on slowly. Screw the water supply valve shut and observe the connection point for a few minutes. Look for any signs of moisture or dripping. If tight and dry, proceed to plug in and run a short cycle on your dishwasher. Confirm quiet operation and absence of leaks, making adjustments if necessary.
Tips for Longevity and Warranty Maintenance
Keep a record of your repair with photos and dates to support warranty claims if issues arise. Regularly inspect all fittings and replace any worn parts to prevent future leaks and vibrations. Proper part selection and installation practices, such as adhering to warranty guidelines, ensure your dishwasher remains efficient for years. Remember, investing a little time now saves costly repairs later.
Final Thoughts
Replacing the brass elbow is a straightforward upgrade that can transform your dishwasher’s performance, making it quieter and more reliable. By following these detailed steps, you’ll enhance your appliance’s longevity and avoid common pitfalls that damage plastic fittings. Keep in mind, small upgrades like these are investments in your home’s comfort and safety.
Many homeowners operate under misconceptions about dishwasher parts, installation, and warranties, which can lead to costly mistakes. Let’s bust some myths and uncover hidden nuances that only seasoned DIY enthusiasts and professionals understand. One widespread misconception is believing that replacing parts with cheap, generic options saves money. However, as highlighted in our guide on [the most popular dishwasher parts](https://appliancedoctorz.com/the-most-popular-dishwasher-parts-and-how-they-improve-performance), investing in quality parts like premium brass fittings not only improves performance but also safeguards your warranty. Relying solely on OEM parts isn’t always necessary, but choosing reputable brands reduces the risk of leaks and failures that could void your warranty—download our [comprehensive guide to dishwasher warranty coverage](https://appliancedoctorz.com/the-complete-list-of-dishwasher-parts-covered-by-warranty) to learn more.Maintaining your dishwasher over time requires investing in the right equipment and adopting proven methods that ensure longevity and optimal performance. I’ve personally found that using a high-quality multimeter is essential for diagnosing electrical issues quickly. I prefer a digital multimeter like the Fluke 117 because of its accuracy, durability, and ease of use during troubleshooting. It allows me to test control boards, thermal fuses, and wiring connections with confidence, saving time and preventing costly mistakes. For checking water pressure and flow, a reliable pressure gauge can help identify issues before they escalate, especially when dealing with inlet valves or hoses.
How do I maintain my dishwasher’s performance over time?
Regular inspections are key. I recommend periodically removing and cleaning the filters, which is detailed in our guide on when to replace dishwasher parts. Additionally, keeping lubrication points free of debris and ensuring hoses are properly secured prevents leaks. A good practice is to check all fittings annually, especially the brass compression fittings, to prevent slow leaks that can cause water damage or mold growth. Using an ultrasonic cleaner to scrub out buildup in the spray arms can restore water flow efficiency. For long-term health, applying a descaling agent once every six months can prevent calcium buildup, particularly in areas with hard water, which can impair sensors and valves.
Future trends in dishwasher maintenance tools include smart diagnostic devices that connect via Wi-Fi and analyze performance data in real-time, alerting homeowners to issues before failures occur. This integration could lead to even more proactive maintenance routines, minimizing downtime and repair costs. As this technology advances, I believe adopting smart diagnostics will become standard practice for those serious about appliance longevity.
To give your dishwasher a fighting chance against wear and tear, I strongly suggest integrating a multimeter check into your monthly maintenance routine. Testing the electrical components regularly can detect early signs of failure, saving you money and hassle. Remember, consistent care and proper tools go a long way in ensuring your dishwasher remains a dependable part of your home. For more detailed guidance on maintaining your appliance, consider reviewing our comprehensive article on parts-to-check when installing a dishwasher for long-term performance.
Lessons That Changed My Repair Game
- One surprising lesson I learned was how a tiny brass fitting prevented decades of leaks and vibrations, proving that quality parts truly make a difference in longevity and peace of mind.
- Replacing plastic with brass wasn’t just about noise reduction; it was about safeguarding my warranty and avoiding costly future repairs—sometimes, investing a little more upfront saves thousands later.
- The hardest part was realizing that overlooking small details like proper Teflon tape application or gentle tightening can make or break your repair success—attention to these nuances is what separates amateurs from pros.
- I discovered that DIY projects benefit immensely from the right tools—having a good multimeter and a quality adjustable wrench turned my simple upgrade into a reliable, long-term fix rather than a temporary patch.
- Most importantly, I learned that understanding your dishwasher’s warranty policies and part warranties can inform smarter choices—wasteful replacements and warranty denials are often just a matter of knowing the rules.
Tools and Resources That Elevated My Knowledge
- Digital Multimeter (like Fluke 117): Essential for diagnosing electrical issues swiftly and accurately, saving time and avoiding unnecessary part replacements.
- Reputable Parts Suppliers (such as Appliance Parts Pro): Trusted sources ensure you get genuine, durable parts like brass elbows that stand the test of time and maintain warranties.
- Warranty guidelines document: Knowing what your warranty covers helps you avoid pitfalls and maximize protection for your investment.
- Installation checklists: Step-by-step guides confirm you don’t miss critical details that could compromise performance or void warranties.
Take Action and Keep Growing
Every upgrade or repair—big or small—brings you closer to a trouble-free dishwasher that runs quietly and lasts longer. Don’t hesitate to explore the nuances of quality parts and proper installation techniques; these lessons pay dividends over time. Remember, the journey of mastering DIY maintenance is ongoing, and each step builds confidence and skill. Dive deeper into these insights, keep track of your repairs, and become the homeowner who truly understands their appliances.
What’s the one small upgrade you’re considering to improve your dishwasher today? Share your thoughts below—I’d love to hear how you’re making your home smarter and safer!
Related Posts

Why This $8 Zinc Leveling Foot Prevents Your Tub from Warping
I remember the moment I realized my bathtub was slowly…

The $9 Replacement Gasket That Stops Door Edge Leaks
I remember the moment vividly. I was mid-cycle, the dishwasher…
The $20 Valve That Stops Your Dishwasher from Siphoning
It happened to me during a busy weekend—my brand-new dishwasher…