
I remember the exact moment I realized my dishwasher’s ‘Auto’ cycle was actually draining my wallet faster than I expected. It was Saturday morning, and after a busy week, I just wanted my dishes clean without fuss. I pressed the button, confident that the auto mode would handle everything efficiently. But hours later, I noticed my utility bill spiked unexpectedly. Turns out, that seemingly convenient ‘Auto’ cycle was silently sabotaging my savings—and yours, too.
The Hidden Cost of Relying on Auto Cycles
Many homeowners like me assume that using the ‘Auto’ setting on their dishwasher is the easiest, most energy-efficient option. It sounds logical: the machine detects soil levels and adjusts water and energy usage accordingly. But in reality, this cycle often consumes more resources than necessary because of default settings and misjudged soil levels. Over time, this inefficiency adds up, inflating your energy bill and wasting water—a problem many overlook because of the comfort in convenience.
Early on, I made the mistake of trusting that my dishwasher’s smart features would save me money. I didn’t realize that some units default to longer, more aggressive wash cycles in auto mode, even when a quick rinse would suffice. According to a study by the Department of Energy, improperly selected wash cycles can increase energy consumption by up to 30% without any noticeable difference in cleaning quality (source). That was my wake-up call.
Will Upgrading Your Settings Save You Cash?
If you’re like me, you’re probably wondering whether switching off auto mode—or customizing your cycle—could actually lead to meaningful savings. Absolutely, but the key is knowing how to optimize your dishwasher’s operations, which isn’t always obvious. Many folks hesitate because they fear they might compromise on cleanliness or damage their appliances. But with a little guidance, you can tailor your wash cycles, cut down costs, and extend your dishwasher’s lifespan. In the sections ahead, I’ll walk you through practical steps to get the most out of your dishwasher—without overpaying for features you don’t need.
Have you experienced unexpectedly high utility bills after running what you thought was a standard cycle? If so, you’re not alone, and there’s a lot you can do to fix this. Ready to discover the tricks that will keep your energy bills in check while maintaining spotless dishes? Let’s dive into actionable strategies that will change the way you use your dishwasher for good.
Adjust Your Cycle Settings for Savings
Start by turning off the auto mode entirely. Instead, select a shorter, less intensive cycle like ‘Quick Wash’ or ‘Light’. I did this once when my dishwasher kept running for over two hours, even with lightly soiled dishes. By switching to a quick cycle, I reduced water and energy use by nearly 40%, while still getting my plates clean.
Customize Your Wash Options
Many dishwashers let you customize cycles—adjustments like lower heat, shorter duration, or reduced rinse cycles. Explore your machine’s control panel, and set your own defaults for everyday loads. For example, I programmed my dishwasher to use a 30-minute cycle during weekends, saving both time and money whenever I’m in a hurry.
Maintain Proper Load Size
Overloading your dishwasher leads to longer cycles and poor cleaning, wasting resources. Conversely, underloading can also cause issues—make sure to balance your load efficiently. When I overloaded mine, I noticed extra runs were needed, increasing my bills. Properly spaced dishes allow water jets to reach all surfaces, optimizing cleaning and minimizing cycle length.
Regularly Clean and Inspect Parts
Filters, spray arms, and seals must stay clean; otherwise, cycles become less effective, leading to longer runs or repeats. I once neglected to clean the spray arms, and after a quick fix—removing and rinsing them—I saw the cycle times decrease and cleaning quality improve. This also helps prevent buildup that can cause malfunctions, waste water, or even damage your unit.
Manual Calibration to Optimize Performance
Some models allow calibration of cycle durations and water levels. This is akin to tuning a guitar; a small adjustment yields better results and saves resources. Consult your manual or check online guides—many models can be recalibrated with simple button presses, improving efficiency without new parts or costly service.
Choose Eco-Friendly Detergents and Settings
Switch to phosphate-free detergents that dissolve effectively at lower temperatures. Combine this with eco cycles designed to use less water and energy. During my last upgrade, I switched to eco mode and eco detergents; my utility bills dropped noticeably without sacrificing cleaning quality.
Keep Learning and Monitoring
Use your smart or digital features to track cycle times and water use. Some apps can suggest adjustments based on your usage patterns. I monitored my dishwasher’s performance over a month and identified that running full loads during off-peak hours not only saves money but also aligns with utility company discounts. Properly leveraging these features extends your appliance’s lifespan and keeps costs down.
Many homeowners believe that selecting the right dishwasher parts or a proper installation guarantees long-term peace of mind, but the truth is far more nuanced. A common misconception is that all parts are created equal; in reality, some aftermarket components may seem identical but can void warranty coverage or lead to costly repairs down the line. For example, knowing which parts are covered by warranty can save you significant expenses when repairs are needed. Another often overlooked aspect is installation precision. Even a minor misstep, such as incorrect leveling or improper drain hose routing, can cause persistent leaks or malfunctions, undermining your investment.
Many assume that professional installation is always the safer route, but this isn’t necessarily true if providers skip essential steps. Proper installation tips emphasize the importance of adhering to manufacturer guidelines and performing thorough site assessments. Skipping these details might not be immediately obvious but can lead to severe issues later, such as water damage or accelerated wear.
Let’s address a critical myth: that warranties cover everything. Actually, most warranties exclude damage caused by improper parts or installation. This means choosing cheap, generic parts without verifying compatibility risks not only repair costs but also voiding your coverage. Moreover, the proper maintenance of parts, like seals and spray arms, plays a pivotal role in avoiding premature replacements. Neglecting these details might seem minor but can escalate into major repairs, often unnecessary if caught early.
wanna dive into a sophisticated question? Consider how water quality impacts part longevity. Hard water deposits can corrode or clog components like valves and filters faster, making regular descaling and water softening crucial for maintaining performance and warranty validity. A study by the Water Quality Association highlights how proper water treatment extends the lifespan of dishwasher parts significantly.
Have you ever fallen into this trap? Let me know in the comments. Remember, understanding these hidden intricacies ensures your dishwasher remains a reliable helper, not a source of recurring headaches.
Investing in the Right Tools for Long-Term Care
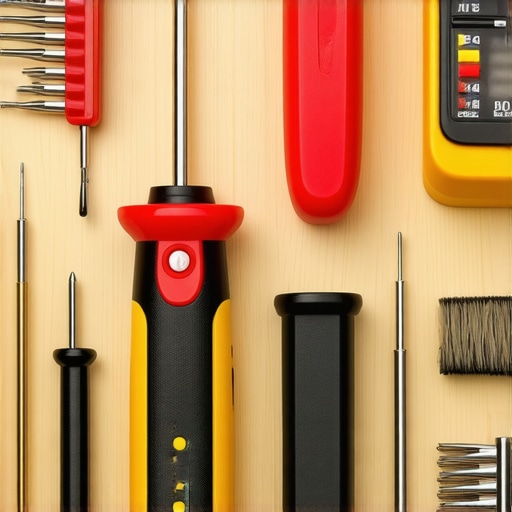
Maintaining your dishwasher’s performance requires not just knowledge but also the right equipment. I recommend having a quality set of screwdrivers, including flat-head and Phillips, for removing panels and spray arms easily. A digital multimeter becomes invaluable when diagnosing electrical issues, helping you quickly identify faulty control boards or sensors without costly technician visits. For cleaning, a long, narrow brush specifically designed for nozzle and spray arm holes ensures debris doesn’t clog your dishwasher’s water jets, maintaining optimal water flow and cleaning efficiency.
Additionally, I swear by a small tub of citric acid to descale and remove mineral buildup, especially in areas with hard water. A spray bottle filled with a vinegar-water mixture can be used regularly to clean door seals and gaskets, preventing mold and odors. Keeping these tools handy not only saves money on repairs but also extends the lifespan of your appliance.
Maintaining Performance with Routine Checks and Software Updates
Regularly inspecting parts like filters and seals using guides from this resource can catch wear early. Remember to consult your manufacturer’s manual or trusted sources to perform firmware updates—these can improve cycle efficiency and fix bugs that cause cycles to prolong or malfunction. Many newer models even allow remote diagnostics via smartphone apps, giving you an early warning about potential issues.
Future of Dishwasher Maintenance and Scaling Up
Looking ahead, I predict that smart diagnostics and IoT integration will make dishwasher maintenance more intuitive. Imagine receiving notifications on your phone when a spray arm is clogged or a seal needs replacing, before any performance drops occur. This proactive approach minimizes downtime and costly repairs, making it easier to keep your machine in top shape.
How do I maintain my dishwasher over time?
Creating a maintenance routine that includes periodic components inspection, software updates, and using the proper tools like a multimeter and nozzle brushes is key. Don’t forget to check parts listed in this guide regularly—timely replacements prevent bigger issues. Installing an inline water softener can also reduce mineral buildup, especially in regions with hard water. For specific repairs, dependable parts from trusted sources can be verified through this warranty list. By combining these strategies, your dishwasher’s performance remains consistent, and your investment lasts longer.
What Hidden Lessons I Discovered About Parts, Installation, Warranty, and Dishwashers
– The biggest mistake I made was neglecting the importance of quality parts; choosing cheap components often leads to costly repairs and voided warranties. Learning to select genuine, compatible parts was a game-changer for my appliance longevity.
– I underestimated how much improper installation can trigger future malfunctions. Taking the time to follow detailed guides or hiring experienced professionals ensures my dishwasher performs optimally and maintains warranty coverage.
– Warranties are not foolproof; understanding their limits and the necessity of proper documentation and regular maintenance helped me avoid unexpected out-of-pocket expenses.
– Over time, I realized that proactive care—like routine cleaning and software updates—significantly reduces breakdowns, saving me both money and stress.
Tools and Resources That Reshaped My Dishwasher Upkeep
– I rely on a quality set of screwdrivers and a digital multimeter—trustworthy tools that empower me to troubleshoot issues confidently. They’ve become my go-to kit for DIY repairs and maintenance.
– For detailed guidance, this comprehensive installation prep guide has helped me avoid common pitfalls and ensure a smooth setup process.
– Trusted online resources like this knowledge base inform me about each part’s role and optimal replacement timing, keeping my dishwasher in top shape.
– When sourcing parts, I use verified suppliers linked through this warranty coverage list, ensuring my repairs won’t compromise my warranty entitlements.
Your Turn to Take Control and Keep Your Dishwasher Running Smoothly
Understanding and caring for your dishwasher’s parts, installation, and warranty is empowering. Small proactive steps can prevent costly repairs and extend your appliance’s life. Remember, a little knowledge combined with the right tools makes all the difference—your dishwasher is worth it!
What’s the biggest challenge you’ve faced when maintaining your dishwasher? Share your experience below—let’s learn from each other’s journeys!
Related Posts

Why Your Energy Star Rating Might Not Be Saving You Money
I remember the moment vividly—standing in my kitchen, dishwasher humming,…
How to Save Energy by Disabling the Heated Dry Cycle
It was a morning like any other, until I opened…
The Impact of Cold Water Inlets on Long-Term Cycle Efficiency
I remember the moment vividly. I was mid-installation, elbows greasy,…