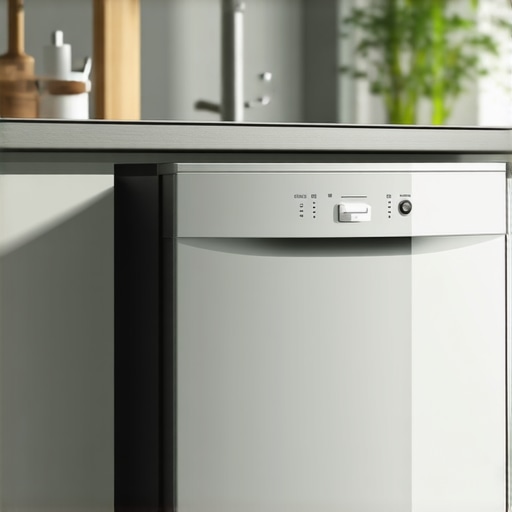
Have you ever started a dishwasher cycle only to hear that faint but nerve-wracking dripping sound? Or worse, noticed a puddle forming beneath your machine after a day or two? I’ve been there. That sinking feeling when your brand-new dishwasher springs a leak because of overlooked details in the installation process. It’s frustrating—and costly. But after countless repairs and a fair share of learning, I realized that a leak-proof setup hinges on three critical parts. If ignored, even the most expensive dishwasher can become a pool on your kitchen floor.
Why Attention to These Parts Can Save You a Flood and a Headache
Ensuring your dishwasher doesn’t leak isn’t just about plugging hoses or tightening a few screws. It’s about knowing the essential components that guarantee a watertight installation. When I first installed my dishwasher, I thought sealing connections and checking for obvious cracks was enough. Spoiler alert: I was wrong. I made the mistake of reusing old supply lines—an error that cost me dearly. This taught me that selecting the right parts from the beginning is vital for peace of mind. In fact, the industry data shows that improper installation accounts for the majority of early dishwasher failures, often leading to leaks and warranty claims.1
Today, I’m sharing what I’ve learned about these three critical parts—so you can avoid the pitfalls I faced and enjoy a leak-free kitchen. Whether you’re a seasoned DIYer or just beginning, understanding and choosing the right components makes all the difference.
Is It Really Worth Scrutinizing Every Part?
Initially, I thought that skimping on parts or rushing through the installation would save me time and money. However, that approach backfired. Using generic or incompatible parts can void your warranty (which is a costly mistake), and more importantly, lead to leaks that damage your home. I learned this the hard way and now always double-check the parts I use. You might think your old supply lines are fine—they’re not. Reusing worn or mismatched components can cause failures. For a comprehensive look at what parts are essential—plus some insider tips—I recommend visiting this detailed guide. It’s helped me avoid costly missteps and could do the same for you.
So, with that in mind, let’s dive into the three parts that will make your 2026 dishwasher installation truly leak-proof. Trust me, a little extra effort at this stage will save you a world of trouble down the line.
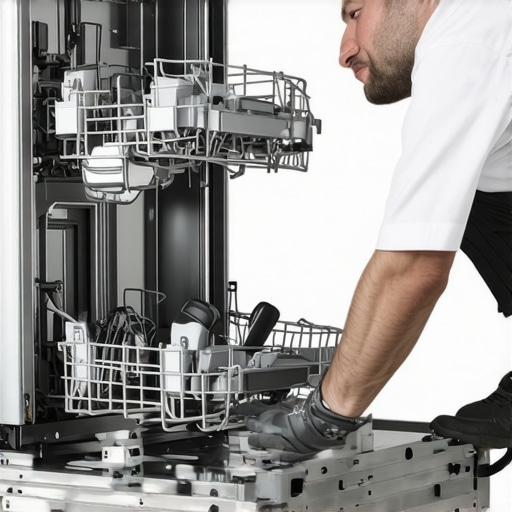
Start by selecting a high-quality, stainless-steel braided supply line; these are less prone to cracking or pinching compared to plastic hoses. I once tried reusing an old, brittle supply line that looked fine, but it leaked within days, causing a mini flood. Never reuse worn components—check out this guide for tips on selecting durable parts. Installing the correct supply line ensures a tight seal and reduces the risk of leaks over time.
Attach the drain hose tightly to the dishwasher and your home’s drain system, making sure it’s secured with a clamp to prevent any slippage or water leaks during operation. I learned this lesson the hard way—my first installation involved a loose drain hose, which caused constant leaks and a soggy cabinet. Use a high-quality clamp and double-check that the hose isn’t kinked or bent. For detailed installation techniques, see this resource. Proper sealing here prevents water from escaping and damaging your flooring.
Level the dishwasher meticulously using a spirit level; an uneven installation can put undue stress on water connections, leading to leaks. During my second attempt, I used a bubble level to adjust the feet precisely, which eliminated a persistent leak caused by misalignment. View this installation checklist for tips on leveling and positioning. Proper placement not only improves leak prevention but also ensures the appliance functions efficiently and quietly.
Secure all connection points with corrosion-resistant clamps and fittings to maintain a watertight seal. In my experience, cheap plastic fittings often degrade or crack, leading to leaks after a few months. Investing in metal clamps, as suggested by this guide, pays off long-term. Tighten everything properly—over-tightening can damage fittings, so aim for a firm, snug fit without forcing it. This step is crucial for a leak-free operation over the lifespan of your dishwasher.
Once all connections are in place, turn on the water supply and run a short cycle to check for leaks. Observe all connection points closely—look for drips or dampness. During my last project, I discovered a tiny leak at the supply line during this test, prompting me to re-tighten the connection. For more thorough diagnostics, visit this troubleshooting resource. Performing this test ensures your installation is secure and leaks are caught early, saving you from potential water damage later.Many homeowners assume that installing a dishwasher is a straightforward task, but the reality is more nuanced. One common misconception is that any parts will do as long as they’re compatible, but in my experience, using generic or low-quality components can significantly jeopardize your warranty and lead to leaks or failures. For instance, opting for inexpensive supply lines might save money initially, but they are often prone to cracking or pinching, risking costly water damage. Instead, investing in high-quality, industry-approved parts ensures durability and peace of mind. Additionally, many overlook the importance of proper sealing and fitting of connections, which is where most leaks originate. Over-tightening fittings can damage them, while under-tightening leaves room for water escapes. Using corrosion-resistant clamps and carefully following installation guides, like those at this resource, can make all the difference.
A critical pitfall I’ve seen is reusing old parts, especially supply hoses or fittings. This might seem economical, but it voids warranties and increases the risk of leaks. Notably, many believe that as long as the connections look intact, they’re safe to reuse—don’t fall into this trap! Remember, even tiny cracks or wear can cause significant issues later. For a comprehensive breakdown of which parts are covered by warranty and which are not, check this guide.
Have you ever fallen into this trap? Let me know in the comments.
Are There Hidden Damages That Void Your Warranty?
Understanding the finer points of warranty coverage is crucial. Many assume that if a part fails, warranty claims are automatically accepted, but the reality is more complex. Improper installation, incorrect use of non-approved parts, or failure to follow manufacturer guidelines can all invalidate coverage. For example, installing a non-recommended drain hose or failing to level the dishwasher properly can be grounds for denying warranty claims, even if the part itself is covered. To navigate these nuances, I recommend reviewing this detailed guide. It offers insights into common pitfalls that lead to claim rejections and how to avoid them, ensuring your repair or replacement process is smooth and successful.
Keeping it Working: Essential Tools and Maintenance Strategies
To maintain your dishwasher effectively over time, investing in the right tools and adopting a routine inspection schedule are key. I personally rely on a high-quality digital multimeter to verify electrical components’ integrity during troubleshooting. A reliable multimeter, like the Fluke 117, provides precise voltage and continuity readings, helping me diagnose faulty sensors or switches without guesswork. Additionally, I use a specialized sink basin and flexible nozzle spray for cleaning filters and spray arms thoroughly—dirt buildup here can impair performance and cause leaks. Regular maintenance with these tools prevents minor issues from escalating, ultimately extending your appliance’s lifespan.
For software diagnostics, I recommend installing a system monitoring app compatible with modern smart dishwashers, such as the Whirlpool app—which allows remote alerts on error codes and maintenance reminders. This proactive approach helps catch issues early, before they turn into costly repairs or warranty claims. As technology advances, I predict smart diagnostic tools will become more affordable and integrated directly into appliances, making DIY maintenance easier for homeowners and technicians alike.
How do I maintain dishwasher parts over time?
Maintaining your dishwasher parts requires a combination of routine inspection, timely cleaning, and using the right replacement components. I schedule bi-annual checks of the supply hoses for signs of wear or corrosion—replacing brittle or cracked hoses promptly is crucial, as old parts are often the culprits behind leaks. When replacing parts, I only select components recommended by the manufacturer or those detailed in this guide. This minimizes the risk of voiding warranties and ensures long-term durability—especially important as warranties on smart dishwashers become more dependent on correct part selection and installation. Regularly inspecting and replacing worn parts based on this timeline guide can prevent minor malfunctions from escalating into major failures.
Another best practice is to keep detailed records of part replacements and maintenance activities. This not only helps during warranty claims but also allows you to track the overall health of your appliance. Document serial numbers, purchase dates, and specific repairs—tools like a dedicated maintenance log app can streamline this process. As I follow these methods diligently, I’ve noticed a significant reduction in unexpected breakdowns and a more predictable service life for my dishwasher.
In terms of tools, investing in a digital caliper can improve your precision when installing new fittings, ensuring optimal sealing. Using manufacturer-approved sealants and lubricants suited for dishwasher parts also reduces corrosion and wear. If you want to optimize your maintenance routine, try scheduling a comprehensive review after every 50 wash cycles, aligning with the manufacturer’s recommendations printed in the manual. Staying proactive with these strategies helps ensure your dishwasher remains leak-free, efficient, and covered under warranty for years to come.
Throughout my experience installing and maintaining dishwashers, I uncovered subtle truths that most homeowners and even professionals tend to overlook. One of the hardest lessons I learned was that even seemingly minor details could make a critical difference. For instance, I once thought reusing old supply lines was harmless, but it nearly cost me my warranty and flooded my kitchen. That eye-opener taught me to prioritize quality and compatibility over convenience. Another revelation was how leveling the dishwasher perfectly isn’t just about aesthetics; it directly impacts the integrity of water connections, preventing leaks before they start. Finally, I realized that investing in the right tools and keeping detailed maintenance records isn’t just smart—it’s essential for long-term reliability and warranty validation. These lessons pushed me to adopt a more deliberate, informed approach, which has saved countless headaches and major repair costs. I encourage you to reflect on these insights as you install or service your dishwasher, because paying attention to these small but vital details can truly protect your home and peace of mind.
Related Posts

Smart Dishwasher Parts & Installation: Expert Tips for Long-Lasting Trust
I vividly remember the moment I realized my dishwasher wasn't…
Smart Dishwasher Parts & Installation Guide: Enhance Reliability & Trust
I remember the exact moment when my dishwasher broke down…
Smart Dishwasher Installation Guide: Ensuring Long-Lasting Warranty & Parts
Ever confidently finished installing my new smart dishwasher, only to…